The Ferrigno Family's 1976 Palm Beach

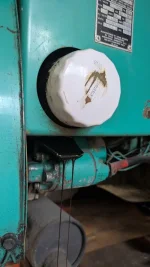
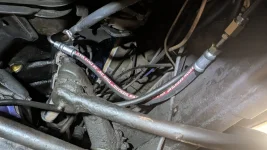
I've been wondering if transmission line pressure is something we should start monitoring.

Our transmissions are getting old and leaky inside. If the transmission pump can't keep the line pressure up, then the "clamp" on the clutch packs is going to drop and the clutches will start to slip amongst other problems.

When I had the engine rebuilt, I also had a rebuilt transmission installed. It had random issues with shifting from 1st to 2nd. After 10 years, it finally was not shifting most of the time, yet I could shift it manually. So I took it in for a rebuild, and it operated the same way on the first test drive. The line pressures were low, yet they could not find an issue. So another core was used for a rebuild and installed. Its been fine for the past 4 years, knock on wood.

Just a pressure sensor wired to my EBL would allow me to see the transmission line pressure and maybe warn of a problem before it happens on the road.
I like seeing my tranny temp now….
 
Funny you mention that, it's on my to-do list to shop for a temp/pressure sensor so I can try to kill two birds with one stone. It's an easy add-on with Winlog for sure.

But, line pressure did check out on this one unfortunately. So the direct clutch itself is certainly shot.
I have a pan sensor in my Ragusa pan running an analog gauge. I also have a DigiPanel so I attached the sensor to the tranny output line to the cooler. I figure I can watch the hottest fluid at that location on the DigiPanel.

If I get around to adding a pressure sensor, I'll put that into the EBL.
 
Well I've let things get pretty out of date again, so let's catch up.


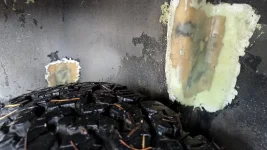
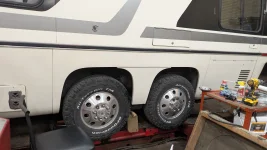
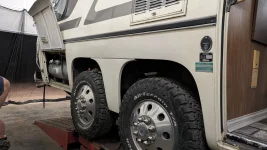
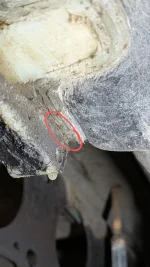
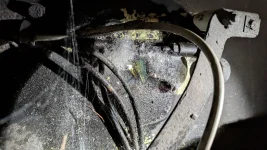
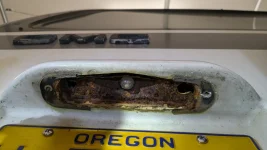
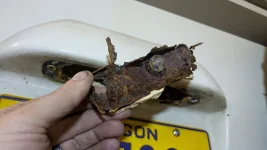
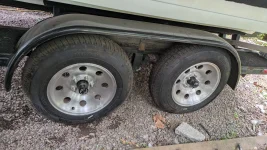
I think I neglected to mention before, I'd noticed some holes in the wheel well when I was fooling with the water heater. Since it was winter time, I figured I'd patch them up with several layers of woven mat.
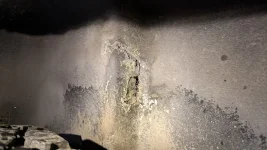
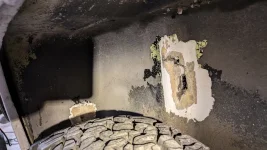
1748399637235.webp1748399655051.webp1748399706971.webp

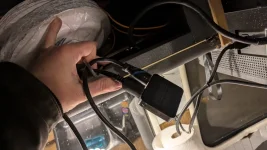
I was trying to figure out where all the HDMI cables go at some point. I pried up the base of the cabinet above the sink and found there are three cables, going to an HDMI splitter that seems to not function. So it's one input and two outputs. One output cable goes to the rear bedroom, and the other goes to the TV mounted at the bunk. That makes sense. But the input cable is a mystery! I can't figure out where it comes from. It'd be great if it went to the head unit in the dash since it had DVD, but I don't think that model has an HDMI output. Hmm...this mystery will plague me.
1748399744878.webp


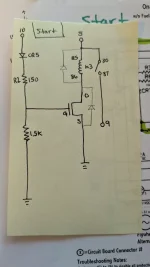
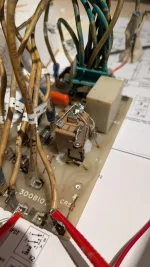
I did a little more work on the Onan board. Made some progress, but we're not quite out of the woods yet. I've not had time to really get back to that. The board now bench-tests correctly, so that's great. The generator itself still dies unless you jump pins 9 and 5. So the board isn't seeing something it wants. I haven't taken time to look at it yet--just spent 5 minutes hooking it up to see what it would do.
1748399774265.webp1748399798113.webp

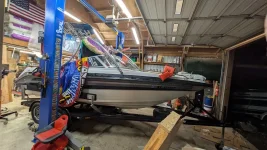
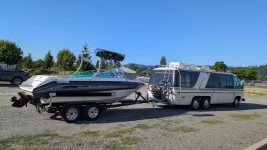
I bought the GMC a new companion in January! Our July 4th campout is the deadline for having both ready to go and playing nice with each other. Of course the old blue boat matched the blue Glenbrook, so that just won't work with the Palm Beach. Gotta keep things coordinated now...(actually it was all dumb luck both times). Upgrades included on this boat include: bigger engine (SBC 350), hydraulic power steering, tandem axles, trailer brakes, open bow for more seating, two extra feet, and lots of other doodads. Hopefully it'll be at the lake soon with the GMC!
1748399817998.webp


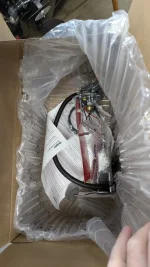
Time to unbox fuel pump #2, and start getting the aux tank fixed up.
1748399833173.webp

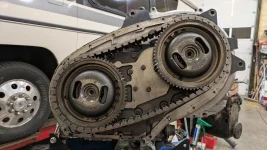
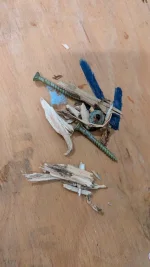
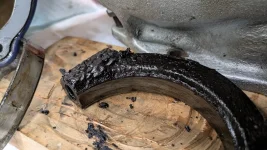
Carnage pics from the trans and diff. PSA: keep up with those oil changes. That final drive was gunky! Pinion bearing was trashed too. Trans looked decent inside, but obviously something let loose inside. Fluid still looked very nice, but there was a lot of clutch material in the pan. Interesting that we somehow destroyed the clutches without burning the fluid.
1748399863641.webp1748399883734.webp1748399894745.webp


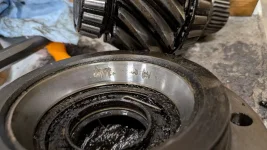
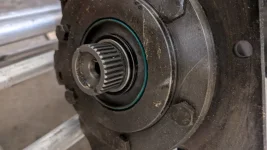
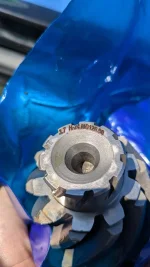
I had to take a gander at the new pinion before boxing it up with the old diff and sending everything off to Jeff Ianatello for an LSD and gear change.
1748399926475.webp


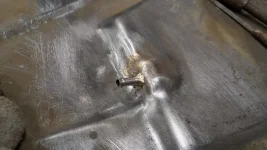
More tank prep--fixing up the leaky vent nipples with some brazing. I really need a lot of practice at this. I'm pretty bad at setting up a torch and knowing what it needs.

1748399943322.webp1748399949553.webp


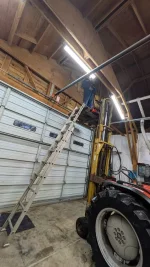
I've been trying to make the shop more usable along the way, so I started an insulation project. I ended up having the ladder feet slide out from under me as I tried to transition from the work platform to the ladder. I fell right off the platform, probably 10+ feet, landed flat on the concrete and the GMC tank. Whoops! My hip put a pretty good dent in the tank, which isn't easy. My fuel capacity is probably closer to 48 gallons instead of 50 now. Oh well.
1748399971127.webp


The fall definitely slowed me down for a few weeks. EVERYTHING hurt since I landed right on my side and clobbered everything on that half of my body. But spreading it all out kept anything from breaking I guess, so here we are.


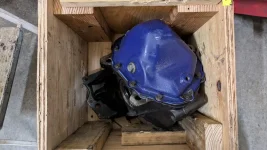
I finally got the final drive back from Jeff. It wasn't packed as securely as when it was sent out, and it definitely jostled around and created a lot of debris on it's return trip. It had all new seals, and the necessary new bearings, along with 3.70 gears and a limited slip. I'm pretty excited about that. Turnaround time took 41 days instead of the 10 that was quoted. It is a one-man show and he did encounter some bad bearings new-in-the-box, so that lost us a few days. Still, it definitely hurt my camping schedule. We were supposed to be camping on April 10th, and the final drive showed up at 1900 hrs on that day. So I set about getting it installed ASAP. It was a late night, but we got it done. I did some early morning break-in/test drives.
1748399996552.webp1748400006494.webp1748400027381.webp

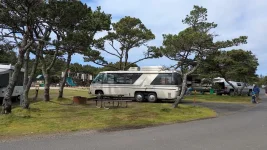
Then we packed up and headed out as quickly as we could to salvage as much of our camping trip as possible. There were several other families expecting us, and we made it!
1748400041733.webp
 
Still way behind, trying to keep up with the updates--but I just keep working on the dang thing!

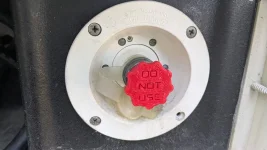
So a year ago, our city water fill sprung a leak, flooded the flooring, and was bypassed. I replaced the tee where it taps in with a regular coupler. This left the city water hose connection unterminated behind the cabinets, but of course I knew not to use it, so I could remedy that issue "later". Well, not soon enough! The wife wanted to help prep for the last camping trip and ended up flooding the RV again. Doh! Despite clear verbal instructions, the hose ended up in the wrong spot. I guess that's on me for making it possible, so I decided to whip up a little plug for that to quell any temptations to repeat this error. If anyone wants the 3D printing file, let me know.
1753394796580.webp

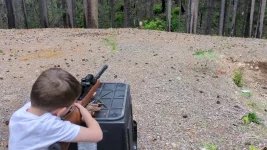
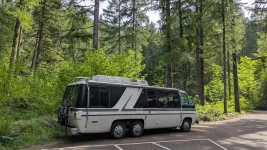
My daughter's 10th birthday rolled around, and there was going to be an elaborate sleepover. The boy and I decided we should get out of Dodge, so we did. Just a night away, boondocking and exploring nearby. He got to try out a .22 pellet rifle and now has a new addiction.
1753394935626.webp1753394924618.webp1753394952344.webp

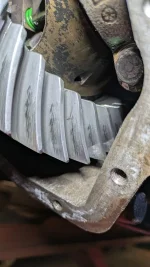
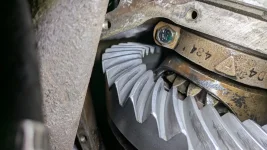
I've got a couple hundred miles on the new 3.70 gears at this point, and they were still noisier than I'd anticipated. The drive side had improved notably, but the coast side still whined a lot when you let off the gas. I just had to pull the cover and see how they were breaking in. Looking better than I'd expected. They're not getting hot, chipping, or grinding. It just looks like there's still the slightest of machining texture left, and it's still working on polishing it away.
1753395143450.webp1753395159894.webp
The drive side is more toward the heel than I'd like, but that's the quiet side, so maybe it'll be OK. There's not much I can do about it now. It was actually a lot quieter on both sides when I replaced the oil with Valvoline full synthetic. I suppose time will tell, but I'm getting less nervous about it as the miles accumulate.


Our big summer-kick-off camping trip to the lake was coming up. We've never managed to use the Palm Beach for this trip, though this will be the 3rd year trying. We've always fallen back to the trusty old Glenbrook. Time to service the Onan since there are no hookups.

1753395338150.webp
 
  • Like
Reactions: Carl Stouffer
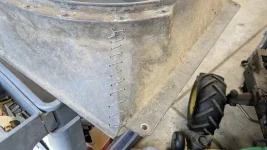
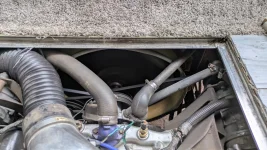
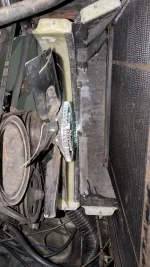
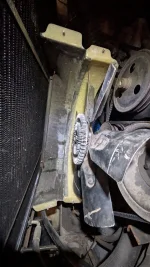
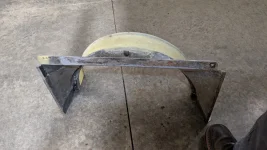
I've been running the Palm Beach without a fan shroud since the engine swap. It's only really been driving in cooler weather, so it was fine. But with boat towing and hot weather on the horizon, it was time to fix up the old busted fan shroud. The steel wire stitching had served me well before the engine swap, but I really hated the horse-collar setup with a passion. All those brackets had been omitted from the engine install, and I had sworn "never again" when I was dealing with it the last time.

1753396045108.webp

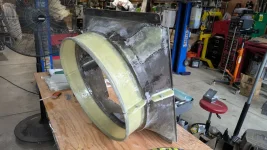
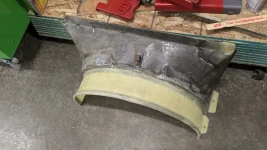
I fixed the cracks, replaced the broken-off mounting ear, added a fiberglass fan-collar, cut the whole thing in two, then added mounting flanges. It fits pretty good, and is pretty lightweight. I'm happy enough.
1753396097743.webp

Due to the front collision damage, we had to tweak the radiator frame a little more to get the rim of the shroud to clear the front of the hatch frame. We used a porta-power to get things back into alignment. This will be a nice upgrade over the years.
1753396245557.webp
 
I've been running the Palm Beach without a fan shroud since the engine swap. It's only really been driving in cooler weather, so it was fine. But with boat towing and hot weather on the horizon, it was time to fix up the old busted fan shroud. The steel wire stitching had served me well before the engine swap, but I really hated the horse-collar setup with a passion. All those brackets had been omitted from the engine install, and I had sworn "never again" when I was dealing with it the last time.

View attachment 15730

I fixed the cracks, replaced the broken-off mounting ear, added a fiberglass fan-collar, cut the whole thing in two, then added mounting flanges. It fits pretty good, and is pretty lightweight. I'm happy enough.
View attachment 15731

Due to the front collision damage, we had to tweak the radiator frame a little more to get the rim of the shroud to clear the front of the hatch frame. We used a porta-power to get things back into alignment. This will be a nice upgrade over the years.
View attachment 15732
Hi Paul - can you elaborate on your cold air intake setup? Parts sourcing, etc. I'm interested in doing the same. Thank you.
 
  • Like
Reactions: EricS
Hi Paul - can you elaborate on your cold air intake setup? Parts sourcing, etc. I'm interested in doing the same. Thank you.
It's a Spectre setup, I can't recall the part numbers. It's their low-profile aluminum plenum though. The hose and filter are Spectre for now as well, though I want to switch over to a Silverado HD air filter box at some point. I'm debating running the hose out the driver's side over the valve cover too, if I can keep it from messing up my hatch/console plans. I'll be looking at that tonight. It's currently a very tight fit with the radiator hose, belts, hatch, shroud.
 
  • Like
Reactions: Seeburg220
It's a Spectre setup, I can't recall the part numbers. It's their low-profile aluminum plenum though. The hose and filter are Spectre for now as well, though I want to switch over to a Silverado HD air filter box at some point. I'm debating running the hose out the driver's side over the valve cover too, if I can keep it from messing up my hatch/console plans. I'll be looking at that tonight. It's currently a very tight fit with the radiator hose, belts, hatch, shroud.
Thank you, Paul. I will look into that. Have a good weekend!
 
Take a look at the carb hat from TorqStorm. It sits lower and doesn't need an adapter or spacer. Looks good too!
Looking it up, the TorqStorm is claming 3.25" height. Pretty decent, but the low-profile Spectre is 2.4", surprisingly enough.
My setup is tall because I'm using the 454/4-barrel adapter underneath my TBI. I don't like the harsh transition of an adapter plate, so that's where I'm at. Seat-of-the-pants tells me it's awesome! :cool: I'll never put it on a dyno for comparisons, so that's the best "data" I'll get. I also have the option of pumping coolant through the base of the TBI like they did from the factory on the 454 trucks. If I get bored in the winter maybe I'll monitor those temps.
 
Last edited:
  • Like
Reactions: EricS
So, we got a "new" boat in January. The old blue and white boat went OK with the 2-tone blue Glenbrook, so I needed to color match the new motorhome too, right? That's sensible, yes?

Well, actually this was just dumb luck I fell into. We'd been looking for a slightly bigger engine, a little more seating, an open bow, power steering, a tandem axle trailer, (the old one was pushing the limits of a single axle), a better swim deck, etc. Well I found everything we wanted and more, in the form of a 1991 Mariah 2000Z. A fantastic brand with a great build quality from years gone by. Complete with a Chevy 350. But it had rusty wheels, rotted tires, rusty surge brake hydraulics, and a knocking in the outdrive. I got it for a decent price and started fixing it up.

The biggest problem--I can't buy new tires for rusty wheels, so what wheels do I get? I started shopping for Ranger/Wrangler/Explorer wheels and such. I figured some aluminum American Racing wheels with the 12-hole pattern wouldn't clash too bad, but in 3 months I couldn't find a decent deal (I'm on FB Marketplace constantly too). Then, another stroke of dumb luck! It turns out for a certain number of years, Ford sourced Alcoa wheels for their Ranger FX4 Pro 2 or something like that. I never knew they existed, and there was a set for $50 stinking bucks less than an hour for me. SOLD!

1753592834002.webp

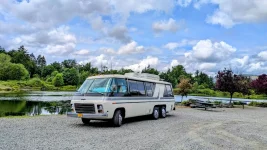
They both need a good buffing, but I'm pretty pleased with how well they look together!

1753592810806.webp

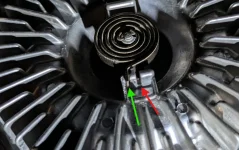
So we went on our boating/camping trip. All-in-all, it went pretty well. The Onan started up great and made no power (some quick troubleshooting revealed a wire had fallen off the brush block terminals). With that fixed, we had AC, a new microwave (that made a terrible grinding noise until disassembly revealed the fan rubbed after the unit warmed up for a couple minutes). More good news, on the drive down we discovered that the fan clutch is way too over-active now (I'll explain why that's good news further down). Bad news is, the transmission pan is leaking like a sieve and the blackwater had a very slow drip once the tank got kinda full.


Needing to constantly check the trans exacerbated a long-time annoyance. My hatch hits my seats. I don't know why. Other people's hatches don't hit their factory seats. I checked the aluminum frame members under the seat pedestals, and they are still using their original holes. Maybe repeatability was an issue in the factory? Anyhow, the thing is stupidly heavy--1" plywood, with a steel plate across the middle, and super heavy flooring with gobs and gobs of caulk. It's noisy too, with the temporary "console" covering the carb hat hole. So something has to give.
1753592857604.webp

1753592880186.webp

Now for the good news of the bad fan clutch...
It's an excuse to experience the convenience of my new custom fan shroud! I had that fan on and off in record time. It was a downright pleasure! I popped in an old spare clutch. We'll see how it does--maybe I'll have to order a new one again. At least they're easy to change now!

1753592982630.webp 1753594064100.webp
 
  • Like
Reactions: dsmithy and Bhart
Looking it up, the TorqStorm is claming 3.25" height. Pretty decent, but the low-profile Spectre is 2.4", surprisingly enough.
My setup is tall because I'm using the 454/4-barrel adapter underneath my TBI. I don't like the harsh transition of an adapter plate, so that's where I'm at. Seat-of-the-pants tells me it's awesome! :cool: I'll never put it on a dyno for comparisons, so that's the best "data" I'll get. I also have the option of pumping coolant through the base of the TBI like they did from the factory on the 454 trucks. If I get bored in the winter maybe I'll monitor those temps.
Good point, but the advantage of the TorqStorm is that the intake hose will clear the valve cover. It appears the Spectre must be indexed so that the hose goes around the valve cover? I tried a few different hats, even the factory air cleaner, and they all needed a spacer to fit over the injectors. BTW, I have the aluminum moho intake manifold and the adapter lines up fairly well, but not nearly as efficient as yours! Nice work!
 
It appears the Spectre must be indexed so that the hose goes around the valve cover?
I'm pretty sure it clears the valve cover. I aimed it forward as much as I could so I could minimize the width of the hatch cutout. I believe someone else is running this hat at the 9:00 position, but I can't remember who. I actually almost rerouted mine a couple days ago, but chickened out due to the hatch cutout issue. The 11:00 position BARELY works out. The floor, shroud, radiator hose, air intake hose, engine brackets and engine belts are really crammed together. It's hard to ensure things don't rub the intake hose.

A couple drawbacks to this one, it resonates and functions as an injector amplifier. Almost comically loud--I'm going to toy with damping it directly. It also won't clear a quadrajet acceleration pump arm without some custom grinding/clearancing. That seems like an oversight, but no longer an issue for me. It's also expensive for what it is, if you ask me. I just had trouble finding a Jeep hat near me.
 
  • Like
Reactions: EricS
I splurged on a Ragusa step, transmission pan, and triple battery tray. I'm pretty disappointed in the quality, but have lodged those complaints in another thread . I've got the step and pan installed for now (after some customizing), time will tell if I pursue replacements. I'm a bit miffed by what I ended up with.


I dug the T-skirts out of storage and did a little repair to them. Then I remounted them with stainless piano hinge (old mounting holes were a little worn out on the motorhome body too). My macerator outlet is now hidden behind the port-side T-skirt, which I'm liking.
1754293573634.webp1754293592856.webp

Speaking of blackwater, I had to address "the drip" from the previous camping trip. There was a hairline crack in the original weld. I was somewhat relieved it wasn't my extensive repairs that had gone bad. I ground it out a little and laid a new bead of PP weld in the gap. Time will tell if it's water tight once more.
1754293645673.webp

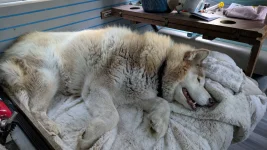
This guy absolutely LOVES being in the motorhome. He simply won't allow me to work in there alone. As stubborn as huskies are, it's easiest to just give him what he wants. :)
1754293673211.webp


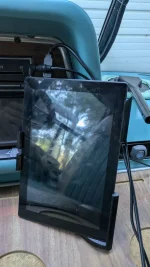
I printed a tablet holder and the fit is really nice. I just need to print a mount for the holder, and figure out where to mount it.
1754293696579.webp

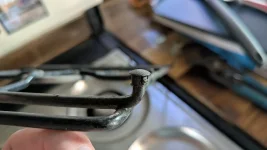
I'm allowing myself to tackle a few of the little things have have been bugging me, line the incessant rattling of the stove while underway. I recently realized the legs of the grates were supposed to have little feet. There were some missing, and others mismatched. I did a lot of searching for black silicone vacuum caps that were ~3/16, and the only place I could find them was AliExpress.
1754293719375.webp


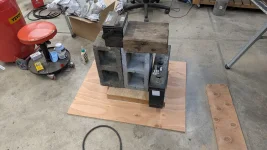
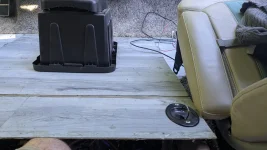
Next up is building a new engine hatch. I'm tired of the heavy, loud, cumbersome original. I want it to swing up while clearing the seats, stay up by itself, be quieter, transfer less heat, be easier to remove and set down somewhere, easier to latch/unlatch. I started with a 1/2" sheet of plywood, and made a 2.5" raised center for it. This stiffens it a bit, gives the console a raised platform to sit on, and clears the carb hat underneath. Gravity clamps were employed for mounting the raised center.
1754293746783.webp


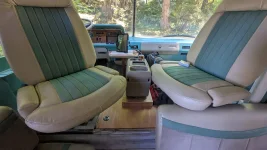
I was glad to see I can swing the seats around. I'd thought the passenger seat was hitting the console, but it's actually limited by the dinette bench first. Huh.

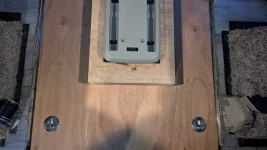
The console is from a early 2010s Caravan/Routan/Town&Country, and is the "premium" option. It's one of the things I liked best about the Routan van we had. It has a power outlet built in, and a quick-release mounting base with built-in contacts for the power. I got it from the yard with a pigtail included, so I'll have to wire that up for convenience at some point.
1754293766803.webp


I'm really loving the new latches. They were a bit fiddly to install. I had to polish the latches and bevel the catches. But after that, and a good soaking with a dry-lube, they're butter smooth! It is so quick and easy to lift or lower the hatch now. I'll be more prone to checking things with greater regularity. It's all about removing those little barriers.
1754293787246.webp

Up next is some sound deadening and some carpet or something. We'll see. I didn't like the sloppily installed/caulked-up and heavy laminate though.
 
Up next is some sound deadening and some carpet or something. We'll see. I didn't like the sloppily installed/caulked-up and heavy laminate though.
I cant tell you how well its going to work, but re: the sound deadening project, I'm using a combination of KilMat (the heavy butyl rubber stuff backed with foil) and something I found by DEI that is used under carpeting.


It should be an effective solution. The KilMat is heavy, but it quells those large panel resonances so well I believe the weight penalty will be worth it. I did my whole cockpit and I'm also lining the rear wheel "tubs" as they rattle like crazy when you tap them.
 
  • Like
Reactions: pvfjr
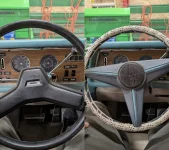
We took the motorhome to White River Falls and the Wasco County Fair this summer, right after my last posts. I'd swapped my steering wheel for better gauge visibility, and I really like it! It was hard to pay $100 for something that seemed like a $10 junkyard find 20 years ago, but here we are. All things considered, I probably got a good deal for it. Came from ebay in Canada, I believe on a '78 G30.

1763758368306.webp 1763758430977.webp

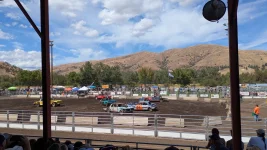
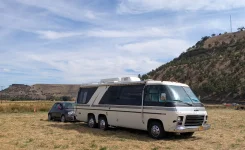
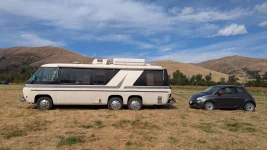
The fair is VERY rural, and very old fashioned, located at the edge of the Warm Springs Indian Reservation. No fancy rides and lights--just lots of country kids having good old-fashioned fun. There are a lot of events with the local native tribes too, and my daughter got to learn some native dances with a boy about her age. Both fun and adorable. We got to enjoy a rodeo and a demolition derby while we were there too.

1763758445364.webp 1763758481624.webp 1763758495325.webp

Since then, I've been mostly focused on getting the old Glenbrook ready for sale, so the Palm Beach didn't get any attention until this week (aside from some other camping trips).

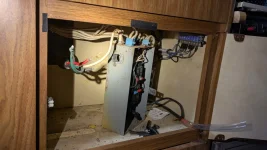
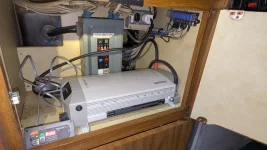
I finally rearranged the electrical cabinet to my liking. There was a ton of wasted space, and no room for my Xantrex inverter/converter. Now I have room for it, a possible transfer switch install, and a solar controller. I'm much happier with this arrangement. I got rid of the extra divider/wall in the middle of the cabinet where the breaker box was mounted, changed the shore cord from rear entry to side entry, relocated the breaker box and outlet/switch box to the rear wall, and moved my 12V fuses upward a bit. Much better. I'm still considering mounting the remote controller somewhere visible, but I'm not sold on the idea.

1763758880600.webp 1763759663496.webp

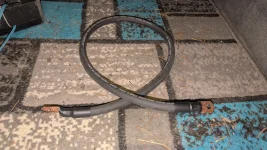
I keep a decent amount of 1/0 welding cable on hand for such projects. I also buy these 1/0 terminal lugs that only have 1/4" holes, but they leave all the "meat" on the ring terminal end. So there's plenty of material left to drill out to the desired size. This reduces the amount of unique parts I have to have on hand. I think I used 1/4", 5/16" and 3/8" as needed on this particular install. They come with adhesive lined heat shrink too--both red and black.
1763759691265.webp


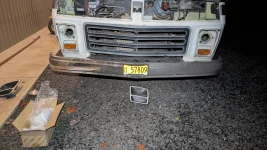
I finally decided to install my Toyota/Koito headlight upgrade after having it on the shelf for a couple years. That's a nice kit! Beam pattern and brightness is much improved on the dark, rainy, curvy highways.

1763759713325.webp1763759731138.webp


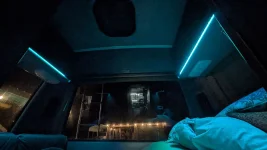
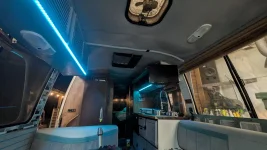
I also decided to tackle the HVAC blower. All four speeds were "low". No change at all. It turns out, my fan switch was 99% unplugged. I lubed the controls up a bit too while I was at it. While I was troubleshooting wiring, I got the PO's LED strip light install straightened out. It's a little silly/unecessary, but all in good fun. You can pick any color you choose with a remote, so it does make for some decent ambiance. Might as well try out the coach's official turquoise accent color...

1763759758664.webp1763759772949.webp


The reason I got a burr under my saddle for the recent upgrades/fixes was that I was tasked with hauling around a bunch of high schoolers. We had about 60 kids from the local youth group doing an around-the-town scavenger hunt/challenge. They were all allowed to sign up to ride with whichever driver/vehicle they wanted, and I ended up with a full dozen kids! Made 15-20 stops over the course of an hour, with all the kids piling in and out. Had a well stocked fridge and freezer, music and lights. Good times. The responses were very favorable, so I think we'll be doing this annually. :)
 
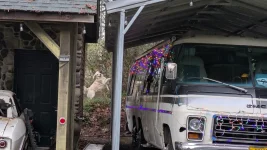
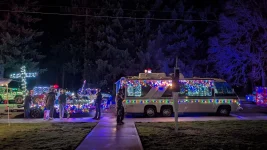
I guess I never added, the Palm Beach's services were requested by the youth group once more. I guess it was a big hit for the pre-Thanksgiving scavenger hunt, so we got roped into the local Christmas parade too. The kids wanted to have a float, so we towed a flatbed for them. Then it was back into the carport for its winter slumber--but not without cracking the corner of the rooftop storage box. :cautious: I got complacent with clearances since it was never an issue with the Glenbrook (the previous resident of the carport). Anyway, that closes out 2025.
1779826033071.webp