I admire your energy and perseverance Paul. BTW, why the fusible links to power the ECM instead of fuses or resettable breakers?
The Ferrigno Family's 1976 Palm Beach
- Thread starter pvfjr
- Start date
You are using an out of date browser. It may not display this or other websites correctly.
You should upgrade or use an alternative browser.
You should upgrade or use an alternative browser.
As usual, you're too kind.I admire your energy and perseverance Paul. BTW, why the fusible links to power the ECM instead of fuses or resettable breakers?
") Good question on the fusible links...
Good question on the fusible links...I was torn between locating the fuse/relay box on the "firewall" where the rest of the power distribution stuff is, or having it under the seat. I opted for keeping it indoors so the connections would age better (even though they're all fully sealed/grommeted). This meant I needed long feeder wires for the box. Both are connected to battery power, but one feeds an input fuse for B+ circuits and one feeds an input fuse for IGN circuits. The IGN fuse feeds a IGN relay, which then feeds other IGN fuses in the box.
So the circuits are all protected, but the feeder wires had no protection for the long run to the fuse box. Fusible links made sense, and they're located right by the factory fusible link. Nothing bulky, no terminal connections to corrode, protects the wire, reduces chance of fire, etc.
Oh, and the most important factor...I already had them laying there in my pile of scrap donor wires.


With it running, I was finally able to pull it out of the shop for a wash. I should've washed it before immobilizing it! It bugged me for months.

During some down time waiting on parts, I worked through some more PO nonsense. Every single circuit on the 12V living area fuse panel had a black pigtail added to it. They were all stripped, touching each other, haphazardly laying about, lazily and ineffectively taped off, and occasionally shorting out on the power converter. Why? This one, I can't figure out.

My throttle body came without the air cleaner hold-down stud. I needed a nice long 1/4-20 carriage bolt, and had to put an s-bend into it (not pictured).

I finally drove it home! I'll be back and forth between here and my friend's larger shop now.

Driving around on hot summer nights without an engine cover was absolutely cooking me. So 5 minutes with a jigsaw improved that. Even better, it really seems to amplify the sound of the injectors! Great, now I have to polish the air cleaner...
In reality, I'll eventually build a custom console that looks normal and intentional.

During some down time waiting on parts, I worked through some more PO nonsense. Every single circuit on the 12V living area fuse panel had a black pigtail added to it. They were all stripped, touching each other, haphazardly laying about, lazily and ineffectively taped off, and occasionally shorting out on the power converter. Why? This one, I can't figure out.
My throttle body came without the air cleaner hold-down stud. I needed a nice long 1/4-20 carriage bolt, and had to put an s-bend into it (not pictured).
I finally drove it home! I'll be back and forth between here and my friend's larger shop now.
Driving around on hot summer nights without an engine cover was absolutely cooking me. So 5 minutes with a jigsaw improved that. Even better, it really seems to amplify the sound of the injectors! Great, now I have to polish the air cleaner...
In reality, I'll eventually build a custom console that looks normal and intentional.
Tidying up a few more things, I wanted to mount the MAP and the ESC. It seemed like a good excuse to try out my threaded insert kit for plastics. It comes with many different sizes, and an adapter that mounts into many standard soldering irons. It slipped right into my Ryobi solder station, and I pressed some M5 brass inserts into the MAP sensor. It will be mounted under the engine hatch rail with counter sunk screws. Now I can remove it on a whim for forearm clearance, and not worry about dropping any nuts or holding a wrench on the back.

I also started pinning out all the ADC connections. I'm routing them from the EBL board to the unused pins of the ECM connector with some random 1980s ribbon cable I had laying around.


This got my fuel pressure sensor up and running in Winlog. Very cool! Big thanks to @billvv for his help along the way. Tragically, it seems Bob from Dynamic EFI has passed away this week, so I'm not sure what that means for the future of this system. Prayers for his family and friends in any case.
I've got it running pretty well on the laptop for now. I think I'll make my own annunciators eventually, and need to refit it to my tablet, but it's a neat start.

I also drilled out my air cleaner and tapped it for 3/8" NPT threads, and screwed an intake air temp sensor into place. After doing some reading, and since my air plenum here is thermally conductive, it seems the "bird cage" style of IAT was the right choice, rather than the solid brass ones. Those are more susceptible to heat soak, unless they're thermally isolated in plastic housings or something.

And a trip to the DMV to make things official! It was 98 degrees and I don't have a shroud. It got a little warm at 210 sitting at lights, but my eyes were glued on those gauges. It ran real great with any air movement though, and was nice and steady at 196. As far as the fuel system goes, it was fantastic! It was about a 65 mile trip to get it registered.

I also started pinning out all the ADC connections. I'm routing them from the EBL board to the unused pins of the ECM connector with some random 1980s ribbon cable I had laying around.
This got my fuel pressure sensor up and running in Winlog. Very cool! Big thanks to @billvv for his help along the way. Tragically, it seems Bob from Dynamic EFI has passed away this week, so I'm not sure what that means for the future of this system. Prayers for his family and friends in any case.
I've got it running pretty well on the laptop for now. I think I'll make my own annunciators eventually, and need to refit it to my tablet, but it's a neat start.
I also drilled out my air cleaner and tapped it for 3/8" NPT threads, and screwed an intake air temp sensor into place. After doing some reading, and since my air plenum here is thermally conductive, it seems the "bird cage" style of IAT was the right choice, rather than the solid brass ones. Those are more susceptible to heat soak, unless they're thermally isolated in plastic housings or something.
And a trip to the DMV to make things official! It was 98 degrees and I don't have a shroud. It got a little warm at 210 sitting at lights, but my eyes were glued on those gauges. It ran real great with any air movement though, and was nice and steady at 196. As far as the fuel system goes, it was fantastic! It was about a 65 mile trip to get it registered.
The 65 mile drive revealed a venting issue with the differential. There seems to be an unexpected oil flow phenomenon. I wish I could see inside while it is operating, but I cannot. For whatever reason, the baffle is rendered ineffective, and oil is getting pumped right out the vent hose. It looks like I lost about 3 cups of oil going to the DMV. What a mess! Everything was so clean and tidy before. 
So to keep an eye things and find out what's really going on, I rigged up a quick catch-can of sorts. Just an upside-down oil-dispensing bottle from the dollar store. I added two tubes to it--one short one for the oil, and one tall one to let the air out of the bottle.
On initial warm-up, it pushes a lot of oil out. Once temp cycling starts with going up hills, coasting down them, stopping in towns, etc...it starts to suck the oil back in.


This isn't the final solution of course, as it doesn't really fix the problem. I was also surprised how much oil it pushes out on a 10 mile warm-up trip! Yikes. I'm going to need a bigger bottle, or a proper fix in short order. At least the mess has been stopped for now.
Since the coach is so well mannered, I felt pretty good about having the wife drive it. In our four years of owning the Glenbrook, she has only driven it at a boat ramp once. Carburetors and their quirks can be a bit of a challenge, and when you're 12,000 lbs, the stakes are high.
So Sunday, she got to drive the Palm Beach all around the local back roads, and both the kids got to come along. It was the first family drive, and they were pretty excited. My wife decided it's the coolest thing she's driven to date. I can't disagree!

So to keep an eye things and find out what's really going on, I rigged up a quick catch-can of sorts. Just an upside-down oil-dispensing bottle from the dollar store. I added two tubes to it--one short one for the oil, and one tall one to let the air out of the bottle.
On initial warm-up, it pushes a lot of oil out. Once temp cycling starts with going up hills, coasting down them, stopping in towns, etc...it starts to suck the oil back in.
This isn't the final solution of course, as it doesn't really fix the problem. I was also surprised how much oil it pushes out on a 10 mile warm-up trip! Yikes. I'm going to need a bigger bottle, or a proper fix in short order. At least the mess has been stopped for now.
Since the coach is so well mannered, I felt pretty good about having the wife drive it. In our four years of owning the Glenbrook, she has only driven it at a boat ramp once. Carburetors and their quirks can be a bit of a challenge, and when you're 12,000 lbs, the stakes are high.
So Sunday, she got to drive the Palm Beach all around the local back roads, and both the kids got to come along. It was the first family drive, and they were pretty excited. My wife decided it's the coolest thing she's driven to date. I can't disagree!

The 65 mile drive revealed a venting issue with the differential. There seems to be an unexpected oil flow phenomenon. I wish I could see inside while it is operating, but I cannot. For whatever reason, the baffle is rendered ineffective, and oil is getting pumped right out the vent hose. It looks like I lost about 3 cups of oil going to the DMV. What a mess! Everything was so clean and tidy before.
So to keep an eye things and find out what's really going on, I rigged up a quick catch-can of sorts. Just an upside-down oil-dispensing bottle from the dollar store. I added two tubes to it--one short one for the oil, and one tall one to let the air out of the bottle.
On initial warm-up, it pushes a lot of oil out. Once temp cycling starts with going up hills, coasting down them, stopping in towns, etc...it starts to suck the oil back in.
View attachment 11671View attachment 11672
This isn't the final solution of course, as it doesn't really fix the problem. I was also surprised how much oil it pushes out on a 10 mile warm-up trip! Yikes. I'm going to need a bigger bottle, or a proper fix in short order. At least the mess has been stopped for now.
Since the coach is so well mannered, I felt pretty good about having the wife drive it. In our four years of owning the Glenbrook, she has only driven it at a boat ramp once. Carburetors and their quirks can be a bit of a challenge, and when you're 12,000 lbs, the stakes are high.
So Sunday, she got to drive the Palm Beach all around the local back roads, and both the kids got to come along. It was the first family drive, and they were pretty excited. My wife decided it's the coolest thing she's driven to date. I can't disagree!
View attachment 11673Ther
There was always discussion years back and concensus that the final drive can be run a little low. A few had issues with it burping out oil and tried a few things and eventually put the level down an inch from the fill hole rather then level and that seemed to solve the drain issue.
I had a 3.07 with the stock vent setup(felpro gasket with groove to the tiny hole in the top of the cover. And now a 3.21 that vents out the flange. No issues with fluid loss running 1” low.
Same with the 3.42 I installed in my friend’s eleganza.
Only other thing is that it has been noted the final drive does get surprisingly hot per those that put temp guages on.
Glad your family enjoys driving.
I'd noticed evidence of the diff being hot-ish. The old oil was cooked in places, and was building up carbon crud like the inside of a neglected engine. I'd never seen that in a diff before. I scraped out everything I could. I've pondered filling it with diesel and letting it idle in the air for a while. I'd bet it still had the original 70's oil in it. You can see how dark the new oil is already (benefit of the glass catch can I suppose).There was always discussion years back and concensus that the final drive can be run a little low. A few had issues with it burping out oil and tried a few things and eventually put the level down an inch from the fill hole rather then level and that seemed to solve the drain issue.
I had a 3.07 with the stock vent setup(felpro gasket with groove to the tiny hole in the top of the cover. And now a 3.21 that vents out the flange. No issues with fluid loss running 1” low.
Same with the 3.42 I installed in my friend’s eleganza.
Only other thing is that it has been noted the final drive does get surprisingly hot per those that put temp guages on.
Glad your family enjoys driving.
I've read the threads about running it an inch low. I ended up about 3 cups low. IIRC I had about 2 quarts in this thing. That was getting close to 1/2 capacity and it was still puking oil out. I'm not sure how low I'd be comfortable running it. But, with the catch can, I can experiment with this pretty easily by draining off whatever is purged into the bottle, and measuring how much I've taken out. Something I'll consider.
Ideally, I'd like to just tap into the diff somewhere with my vent that doesn't have so much oil flowing. If I could vent more gas and less oil--even if I still had to have the catch can--then I'd be happy. The catch can will still separate the oil from the air.
Another hair-brained idea...
I could use this pumping phenomenon to my advantage. I could let the bottle drain back out through a cooler and pipe it back into the drain plug I installed on the cover. Then just let it flow!
Something else is going on here. It should NOT be puking oil out of the vent, especially if it is filled to 1" BELOW the filler. Is the FD a new one or has new ring and pinion? If so colld be tolerances are tight and heat is gears trying to break-in to each other. I wonder if the oil you are using is creating the elevated temps and making it almost boil out. Is the FD noisy with a speed whine? I have been using Amsoil 75W140 from the first day that I installed my 3.21. I have changed that oil 3 times in the last almost 100K miles and each time it comes out as clean as the day I put it in. I have never noticed that the FD is excessively hot after long 8hr days on the road. I'd say temps were 110* or so. Not hot but on the edge of warm/hot. Using a stock cover, not fined aluminum. Also, my guess is that you've somehow blocked the vent, either over tightening the cover bolts or gasket sealer squashed out and has blocked the vent. It just should not be puking oil. Keep us posted on what you find.
Larry, the missing puzzle piece is somewhere in the last few pages of this thread. Long story short, my vent is custom. That's why I'm able to plumb a hose to it like this. Everything else about the diff is original and crusty. I have a drain plug and a vent port in the cover. The desire was to be able to change the oil regularly and easily, without having to source the now incorrect diff cover gaskets, and then needing to fabricate correct ones each time. I'm happy to report the diff itself didn't leak a drop from its seals or the gasket-free cover. My new vent hose up my the frame rail has been puking out the oil though.Something else is going on here. It should NOT be puking oil out of the vent, especially if it is filled to 1" BELOW the filler. Is the FD a new one or has new ring and pinion? If so colld be tolerances are tight and heat is gears trying to break-in to each other. I wonder if the oil you are using is creating the elevated temps and making it almost boil out. Is the FD noisy with a speed whine? I have been using Amsoil 75W140 from the first day that I installed my 3.21. I have changed that oil 3 times in the last almost 100K miles and each time it comes out as clean as the day I put it in. I have never noticed that the FD is excessively hot after long 8hr days on the road. I'd say temps were 110* or so. Not hot but on the edge of warm/hot. Using a stock cover, not fined aluminum. Also, my guess is that you've somehow blocked the vent, either over tightening the cover bolts or gasket sealer squashed out and has blocked the vent. It just should not be puking oil. Keep us posted on what you find.
I had fashioned an internal baffle for the custom diff cover's vent port. That was apparently an utter failure. There is some dynamic flow phenomenon that is defeating my baffle. That's why I'd like to see inside while driving. I may be baffled, but the oil is not.
This should give you and idea of what it looks like inside your FD. Pretty cool what all is happening in there.

 www.roadandtrack.com
Here's a Look at Exactly What Happens Inside Your Car's Differential
Ever wonder exactly what a differential does when you get it spinning? Here's your answer.
www.roadandtrack.com
On ours the cause of lots of oil blowing out the vent was a carrier side bearing going out. I messed around with the gasket and oil changes before the side bearing got noticed. It was fun to keep putting oil in to get back home. We got a 3:55 differential from Jim K and it's been fine since. By the time i noticed the bearing issue it was pretty obvious (side play when it should be preload) and it was running hotter in operation. This is why I still have spare cover gaskets.
Time for another update. Since I've actually been able to drive the coach all around, I've been taking care of minor annoyances that pop up here and there. These things tend to pop up more in use than they do during inspections...
One such item was the realization that the Parking Brake annunciator is actually separate from the Brake annunciator, and it was not working. How do I know? Well, I may have driven a short distance with the parking brake on. At least it was a short distance! I wondered why it felt gutless all the sudden. Whoops! Time to fix the dummy light I suppose. I found the switch on the left side of the lever assembly. The steel-framed assembly tested well for ground. I manually grounded the wire, and the light came on. So that narrowed it down to the switch itself. A 1/4" ratcheting wrench extracted the single screw holding it to the lever assembly.

Yep, nothing shiny about that contact disc. The stationary contacts were just as bad. I shined everything back up with a fiberglass scratch pen.

Success!

Then I decided to finally address the Onan rectifier. It was confirmed bad months ago, and I new it would be tricky to coax the new rectifier into the old socket. I tried for a while after twisting the terminals on the rectifier accordingly, then gave up and just decided to extract the terminals and plug them in individually.


The little guy helped insulate the bare female spade terminals. Actually, I think I replaced all those with fresh ones after extracting them. IIRC, the terminals and wire were a bit aged.

I cleaned up the aluminum housing there the rectifier mounts, added some fresh thermal grease, fabbed up a plastic retainer to replace the defunct connector shell (the screw needs something to grab), and installed the rectifier.

Now we have AC power! Hmm, perhaps a bit too much...

I worked the throttle linkage by hand a bit, and it didn't feel very "free". I could feel the governor spring, but it felt like there were other forces at play. So I disconnected all the linkages and started working things individually. The carb was nice and free, but the governor rod had a very stiff ball/socket joint. I cleaned up all the rust on all the pivot points and gave them a light greasing. Wow, no adjustments needed! Use it or lose it, I suppose.

I don't know why I took this pic, I guess I'm just still glad to have it home!

The bumper had a major droop/twist toward the end of the passenger side. I got out a chain and the tractor, and started twisting it back into shape. It's not perfect, but it doesn't warrant a double-take when you walk past it anymore. Here's a before and after, with inconsistent vantage points to ruin the effect.")


The Blue Sea fuse panel for the living area went in without any trouble. Same one I used on the Glenbrook--I really like them. The PO had criss-crossed a few of the wires previously, so I had to straighten them out so the circuits matched the circuit numbers on the big sticker on the door. I later had to purchase a big pack of 15A fuses, but everything tested well with the temporarily incorrect fuses.

The little guy was hanging out with me while mom was away. I told him to go take a shower before bed, and before mom got home. 10 minutes later, he was back out in the motorhome with a wet head and fresh work clothes, ready to keep helping! So we focused on a task that wouldn't get him rolling around on the ground. Previous inspection revealed some underperforming burners, so I got him a steel wire to clean out all the orifices. He did a great job at this tedious task.

Back on the lift at my friend's house for some black tank work. It dawned on me how visible the frame rail was now that the coach was clean. It was covered with overspray and caught more light than it ought.

So I decided to hit it with some matte black spray paint, and then didn't take another pic. Oh well. Trust me, it looks a lot better now.
I decided I didn't want to stick with an obsolete black tank valve, so I needed something different to attach to. I couldn't find anything with the original bolt pattern, and those bosses were destroyed anyway. So I got a basic Valterra 3" square flange for a few bucks and decided to build up my own mounting bosses for it. I used some thread inserts for extra strength. The new flange needed aligned to the old flange while I tacked the bosses in place, so I sourced a specialty alignment cone (that's a Taco Bell medium cup, for your reference). It really worked great! It's also polypropylene just like the tank, so no worries about contamination there...


Once the bosses were set in place after endless plastic welding, I bolted the flange on. My friend had a random toilet tank gasket that fit very well--kind of a foamy rubber stuff. I had to trim off some extra parts, but I think it'll work. The bolt threads got plenty of anti-seize, so fingers are crossed for a long lifetime on this stuff.

I had to clearance the crossmember a bit with the plasma cutter. I don't want it putting any undue strain on the outlet--that could have been a factor with all the original damage I think. Finally, a fresh new valve! It's attached with a flexible Ferco coupling to keep stresses at a minimum.


Looking forward to adding a macerator to this sometime soon.
The wife wants this coach to be "wife friendly" (her words, too). She dreams of traveling in and operating this machine independently, so I'm trying to eliminate quirks and gotchas. One such issue is the oil fill that looks like a radiator cap, and is located by the radiator. Recipe for disaster! She's pretty good about checking/adding fluids to old rigs, so let's take care of that. I made this quite a while ago, but never got around to installing it. It's a 3D printed insert for the stock cap, with embossed lettering that won't wear out or rub off. It fits in the cap very nicely, and is held in with some glue.


One such item was the realization that the Parking Brake annunciator is actually separate from the Brake annunciator, and it was not working. How do I know? Well, I may have driven a short distance with the parking brake on. At least it was a short distance! I wondered why it felt gutless all the sudden.
Whoops! Time to fix the dummy light I suppose. I found the switch on the left side of the lever assembly. The steel-framed assembly tested well for ground. I manually grounded the wire, and the light came on. So that narrowed it down to the switch itself. A 1/4" ratcheting wrench extracted the single screw holding it to the lever assembly. Yep, nothing shiny about that contact disc. The stationary contacts were just as bad. I shined everything back up with a fiberglass scratch pen.
Success!
Then I decided to finally address the Onan rectifier. It was confirmed bad months ago, and I new it would be tricky to coax the new rectifier into the old socket. I tried for a while after twisting the terminals on the rectifier accordingly, then gave up and just decided to extract the terminals and plug them in individually.
The little guy helped insulate the bare female spade terminals. Actually, I think I replaced all those with fresh ones after extracting them. IIRC, the terminals and wire were a bit aged.
I cleaned up the aluminum housing there the rectifier mounts, added some fresh thermal grease, fabbed up a plastic retainer to replace the defunct connector shell (the screw needs something to grab), and installed the rectifier.
Now we have AC power! Hmm, perhaps a bit too much...
I worked the throttle linkage by hand a bit, and it didn't feel very "free". I could feel the governor spring, but it felt like there were other forces at play. So I disconnected all the linkages and started working things individually. The carb was nice and free, but the governor rod had a very stiff ball/socket joint. I cleaned up all the rust on all the pivot points and gave them a light greasing. Wow, no adjustments needed! Use it or lose it, I suppose.
I don't know why I took this pic, I guess I'm just still glad to have it home!
The bumper had a major droop/twist toward the end of the passenger side. I got out a chain and the tractor, and started twisting it back into shape. It's not perfect, but it doesn't warrant a double-take when you walk past it anymore. Here's a before and after, with inconsistent vantage points to ruin the effect.
The Blue Sea fuse panel for the living area went in without any trouble. Same one I used on the Glenbrook--I really like them. The PO had criss-crossed a few of the wires previously, so I had to straighten them out so the circuits matched the circuit numbers on the big sticker on the door. I later had to purchase a big pack of 15A fuses, but everything tested well with the temporarily incorrect fuses.
The little guy was hanging out with me while mom was away. I told him to go take a shower before bed, and before mom got home. 10 minutes later, he was back out in the motorhome with a wet head and fresh work clothes, ready to keep helping! So we focused on a task that wouldn't get him rolling around on the ground. Previous inspection revealed some underperforming burners, so I got him a steel wire to clean out all the orifices. He did a great job at this tedious task.
Back on the lift at my friend's house for some black tank work. It dawned on me how visible the frame rail was now that the coach was clean. It was covered with overspray and caught more light than it ought.
So I decided to hit it with some matte black spray paint, and then didn't take another pic. Oh well. Trust me, it looks a lot better now.
I decided I didn't want to stick with an obsolete black tank valve, so I needed something different to attach to. I couldn't find anything with the original bolt pattern, and those bosses were destroyed anyway. So I got a basic Valterra 3" square flange for a few bucks and decided to build up my own mounting bosses for it. I used some thread inserts for extra strength. The new flange needed aligned to the old flange while I tacked the bosses in place, so I sourced a specialty alignment cone (that's a Taco Bell medium cup, for your reference). It really worked great! It's also polypropylene just like the tank, so no worries about contamination there...
Once the bosses were set in place after endless plastic welding, I bolted the flange on. My friend had a random toilet tank gasket that fit very well--kind of a foamy rubber stuff. I had to trim off some extra parts, but I think it'll work. The bolt threads got plenty of anti-seize, so fingers are crossed for a long lifetime on this stuff.
I had to clearance the crossmember a bit with the plasma cutter. I don't want it putting any undue strain on the outlet--that could have been a factor with all the original damage I think. Finally, a fresh new valve! It's attached with a flexible Ferco coupling to keep stresses at a minimum.
Looking forward to adding a macerator to this sometime soon.
The wife wants this coach to be "wife friendly" (her words, too). She dreams of traveling in and operating this machine independently, so I'm trying to eliminate quirks and gotchas. One such issue is the oil fill that looks like a radiator cap, and is located by the radiator. Recipe for disaster! She's pretty good about checking/adding fluids to old rigs, so let's take care of that. I made this quite a while ago, but never got around to installing it. It's a 3D printed insert for the stock cap, with embossed lettering that won't wear out or rub off. It fits in the cap very nicely, and is held in with some glue.
I went to a cruise-in, fly-in, chicken dinner in Jordan OR a couple weekends ago. It was really neat! It was around 100 planes and 500 cars. In the past they've served around 2000 chicken dinners or so. I had to start a new row when I arrived due to my size. Had a Ferrari park next to me, so that was neat. I should've gotten "best in class", but never heard anything about it.

While at the show I tinkered with my virtual gauges, ran freshwater into my black tank to see if there was any leakage, talked with lots of folks. Many took an inside tour too. Much to my dismay, when I looked underneath, there was water dripping off the black tank! A closer look revealed it coming off the top...again. So I went inside and poked around, and sure enough there was wet subfloor again. This time it was coming from the passenger side instead of the driver side.
So it had to be the tank, pump, or bathroom areas. I decided to start with checking the water heater area. Dang, that thing is really wedged in there and not serviceable at all. Had to pull the cabinet out to even get a look.

We've got quite a mish-mash of plumbing here. There's old black polyethylene, newer red and black pex, rubber hose for the engine coolant, and braided vinyl hose. ALL of them seemed to receive the pex crimp treatment. It didn't seem to work well for the vinyl hose. I turned the pump on for 20 seconds and got this puddle:

The drain line for winterizing has a number of connections before you get to the valve. It looks like the barb at the tank was leaking where the hose is crimped on. I think I'll eliminate all this braided hose in favor of real pex.


While at the show I tinkered with my virtual gauges, ran freshwater into my black tank to see if there was any leakage, talked with lots of folks. Many took an inside tour too. Much to my dismay, when I looked underneath, there was water dripping off the black tank! A closer look revealed it coming off the top...again. So I went inside and poked around, and sure enough there was wet subfloor again. This time it was coming from the passenger side instead of the driver side.
So it had to be the tank, pump, or bathroom areas. I decided to start with checking the water heater area. Dang, that thing is really wedged in there and not serviceable at all. Had to pull the cabinet out to even get a look.
We've got quite a mish-mash of plumbing here. There's old black polyethylene, newer red and black pex, rubber hose for the engine coolant, and braided vinyl hose. ALL of them seemed to receive the pex crimp treatment. It didn't seem to work well for the vinyl hose. I turned the pump on for 20 seconds and got this puddle:
The drain line for winterizing has a number of connections before you get to the valve. It looks like the barb at the tank was leaking where the hose is crimped on. I think I'll eliminate all this braided hose in favor of real pex.
Well I've been getting side tracked a lot with life. Lots of kids' sports, and getting another project ready for sale. The little guy has been diving right in after football practice to help here and there. Got the Corvair sedan tuned up and ready for sale so I can focus on the Corvair wagon instead. I envy his flexibility. I suppose it also helps when you only weigh 45 lbs.

The obese shelter dog sure loves being in the GMCs. He's not shy about barging in and making himself comfortable while I work--especially if there's food.

I got that whole mess of plumbing replaced by the water heater. There was regular hose barbs, barbs for PE, PEX clamps, etc all mixed together. Vinyl hose, pex hose, PE pipe and more. Nothing was right. That's all fixed now, and nothing leaks.

I've been filling the bellows manually with shrader valves all this time, so I thought I'd troubleshoot the tampered-with EL1 system a bit. First off, the little pump can't get past 50 psi. I plugged its output and it got up to 120, so it's just a leakage-rate equilibrium that keeps it at 50. That's pretty bad. First off, the line going to the tank leaked like crazy, and looked a little skinny to me. I know black is slimming, but it just looked wrong.

Sure enough, held up next to another black 1/4" line, it was definitely undersized! Who knows where they got that "air line".

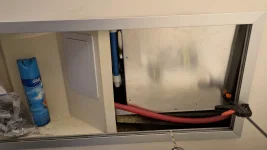
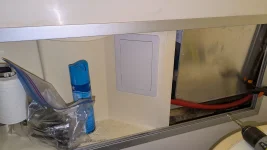
There was no room to reach past the water heater and operate the winterizing valves, so I decided to add in an access panel. I guess the PO either didn't winterize, or had to remove the cabinets each time? Odd.

I also glued in a new backer board for mounting the cabinet. The old one was detached.

With the 4x6 access panel, I can get to the winterizing valves easily. That will be nice.

I'd been looking for a replacement electrical panel to no avail, and decided to just fix what I've got. The neutral bar was in bad shape. Lots of oxidation and heat. I couldn't find an insulated bus bar to fit in that space, so I pulled the old one out, removed all the clamps from it, remounted the old buss bar bare, installed a new ground bar, and mounted it to the old neutral bar. The wires were all cut back to fresh copper too, of course.


I tried to avoid it, but I broke down and decided to make the proper gasket for the front diff. The cover-vent idea wasn't panning out, as it just kept pumping oil up the hose. Something was just wrong with the fluid dynamics inside. So I fashioned the missing baffle layer for the Felpro gasket. I still can't believe Felpro used to make it correct, then changed it without changing the part number.

My assistant helped pull a bunch of hardware from the parts coach. The PO put sticky velcro strips everywhere on the doors and drawers instead of fixing the retaining mechanisms. We'll be going back to original. We got some doors and hinges for the Glenbrook while we were at it.


The obese shelter dog sure loves being in the GMCs. He's not shy about barging in and making himself comfortable while I work--especially if there's food.
I got that whole mess of plumbing replaced by the water heater. There was regular hose barbs, barbs for PE, PEX clamps, etc all mixed together. Vinyl hose, pex hose, PE pipe and more. Nothing was right. That's all fixed now, and nothing leaks.
I've been filling the bellows manually with shrader valves all this time, so I thought I'd troubleshoot the tampered-with EL1 system a bit. First off, the little pump can't get past 50 psi. I plugged its output and it got up to 120, so it's just a leakage-rate equilibrium that keeps it at 50. That's pretty bad. First off, the line going to the tank leaked like crazy, and looked a little skinny to me. I know black is slimming, but it just looked wrong.
Sure enough, held up next to another black 1/4" line, it was definitely undersized! Who knows where they got that "air line".
There was no room to reach past the water heater and operate the winterizing valves, so I decided to add in an access panel. I guess the PO either didn't winterize, or had to remove the cabinets each time? Odd.
I also glued in a new backer board for mounting the cabinet. The old one was detached.
With the 4x6 access panel, I can get to the winterizing valves easily. That will be nice.
I'd been looking for a replacement electrical panel to no avail, and decided to just fix what I've got. The neutral bar was in bad shape. Lots of oxidation and heat. I couldn't find an insulated bus bar to fit in that space, so I pulled the old one out, removed all the clamps from it, remounted the old buss bar bare, installed a new ground bar, and mounted it to the old neutral bar. The wires were all cut back to fresh copper too, of course.
I tried to avoid it, but I broke down and decided to make the proper gasket for the front diff. The cover-vent idea wasn't panning out, as it just kept pumping oil up the hose. Something was just wrong with the fluid dynamics inside. So I fashioned the missing baffle layer for the Felpro gasket. I still can't believe Felpro used to make it correct, then changed it without changing the part number.
My assistant helped pull a bunch of hardware from the parts coach. The PO put sticky velcro strips everywhere on the doors and drawers instead of fixing the retaining mechanisms. We'll be going back to original. We got some doors and hinges for the Glenbrook while we were at it.
Attachments
My ebay teak shower mat finally arrived. It's a perfect fit! It was used, so unfortunately I can't direct anyone toward a regular supply of them. It was listed as 19.5"x26" and required no customizing. It also has a lot of thin high-density pads stuck to the back, and seems like it will work well for our purposes.

I also got the breaker panel cover from the parts coach installed. I had to knockout another space on it--I suppose that one had fewer circuits. It's nice to have everything safe from curious little fingers now.

And now comes the time to tackle my greatest shame...
The wall panels. Every time I show off the GMC, my greatest fear is they will assume this is my handiwork! It's quite the exhibition of poor craftsmanship. I usually try to keep my priorities as function over form, but I have an excuse for tackling some of this "form". I need a table! Currently, the wall panel job is so botched that a secure table is impossible. The rail just falls off, and was only secured to paneling that was secured to nothing.
Also note: the outlet sits right in front of the bench. So if you put the dinette into bed mode, you cannot use the outlet.

Not only that, but this is some of the globbiest, messiest painting I've laid eyes on.

And the swollen planks pushed all the trim off the wall.

Lo and behold, the original (and rotted) panels are still hidden beneath. They just went over the top with all this!

And here's a big gap the represents about 2 inches of lost aisleway. There appeared to be no attempt at matching the curvature of the wall.

A thousand staples fired in vain, along with a mile of construction adhesive that adhered nothing. But wait, there was some silicone added for good measure.

I got it down to the frame and insulation. Hey look, it's the anchors where the table is SUPPOSED to be mounted. Alas, the thread inserts are loose. We pried them out and replaced them with new rivnuts. Originals were 10-32, and all I had was 10-24. So I'll need new screws now.

The door panel was equally bad. They left the old curved panel in place, put straight planks on top, and at the edges, they filled the enormous gap with silicone. But don't worry, they painted over the silicone to match. Getting that stripped was satisfying. I've got some thread inserts to fix before a new panel can go on, and there is much room for improvement with the insulation.

I also got the breaker panel cover from the parts coach installed. I had to knockout another space on it--I suppose that one had fewer circuits. It's nice to have everything safe from curious little fingers now.
And now comes the time to tackle my greatest shame...
The wall panels. Every time I show off the GMC, my greatest fear is they will assume this is my handiwork! It's quite the exhibition of poor craftsmanship. I usually try to keep my priorities as function over form, but I have an excuse for tackling some of this "form". I need a table! Currently, the wall panel job is so botched that a secure table is impossible. The rail just falls off, and was only secured to paneling that was secured to nothing.
Also note: the outlet sits right in front of the bench. So if you put the dinette into bed mode, you cannot use the outlet.
Not only that, but this is some of the globbiest, messiest painting I've laid eyes on.
And the swollen planks pushed all the trim off the wall.
Lo and behold, the original (and rotted) panels are still hidden beneath. They just went over the top with all this!
And here's a big gap the represents about 2 inches of lost aisleway. There appeared to be no attempt at matching the curvature of the wall.
A thousand staples fired in vain, along with a mile of construction adhesive that adhered nothing. But wait, there was some silicone added for good measure.
I got it down to the frame and insulation. Hey look, it's the anchors where the table is SUPPOSED to be mounted. Alas, the thread inserts are loose. We pried them out and replaced them with new rivnuts. Originals were 10-32, and all I had was 10-24. So I'll need new screws now.
The door panel was equally bad. They left the old curved panel in place, put straight planks on top, and at the edges, they filled the enormous gap with silicone. But don't worry, they painted over the silicone to match. Getting that stripped was satisfying. I've got some thread inserts to fix before a new panel can go on, and there is much room for improvement with the insulation.

Insulation around the dinette was fortified. More spray foam, some fiberglass, and a layer of Reflectix under the panel too.


I had to make a custom bent knife for flush cutting foam while keeping the handle from interfering.

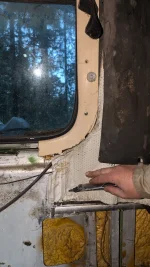
Under the original panel, behind the passenger seat, there's an old anchor point of some sort. Interesting. Possible shoulder harness? Kinda far back, but maybe usable.

I also got a thermal break foam/foil roll for the aluminum members. I pulled the H channel out of the parts coach. I'm glad I had it available. EVA foam boat flooring on 1/8" luan plywood makes up the panel.

I also put some cheap peel and stick backsplash around the window temporarily. I'll revisit this when I'm ready to dismount the cabinet and construct Roman shades.


Another nice change, the outlet is now usable with the bed deployed!

Up next will be the door panel.
I had to make a custom bent knife for flush cutting foam while keeping the handle from interfering.
Under the original panel, behind the passenger seat, there's an old anchor point of some sort. Interesting. Possible shoulder harness? Kinda far back, but maybe usable.
I also got a thermal break foam/foil roll for the aluminum members. I pulled the H channel out of the parts coach. I'm glad I had it available. EVA foam boat flooring on 1/8" luan plywood makes up the panel.
I also put some cheap peel and stick backsplash around the window temporarily. I'll revisit this when I'm ready to dismount the cabinet and construct Roman shades.
Another nice change, the outlet is now usable with the bed deployed!
Up next will be the door panel.
Attachments
Well we've had a little fun with the GMC. We went on a trip to Champoeg State Park in November.

The kids and dogs travel well in it. It's a crowded but happy place! Silliness abounds.


I got the color matched bunk rail moved over from the old GMC. The kids are really enjoying the nicer furniture.

The virtual dashboard is super handy on-the-go. The fuel pressure sensor keeps railing and dying at temp. I might have to try another one.


Then some holiday travel to Eugene to see lots of my wife's East Coast relatives.
I went back to work, and she wanted to stay a few more days and bring the coach back on her own. I was a little nervous about that, but she was insistent. And of course, it started slipping at some point in that 80 minute drive. She didn't think it was abnormal until it was too late. It was pretty much 2nd gear only when she hit the hills close to home and decided to give me a call. I had her put it in actual 2nd and creep home a little slower. End result, no third and no reverse. This points to a roasted direct clutch.
So....
We're doing it again! Feels like deja vu. Transmission is already out. I haven't done a post-mortem yet, but there's lots of friction material in the fluid. The fluid itself doesn't seem burned though.

The fresh diff oil looked pretty awful too. As we were rebuilding this motorhome, my friend kept pointing out that the trans and diff were the only things that weren't new. So I'm blaming him for jinxing them both.

The kids and dogs travel well in it. It's a crowded but happy place! Silliness abounds.
I got the color matched bunk rail moved over from the old GMC. The kids are really enjoying the nicer furniture.
The virtual dashboard is super handy on-the-go. The fuel pressure sensor keeps railing and dying at temp. I might have to try another one.
Then some holiday travel to Eugene to see lots of my wife's East Coast relatives.
I went back to work, and she wanted to stay a few more days and bring the coach back on her own. I was a little nervous about that, but she was insistent. And of course, it started slipping at some point in that 80 minute drive. She didn't think it was abnormal until it was too late. It was pretty much 2nd gear only when she hit the hills close to home and decided to give me a call. I had her put it in actual 2nd and creep home a little slower. End result, no third and no reverse. This points to a roasted direct clutch.
So....
We're doing it again! Feels like deja vu. Transmission is already out. I haven't done a post-mortem yet, but there's lots of friction material in the fluid. The fluid itself doesn't seem burned though.
The fresh diff oil looked pretty awful too. As we were rebuilding this motorhome, my friend kept pointing out that the trans and diff were the only things that weren't new. So I'm blaming him for jinxing them both.
Is that WinLog you are using for your virtual dash? Nice layout.The virtual dashboard is super handy on-the-go. The fuel pressure sensor keeps railing and dying at temp. I might have to try another one.


I've been wondering if transmission line pressure is something we should start monitoring.
Our transmissions are getting old and leaky inside. If the transmission pump can't keep the line pressure up, then the "clamp" on the clutch packs is going to drop and the clutches will start to slip amongst other problems.
When I had the engine rebuilt, I also had a rebuilt transmission installed. It had random issues with shifting from 1st to 2nd. After 10 years, it finally was not shifting most of the time, yet I could shift it manually. So I took it in for a rebuild, and it operated the same way on the first test drive. The line pressures were low, yet they could not find an issue. So another core was used for a rebuild and installed. Its been fine for the past 4 years, knock on wood.
Just a pressure sensor wired to my EBL would allow me to see the transmission line pressure and maybe warn of a problem before it happens on the road.
Funny you mention that, it's on my to-do list to shop for a temp/pressure sensor so I can try to kill two birds with one stone. It's an easy add-on with Winlog for sure.I've been wondering if transmission line pressure is something we should start monitoring.
Our transmissions are getting old and leaky inside. If the transmission pump can't keep the line pressure up, then the "clamp" on the clutch packs is going to drop and the clutches will start to slip amongst other problems.
When I had the engine rebuilt, I also had a rebuilt transmission installed. It had random issues with shifting from 1st to 2nd. After 10 years, it finally was not shifting most of the time, yet I could shift it manually. So I took it in for a rebuild, and it operated the same way on the first test drive. The line pressures were low, yet they could not find an issue. So another core was used for a rebuild and installed. Its been fine for the past 4 years, knock on wood.
Just a pressure sensor wired to my EBL would allow me to see the transmission line pressure and maybe warn of a problem before it happens on the road.
But, line pressure did check out on this one unfortunately. So the direct clutch itself is certainly shot.

