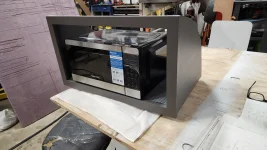
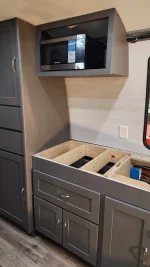
Quick little over head cabinet for the microwave! Still have to look for a way to hold the microwave. Any ideas please let me know.
1973 GMC 26' Glacier Build
- Thread starter ScottC
- Start date
You are using an out of date browser. It may not display this or other websites correctly.
You should upgrade or use an alternative browser.
You should upgrade or use an alternative browser.
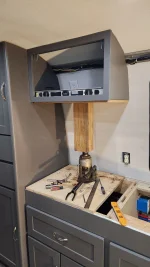
Does the microwave have little rubber feet screwed into the bottom of the microwave? If so, you could remove those four screws and replace with longer screws. Screw up through the bottom of the shelf, through the rubber feet, into the bottom of the microwave.Quick little over head cabinet for the microwave! Still have to look for a way to hold the microwave. Any ideas please let me know.

A bit extreme, but....Quick little over head cabinet for the microwave! Still have to look for a way to hold the microwave. Any ideas please let me know.
I removed the casing of the microwave to look for empty areas on the bottom. I then drilled three holes and installed three rivnuts. I then drilled three holes in the bottom of the shelf and ran three machine bolts up into the casing from below. The microwave isn't going anywhere....
A quick and dirty method I had...Quick little over head cabinet for the microwave! Still have to look for a way to hold the microwave. Any ideas please let me know.
The face frame of my microwave cubby stuck up about 1/4" on the bottom edge. So I centered the microwave on a 1/4" board and screwed it down through the feet, using slightly longer screws. I counter-sunk the screws on the bottom side of the board so it'd be flush on the bottom. The board was sized to fit the bottom of the microwave cubby. So I can just set the whole microwave/board assembly down in place in the cubby, let it drop down behind the face frame, and sink some small screws through the 1/4" board down into the main shelf--off the side of the microwave. The edge of the 1/4" board is hidden by the face frame, so you can hardly tell it's there (it helps being short).
If I had it to do again, I'd probably 3D print some special flanged feet for the microwave, and some key-slot brackets for the shelf--or something like that.
Thanks for the replies, Paul I like this idea, I do need to lift the front of microwave to clear the edge (Poor planning, lol) I might put rivnuts in bottom to attach board. I had originally thought I needed a strap, this will be much cleaner. Thanks!!!A quick and dirty method I had...
The face frame of my microwave cubby stuck up about 1/4" on the bottom edge. So I centered the microwave on a 1/4" board and screwed it down through the feet, using slightly longer screws. I counter-sunk the screws on the bottom side of the board so it'd be flush on the bottom. The board was sized to fit the bottom of the microwave cubby. So I can just set the whole microwave/board assembly down in place in the cubby, let it drop down behind the face frame, and sink some small screws through the 1/4" board down into the main shelf--off the side of the microwave. The edge of the 1/4" board is hidden by the face frame, so you can hardly tell it's there (it helps being short).
If I had it to do again, I'd probably 3D print some special flanged feet for the microwave, and some key-slot brackets for the shelf--or something like that.
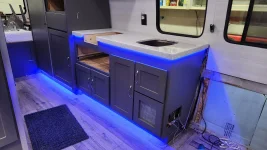
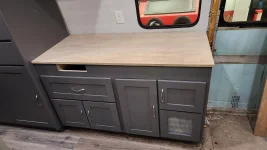
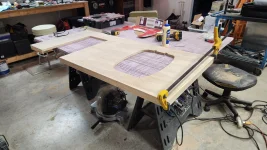
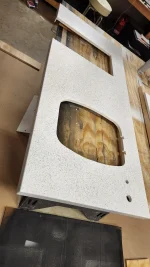
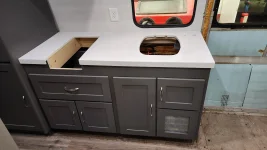
Countertop time, just making countertop out of cabinet grade 3/4" plywood, going to make a fake Corian finish for galley and bathroom.
Attachments
I like your cooktop idea! I don't think we've ever used 3+ burners at once. More counter space sure looks nice.
Hmm. Are you sure about the "everything back apart..."? Swapping out the diff is one of the easier things on this coach. Is there something else making it difficult?I know it feels like a lot, but the extra $900 will be money extremely well spent. If you'd decide to do it later, this will be a huge missed opportunity, and taking everything back apart to install the LSD will really suck. If you are towing anything, and if you are *ever* off pavement (even just gravel or grass), the LSD is a must. If you read through the old forums, you'll see a lot of stories about people stuck in the grass at rallies and parks (not even difficult "off road" scenarios). If you are able to be patient, take the time to make the additional savings for the LSD. And the EFI is a huge improvement as well (just confirming that that is also the right decision).
I dunno, I think I'd rather swap a headlight bulb.Swapping out the diff is one of the easier things on this coach.
I've had my diff out a couple times. I prefer to install it with the transmission in one piece--assuming the trans has a reason to come out. There are a couple bolts holding the diff to the trans that are pretty tricky to get to. On many coaches, they're simply just missing at this point. But when they're all there, it's a pain.
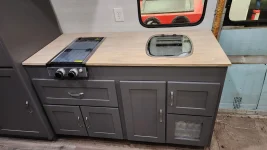
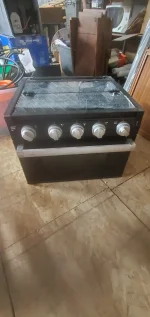
Yeah, we bought a New Furrion stove/oven at auction in town and the more we thought about it we said are we ever going to need three burners and the oven? Nope. Oven is still available if anybody is interested I will make you a deal. Just like a lot of other things we picked up for our coach and are NOT going to use.I like your cooktop idea! I don't think we've ever used 3+ burners at once. More counter space sure looks nice.

Attachments
I dunno, I think I'd rather swap a headlight bulb.
I've had my diff out a couple times. I prefer to install it with the transmission in one piece--assuming the trans has a reason to come out. There are a couple bolts holding the diff to the trans that are pretty tricky to get to. On many coaches, they're simply just missing at this point. But when they're all there, it's a pain.
Can confirm.
Swapping out the final drive is not a fun thing to do. There's at least one fastener that is so difficult to reach that GM used a nut and stud instead of a bolt.
It's a pain in the arse IMO.
I even 'hit it with my purse' and it didn't install easily so don't bother telling me to try that! LOL
It's much easier if the transmission is out.
If I remember I used a crooked box end wrench on the hard to get at nut, but I don't remember which wrench I used.Can confirm.
Swapping out the final drive is not a fun thing to do. There's at least one fastener that is so difficult to reach that GM used a nut and stud instead of a bolt.
It's a pain in the arse IMO.
I even 'hit it with my purse' and it didn't install easily so don't bother telling me to try that! LOL
It's much easier if the transmission is out.

Bill Bramlett gave me his fixture to remove and install a final drive. with the use of a floor jack. It keeps the final drive level and easily installs without damaging the gasket.


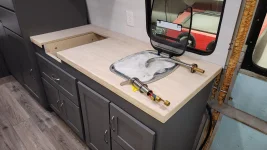
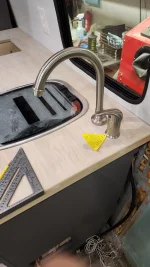
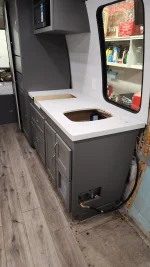
Time for some color, we are going for a Corian look so laid down some white, little grey/black stone paint then epoxy resin over the top.
Attachments

I like that!!!!! Can you list the exact products you used?Time for some color, we are going for a Corian look so laid down some white, little grey/black stone paint then epoxy resin over the top.
I got the idea from the video below, we did our own variation and different brand of epoxy, the epoxy turned out OK we had some problems but it is good enough for us.I like that!!!!! Can you list the exact products you used?