Converting to LiFePO4 batteries and Sailor Man's LiFePO4 Build

BattleBorn BBGC2 Engine Compartment 071522.webp


This was the original design for the 3 batteries in the engine compartment on the aluminum Ragusa battery tray. Since then, the rear BattleBorn BBGC2 has been eliminated and a DieHard Gold LF-2 100AH 800CCA battery has been substituted.
However, with the very significant and complicated wiring in front of the three batteries, it was too daunting to replace batteries from the front of the coach.
The alternative was to remove the wheel well on the passenger's side to gain access to the rear of the battery tray.
It was also too daunting to jack up the entire coach to remove the front tire.
That done, there were more challenges.
The pan is 22" above the ground and the tire is very difficult to get around. In this location, my weaker left arm would have to do most of the work.
First the old battery had to be removed, so the front wheels had to be turned all the way to the right. Mine wasn't all the way.
View attachment 14940
This rig was how I got the old DieHard out. I had to provide a surface to slide the battery out of its position on the tray. It ultimately fell to the ground as I was breaking down the support but not a problem since it was going to be recycled.
View attachment 14942
This attempt tried to pry the battery up enough to slip wood blocks under it. I on;y got the battery up about 6" before this approach was abandoned.
View attachment 14941
My first attempt to lift the new battery into place was using this motorcycle lift for the 38 lb. battery. I got it up 12" before it jammed with the coach's frame. Still about 11" more to go.
View attachment 14943
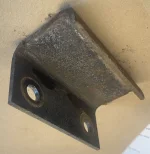
I then sought that I could rig a small block and tackle for the battery to be lifted. There are (9) 3/8" bolts and (4) 1/2" bolts to fasten the driver's and passenger seats. Adding lift nuts like these provide the fastening points. Luckily I did not need them but I have left them in place because they may be handy sometime in the future.
View attachment 14939
Ultimately, I was able to use this sizzors jack that could lift the battery all the way up but I had to rotate it about 90° (front to back) to clear all of the obstructions. I had to adjust the arrangement about every 1/2" lift to avoid a collapse. When the bottom of the battery was finally above the lip on the tray, I was able to slide it over.
It was a very tight fit and a small pry bar was needed to wiggle to battery into its final position on the tray.
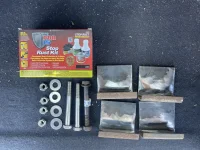
This unit is not expensive and (4) of them are often bolted to the bottom of a trailer to level out and support the trailer when camping.
View attachment 14944
As I got the battery close to the height, the treaded rod started to jam on the bottom of the bumper.
View attachment 14945
I also tried (4) of these but they proved to be too unstable.

The new DieHard battery with it's 3 year warranty is now in place'
View attachment 14946
The lower Sterling 12vdc battery to 12vdc battery charger is now activate. The (10) BattleBorn 12vdc, 100AH batteries are supplying all of the charging battery for the DieHard 800 CCA starting power.
The BattleBorn 1,000 AH battery bank is charged by solar, shore and 160 amp alternator.
Phew, finally operational!

IMG_2674.webp
I had to reverse the communications cables because the connectors at each end were different and didn't mate to either the remote controller or the charger. It was a bit of a pain to access the remotes. However, I am pleased that it is working now.

 
View attachment 15137
I had to reverse the communications cables because the connectors at each end were different and didn't mate to either the remote controller or the charger. It was a bit of a pain to access the remotes. However, I am pleased that it is working now.

IMG_2777.webp
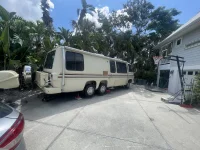
Jacob Payer has arrived to help me finish the coach. He got the engine started an we moved the coach.

He travels in his own GMC Motoehome that he restore from gutted. He is sleeping in our guest room.
IMG_2761.webp
IMG_2782.webp
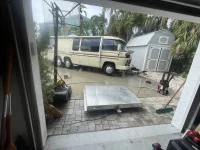
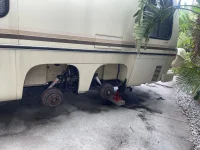
It is now off the ground and we have taken down the (2) old gasoline tanks. Yesterday they went to the dump.
IMG_2775.webp
Jason Stryker's 70 gal aluminum tank is ready to be installed, but we have much to do to prepare the coach for it.
IMG_2763.webp
It is not a simple matter to prepare for the tank.
IMG_2773.webp
IMG_2788.webp
This is Jacob's coach parked in the street.
 
  • Love
  • Like
Reactions: tmsnyder and Kendra
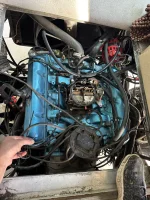
IMG_2001.webpThis was how my new COOP 455 looked when I got the coach from Cliff. Wires everywhere and some were not connected to anything.
IMG_2086.webp
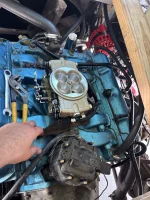
Jacob is installing the FiTech fuel injection system and cleaning up the existing electrical spider's nest.
IMG_2088.webp
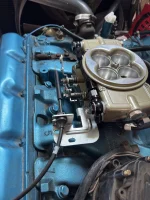
The original throttle plate does not work with the FiTach, so Jacob is fabricating a new replacement. The plate has to be longer.
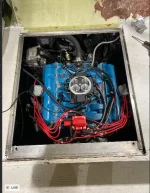
Jacob's Engine Install 061425.webp
This is Jacob's Holly fuel injection system on his coach.
 
  • Like
Reactions: Kendra
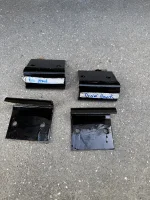
In order to install the new aluminum tank, these clip needed to have the leg extended by 1 1/2" with custom hole locations for each site. A local welding shop shared off the portion of the old leg with the old bolt holes
IMG_2789.webp.IMG_2791.webp
After the new holes were drill, multiple coats of POR15 were applied.
IMG_2071.webp
The tank comes with fittings for 1/2" high pressure fuel hose. Jim Bounds says that the normal 3/8" hose is appropriate, so we have to use 1/2" to 3/8" reduction fittings.
We also have to cap off the outlet for the generator on the tank because there is no generator.
 
Last edited:
  • Like
Reactions: Kendra
I have heard many heart wrenching stories about fuel starvation from failed fuel pumps and clogged filters. There are multiple switch outs of filters on a single trip. Carrying extra filters or pumps is just not enough to make the experience of a trip any more pleasurable if one is working about being stuck on the side of the road.
If the spares are stored safely at home, they are of little value.
I have always been a belts and suspenders guy stemming from voyaging offshore on a sailboat. I always carried multiple parts of the same items based upon which parts were most significant.
However, airplanes often have 2, 3 or more identical back up system that can just be brought online when the primary system fails.
Let's do that for the GMC!
IMG_2703.webp
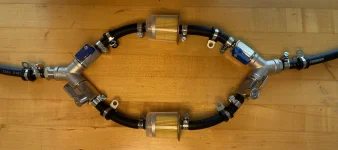
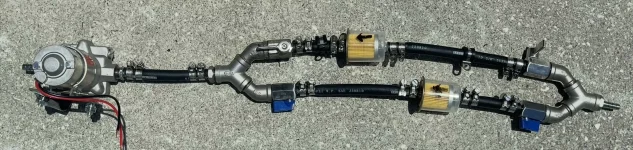
Before I decided to move forward with the high pressure fuel system for the FiTech fuel injection system, I fashioned this arrangement to provide clean fuel to the Rochester carb when the filter fouled.
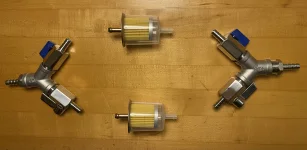
In this design, there are (4) valves so that a fouled filter does not have to be replaced. I this photo all the valves are open, but in actual use, the two valves on one branch would be shut off. Then when the operational filter became fouled or restrictive, its' valves could be shut and the alternative filter's valve are opened.
There is a minimal loss of time.
I then added (4) 45° elbows to bring the filters closer and lengthened the right hose on the right side of the upper filter and lengthened the left hose on the lower filter. That provided more flexibility to switch the fouled filter out with both adjacent valves closed.
In this version there is a single Holley low pressure fuel pump.
IMG_2828.webp
The switch out could be done at any convenient time.
I also plan to install a pair of fuel pumps in a similar fashion to keep me on the road if a pump fails or under performs.
IMG_2729.webp
All of the plumbing fittings are stainless steel to minimize corrosion issues.
Jamestown Distributers recommends not using teflon tape to seal connections. They said that the tape factories and winds up severely fouling the marine fuel tanks. Instead, they recommend using Permatex Aviation Form-A Gasket No. 3 Sealant instead. This is what I have used for these fittings.
I am working on a high pressure arrangement using (2) FiTech pumps in tandem with pair of filters plumbed in a similar fashion.
 

Attachments

  • IMG_2700.webp
    IMG_2700.webp
    1.2 MB · Views: 3
Last edited:
Now.....if Coleman (or anyone else) could re-introduce a rooftop 6,000 btuh cooling air conditioner, I am thinking I could make my wife happy by using that unit at night at modest settings and maybe get some air conditioning out of a lithium setup. I would reduce the area to be cooled by shutting the bathroom door. I have no rear AC unit, merely a crank up vent with fan. Word on the street says "no" to a boondocking system unless you can go crazy with batteries and charging methods. I like "simple". Like no airconditioning, which I did no grow up with anyway.....BUT.....trying to keep her happy. I would pre-cool the interior using the Onan, then shut that off snore away with "some" modest cooling with a smaller A/C unit, like Coleman used to make (I think it was the Polar Cub or something like that)......I am interesting in a lithium setup and have been following the DIY approach to creating your own battery pack.
They have 12 vdc roof top A/C that pull fewer than 15 amps....
 
I have heard many heart wrenching stories about fuel starvation from failed fuel pumps and clogged filters. There are multiple switch outs of filters on a single trip. Carrying extra filters or pumps is just not enough to make the experience of a trip any more pleasurable if one is working about being stuck on the side of the road.
If the spares are stored safely at home, they are of little value.
I have always been a belts and suspenders guy stemming from voyaging offshore on a sailboat. I always carried multiple parts of the same items based upon which parts were most significant.
However, airplanes often have 2, 3 or more identical back up system that can just be brought online when the primary system fails.
Let's do that for the GMC!
View attachment 15619
Before I decided to move forward with the high pressure fuel system for the FiTech fuel injection system, I fashioned this arrangement to provide clean fuel to the Rochester carb when the filter fouled.
In this design, there are (4) valves so that a fouled filter does not have to be replaced. I this photo all the valves are open, but in actual use, the two valves on one branch would be shut off. Then when the operational filter became fouled or restrictive, its' valves could be shut and the alternative filter's valve are opened.
There is a minimal loss of time.
I then added (4) 45° elbows to bring the filters closer and lengthened the right hose on the right side of the upper filter and lengthened the left hose on the lower filter. That provided more flexibility to switch the fouled filter out with both adjacent valves closed.
In this version there is a single Holley low pressure fuel pump.
View attachment 15621
The switch out could be done at any convenient time.
I also plan to install a pair of fuel pumps in a similar fashion to keep me on the road if a pump fails or under performs.
View attachment 15622
All of the plumbing fittings are stainless steel to minimize corrosion issues.
Jamestown Distributers recommends not using teflon tape to seal connections. They said that the tape factories and winds up severely fouling the marine fuel tanks. Instead, they recommend using Permatex Aviation Form-A Gasket No. 3 Sealant instead. This is what I have used for these fittings.
I am working on a high pressure arrangement using (2) FiTech pumps in tandem with pair of filters plumbed in a similar fashion.
Why not just use an aluminum high capacity race filter and rid yourself of that mess?
 
The new 70 gallon aluminum tank is finally in but not yet plumbed. I has been a very difficult time to get it into place and fasten it. It did not come with the fittings that I expected and most of them were for 1/2" not the 3/8" I expected.
All of the high pressure host and components are 3/8"
View attachment IMG_2140.mov
As you can see near the end of the video, the exhaust system does not pass by to the rear of the coach as it was originally designed. In my coach, it came with the exhaust pipes exiting in front of the coach's door.
 
Last edited:
  • Like
Reactions: Kendra
The new 70 gallon aluminum tank is finally in but not yet plumbed. I has been a very difficult time to get it into place and fasten it. It did not come with the fittings that I expected and most of them were for 1/2" not the 3/8" I expected.
All of the high pressure host and components are 3/8"
View attachment 15775
As you can see near the end of the video, the exhaust system does not pass by to the rear of the coach as it was originally designed. In my coach, it came with the exhaust pipes existing in front of the coach's door.

Please read the post I made today on "So what did you do to your GMC today?". The total system had been installed and the engine is running. I had some fears that it mih=ght not work.

A locked brake is keeping us from testing it on the road, but I have a theory.

What is my coach capable of with this configuration?
 
I have heard many heart wrenching stories about fuel starvation from failed fuel pumps and clogged filters. There are multiple switch outs of filters on a single trip. Carrying extra filters or pumps is just not enough to make the experience of a trip any more pleasurable if one is working about being stuck on the side of the road.
If the spares are stored safely at home, they are of little value.
I have always been a belts and suspenders guy stemming from voyaging offshore on a sailboat. I always carried multiple parts of the same items based upon which parts were most significant.
However, airplanes often have 2, 3 or more identical back up system that can just be brought online when the primary system fails.
Let's do that for the GMC!
View attachment 15619
Before I decided to move forward with the high pressure fuel system for the FiTech fuel injection system, I fashioned this arrangement to provide clean fuel to the Rochester carb when the filter fouled.
In this design, there are (4) valves so that a fouled filter does not have to be replaced. I this photo all the valves are open, but in actual use, the two valves on one branch would be shut off. Then when the operational filter became fouled or restrictive, its' valves could be shut and the alternative filter's valve are opened.
There is a minimal loss of time.
I then added (4) 45° elbows to bring the filters closer and lengthened the right hose on the right side of the upper filter and lengthened the left hose on the lower filter. That provided more flexibility to switch the fouled filter out with both adjacent valves closed.
In this version there is a single Holley low pressure fuel pump.
View attachment 15621
The switch out could be done at any convenient time.
I also plan to install a pair of fuel pumps in a similar fashion to keep me on the road if a pump fails or under performs.
View attachment 15622
All of the plumbing fittings are stainless steel to minimize corrosion issues.
Jamestown Distributers recommends not using teflon tape to seal connections. They said that the tape factories and winds up severely fouling the marine fuel tanks. Instead, they recommend using Permatex Aviation Form-A Gasket No. 3 Sealant instead. This is what I have used for these fittings.
I am working on a high pressure arrangement using (2) FiTech pumps in tandem with pair of filters plumbed in a similar fashion.
IMG_2956.webp
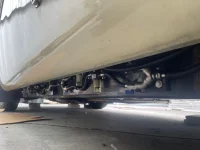
The system is completely in place with the new 70 age aluminum tank.
IMG_2956.webp
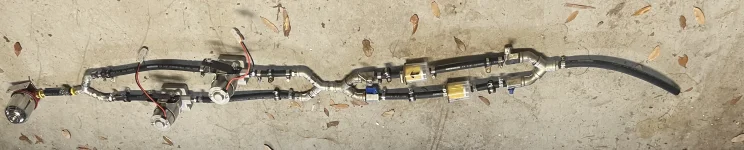
This is the filter section. There are (4) valves that allow for either filter to be in use. To switch from a fouled filter to a new one, shut of the (2) valves in front and behind the fouled filter. Switch on the the (2) valves in front of and behind the clean filter and you are back in business.
IMG_2956.webp
This is the (2) high pressure FiTech fuel pumps.
IMG_2958.webp
Only one can be in service at one time.
IMG_2961.webp
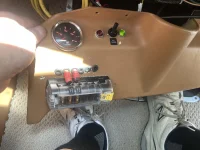
The fuel pumps are activated by the 3 position waterproof toggle switch. In this case the switch is up and the green indicator light is on.
If the switch is n the center position, no fuel pump will work. The engine won't start. Theft proof position.
When the switch is down, the other fuel pump runs and the red light will be on.
With a 70 gale tank, I decided to use a fuel gauge with 1/8 indicators to get a more accurate reading of how much fuel is in the tank.
The pumps can use up to 15 amps in operation, so each is protected individually with 20 amp blade fuses. Spare fuses are are stored next to the active fuses to simplify replacement.
The fuse block is prepared for future electrical connections.
The electrical pumps are are powered through the FiTech control box.
 
I am looking for someone to pass my coach on to someone who will love her. I have started a thread

Looking for a Future Buyer of Sailor Man's Coach​

Although I hope to be using the coach until I am 100, who knows?

I am planning for the worst.

Claude will sell her, but to whom? I hope that it is one of you.

IMG_2937.webp
Want to get behind the steering wheel?
 
  • Love
Reactions: tmsnyder
I am looking for someone to pass my coach on to someone who will love her. I have started a thread

Looking for a Future Buyer of Sailor Man's Coach​

Although I hope to be using the coach until I am 100, who knows?

I am planning for the worst.

Claude will sell her, but to whom? I hope that it is one of you.

View attachment 16009
Want to get behind the steering wheel?

Not before you put at least 100k miles on it I hope!
 
IMG_2973.webp
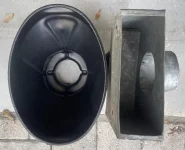
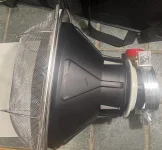
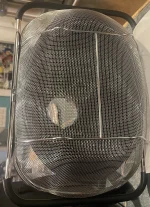
On the right is the standard engine air intake with (2) 90° bends before reaching the carb. My upgrade is to substitute an elliptical funnel air intake without any bend to provide oxygen to new FiTech system. I hope that this will provide more positive air pressure when underway and increase the oxygen content. The FiTech system has an oxygen sensor, so it should adjust to the new conditions.
IMG_2981.webp
IMG_2980.webp