Converting to LiFePO4 batteries and Sailor Man's LiFePO4 Build

That clean roofline is inspiring. I rarely use my rooftop pod and it's just about shot. I've never used the rooftop A/C (western US and almost always off-grid). After seeing these photos, I think I'll delete most items off my roof this year. I'm running a DC fridge and no propane water heater, so I'll probably also remove the fridge roof vent.

Less wind drag, noise, and shadows across the solar panels.
How about no rails or ladder and more solar panels.
 
IMG_2511.webp
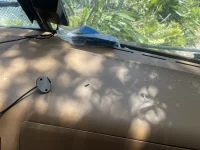
I had the entire dashboard professionally repainted. Unfortunately, the preparation of the previously painted dashboard was substandard and the old paint gassed and generated blisters. The will soon crack open and flake.
IMG_2512.webp
All of these panels had been removed. I spoke to Cliff about removing them again but he said that was a very bad idea. He says that the plastic is too fragile and the windshield would have to be removed. He suggested to sand down the bad sections, epoxy and repaint with the same paint. Sounds like I will have years of doing this.
IMG_2513.webp
IMG_2514.webp
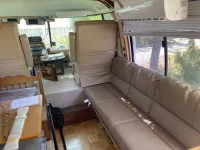
The interior is starting to take shape.
IMG_2516.webp
What a pleasure to have the coach home and I can do a little almost every day.
 
  • Love
Reactions: Kendra and tmsnyder
View attachment 14584
I had the entire dashboard professionally repainted. Unfortunately, the preparation of the previously painted dashboard was substandard and the old paint gassed and generated blisters. The will soon crack open and flake.
View attachment 14585
All of these panels had been removed. I spoke to Cliff about removing them again but he said that was a very bad idea. He says that the plastic is too fragile and the windshield would have to be removed. He suggested to sand down the bad sections, epoxy and repaint with the same paint. Sounds like I will have years of doing this.
View attachment 14586
View attachment 14587
The interior is starting to take shape.
View attachment 14588
What a pleasure to have the coach home and I can do a little almost every day.

Should keep you out of trouble for a while :)
 
That clean roofline is inspiring. I rarely use my rooftop pod and it's just about shot. I've never used the rooftop A/C (western US and almost always off-grid). After seeing these photos, I think I'll delete most items off my roof this year. I'm running a DC fridge and no propane water heater, so I'll probably also remove the fridge roof vent.

Less wind drag, noise, and shadows across the solar panels.

I'm with you, I don't like all the stuff on the roof. I removed the roof storage b/c I don't ever want to have to get up there. Removed the ladder and the safety rails, removed both A/Cs and replaced one with a low profile roof A/C and other with a MaxxAir vent. I also removed the passenger side awning and replaced it with a clip on sun fly shade with is supported on one side by the coach and the other side by two staked in poles.
 
  • Like
Reactions: Tybalt39 and Kendra
I'm with you, I don't like all the stuff on the roof. I removed the roof storage b/c I don't ever want to have to get up there. Removed the ladder and the safety rails, removed both A/Cs and replaced one with a low profile roof A/C and other with a MaxxAir vent. I also removed the passenger side awning and replaced it with a clip on sun fly shade with is supported on one side by the coach and the other side by two staked in poles.
Totally agree! Rails, ladder, cargo box, radio antenna, TV antenna; GONE! I wanted to get rid of the AC unit(s), but the steps needed to design a mini-split HVAC system were too much to handle at this stage of restoration. So, swap a vent fan for the rear AC and replaced front with a quiet heat-pump.

Any thoughts on running a bathroom vent out the side of the coach rather than the roof? The other vents? Other solutions to clear the roof for more solar panel installation?
 
Last edited:
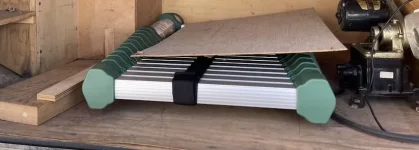
Co-Op deleted the roof rack during 2016 repaint for previous owner. I've been using a collapsible aluminum ladder, a bit wobbly but very compact. Here's a post with a summary of my 2022 solar mods.

When I clear everything off the roof I'll continue carrying the portable ladder in case solar wiring needs work on the road. I'd love to cover the entire roof with flexible CIGS-type panels, but that probably won't fit my current budget.

A Studor vent (concealed air admittance valve) can be a good solution in a kitchen island where wastewater is promptly flushed out with lots of clear water at home - but I wouldn't try that inside an RV. I suppose a side vent is possible near the roof, away from windows. Best compromise might be use the factory plumbing vent locations but find a decent looking cap that's functional.
 
Last edited:
View attachment 14584
I had the entire dashboard professionally repainted. Unfortunately, the preparation of the previously painted dashboard was substandard and the old paint gassed and generated blisters. The will soon crack open and flake.
View attachment 14585
All of these panels had been removed. I spoke to Cliff about removing them again but he said that was a very bad idea. He says that the plastic is too fragile and the windshield would have to be removed. He suggested to sand down the bad sections, epoxy and repaint with the same paint. Sounds like I will have years of doing this.
View attachment 14586
View attachment 14587
The interior is starting to take shape.
View attachment 14588
What a pleasure to have the coach home and I can do a little almost every day.
I have a dark-brown dash cover I would like to get rid of. It covers some of the defects until you are ready to pursue a fix.

IMG_0005.webp
 
Co-Op deleted the roof rack during 2016 repaint for previous owner. I've been using a collapsible aluminum ladder, a bit wobbly but very compact. Here's a post with a summary of my 2022 solar mods.

When I clear everything off the roof I'll continue carrying the portable ladder in case solar wiring needs work on the road. I'd love to cover the entire roof with flexible CIGS-type panels, but that probably won't fit my current budget.

A Studor vent (concealed air admittance valve) can be a good solution in a kitchen island where wastewater is promptly flushed out with lots of clear water at home - but I wouldn't try that inside an RV. I suppose a side vent is possible near the roof, away from windows. Best compromise might be use the factory plumbing vent locations but find a decent looking cap that's functional.
IMG_1592.webp
Is your ladder like mine?
 
View attachment 8933
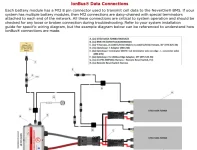
This is the diagram that was provided by WakeSpeed and Lithionics for my 51.2v dc battery system. Unfortunately, there were more than one issue with this diagram.
In the first place, Cliff did not see the sense of having two separate battery switches, one positive and one negative. I could not explain it either, but I told him to install it this way because I did not want to do anything that would void Lithionics warranty.
However, I have just learned this week that this arrangement is necessary because the Lithionics batteries are the only battery that has earned the UL certification. To install the UL certified battery in accordance with all UL requirements, the (2) battery switches must be installed.
I then discovered that there was another issue with this diagram. Just to make absolutely certain that the installation met all requirements, I decided to check the charging voltages and currents necessary to accommodate the Lithionics batteries. Another issue came up.

For the two batteries, Lithionics lists:
Nominal Voltage: 51.2 volts
Charge Voltage: 58.4 volts
Float Charge: 53.6 volts

Operating Volt Range: 46.4 volts to 53.6 volts

All of the battery switches indicated are limited to 48v dc, so there is an issue. I had to find two battery switches that will handle the voltages in this arrangement,

BlueSea does have a ML-Series Remote Battery Switch that will handle 0 volts to 64 volts.

On page #45 of the 2023 BlueSea Catalog states:

"ML-Series Solenoid & RBS Update
A number of ML-Series Solenoids and Remote Battery
Switches are now rated to 64V DC, making them
ideal for use in 36V DC and 48V DC nominally-rated
systems. The new 64V DC rating applies only to the
contact voltage, while maintaining the existing 12V DC
or 24V DC signal voltage, making them ideal for use in
multi-voltage systems like solar or golf-carts. The new
higher voltage rating was tested to 2,000 live-switching
cycles at maximum operating voltage per UL 1107
requirements."


I then have ordered two of these components and a separate 100 amp circuit breaker to handle the expected voltage and amperage.
This necessitated yet another redesign of the installation in the generator cView attachment 8972ompartment.
View attachment 8934
Sometimes it is just exhausting to run into issue after issue whenever one seeks to incorporate innovations in a project. Yesterday and today I have been working overtime to get this installation just right. What you see above is the third arrangement designed during this period. There were issues with the information provided by the manufacturers was faulty. I am hoping that the image above has resolved everything, but you never know!
View attachment 8973
I think that that I found out why we couldn't get the 51.2vdc alternator working. Lithionics' and their distributer did not provide a wiring diagram for the CanBus communication system that is required for the Battery Management System to work.
1744457426729.webp
I finally found this diagram after a very long search. However, the cables that we bought from Lithionics and WakeSpeed did not provide the appropriate cables shown here.
I am purchasing the missing items on Amazon and they should all be here by Thursday.
IMG_2537.webp
This is the WakeSpeed Ws500 installation in the engine compartment. The 12vdc unit on the right is functioning. The 48vdv one on the left awaits the Lithionics BMS to start working.
 
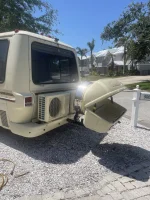
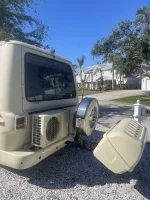
Well, almost everything is finally in place on the rear of the coach.
View attachment 14578
I need to put on the license plate and fashion a yellow painted board with a large GMC on it to hide the Thule.
View attachment 14579
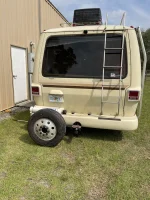
Lots of road clearance and easy to get to everything. No more on the roof.
View attachment 14580
View attachment 14581
It just extends the belt line, doesn't it. What do you think about this arrangement? It is just as I drew it.
It looks so long, low and sleek.
It kind of looks like the Thule box is the son of PacMan.
IMG_2540.webp
THe Thule was really designed to fit on the rear of an SUV or any vehicle that has a rear hatch door. It tilts backwards to allow access to the interior of the vehicle without removing it.
Because the cover is "domed" you can really pile stuff high up to 350 lbs. Not bad if you can do this while standing on the ground! No hauling stuff up and down a ladder.
IMG_2541.webp
Using that feature in this application provides access to the spare tire to rwmove the sy=stainless steel lug covers and 6 of the lugs. The spare wheel cover can then be removed and the telescoping tire mount handle is pulled out to provide leverage to rotate the wheel to the ground. The lever is about 5 feet long, so the mechanical advantage is considerable.
IMG_1126.webp
Remove the last two lugs with the spare tire on the ground. Then roll the tire to the location where you are repalacing the flat tire. Install the spare tire and then roll back the flat tire on the spare tire mount.. Rotate the deflated tire and mount back into vertical position. Restore the Thule to it original position and you are ready to roll again.
You did all of this without lifting a tire. Not Bad!
 
Last edited:
I have been placing a lot of comments on other threads. If you double click on my face, you should be transferred to a list of my most recent posts. On the other stream. you will probably find more detailed information on a particular product, repair, idea, etc.
I was uncertain when I started this of how to structure the content. It seemed to me that each thread was focused on a single issue. My approach to the project is that every topic is deeply connected to every other one and that is what this thread is all about. Every repair, modification or improvement has an impact on everything else and should not be solely considered in isolation.
It is my practice to consider everything and what is total impact of every repair, replacement, innovation, etc. So it is a quandary about whether to post here or on another stream. When one aspect is being addressed, I think that everyone on that thread is focussed on one thing, so the audience is already selected for my comment.
Anyway, please try to see every one of my posts.
 
I have been placing a lot of comments on other threads. If you double click on my face, you should be transferred to a list of my most recent posts. On the other stream. you will probably find more detailed information on a particular product, repair, idea, etc.
I was uncertain when I started this of how to structure the content. It seemed to me that each thread was focused on a single issue. My approach to the project is that every topic is deeply connected to every other one and that is what this thread is all about. Every repair, modification or improvement has an impact on everything else and should not be solely considered in isolation.
It is my practice to consider everything and what is total impact of every repair, replacement, innovation, etc. So it is a quandary about whether to post here or on another stream. When one aspect is being addressed, I think that everyone on that thread is focussed on one thing, so the audience is already selected for my comment.
Anyway, please try to see every one of my posts.
IMG_2543.webp
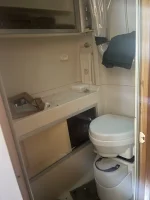
Now that the coach is home, I finally got the composting toilet out of its sealed cardboard box. It is sitting about 6" too high because I have not yet removed the two threaded studs that fastened down the old toilet.
There are no electrical or plumbing connections.
The removable container with the black lifting strap collects urine only.
It is hard to see but there are a bunch of small dark brown bricks siting on the lower shelf. They are copra, pressed coconut shell fiber. The bricks have to be broken apart and put in the number 2 container where the composting occurs. The copra and feces are stirred after every #2 use. Each fill of copra is in a bag, so when it is time to be emptied, pull the filled bag, tie up no dispose.
Ho more looking for a dump station.
This was designed for cruising boaters so that they could eliminate holding tanks and not be an enviromental outlaw.
The urine can be disposed of nearly anywhere. The composed feces/copra can be spread anywhere, including the garden as long as there are no edible plants. You can even put the bag in the garbage.
The 30 gal black tank is now a grey water tank but it is only getting water the drains at two sinks and you know how ofter you turn those faucets on. It will take forever, to fill those tanks and of course you can drain it anywhere.
It seems to extend less from the wall, providing more floor area in front of the sink and for showering. Unfortunately, I don't remember what it was like with the old toilet.

No more long coiled hoses, rubber gloves, macerators and tank blockages.
I have been advised by many satisfied owners that there is no bad smell issue.

I plan to fashion a floor grating from the 1" x 1" from the 1" x 1" Ipe wood that I have in the shop. Ipe wood is a strong as steel, waterproof, fire proof and beautiful dark brown when varnished.

There will be no standing in water and the grating will reduce the tripping danger when leaving to bathroom.

After taking a shower, the next person usng the toilet will not be standing in water either.

I have been advised that the new Whale 3 gal., 12vdc hot water heater will be delivered from Wallmart at a price well below Amazon. This unit has a heat exchanger that allows to siphon heat off of the 455's steaming hot water cooling system. The 3 gals will be very hot in the hw heater when the engine is turned off.
This is a marine device and is all stainless steel.
This is for non potable, recirculating, filtered, closed shower water system. I hope to locate the the filtration system here but if not, in the lpg tank compartment behind the bulkhead. The water pump is there already and the lpg tank is not there. It is in a third compartment behind the front wheel on the driver's side.
This system will provide hot water for both the inside and outside shower. I plan to collect water from the outside shower in a small inflatable toddler's pool with a loose wood grating.
Since water will be lost in the showering process, I plan to install a small expansion tank like the one for the 455's radiator. I plan to refill the expansion tank from the sink's hot water faucet. That replacement hot water is heated by the tankless hot water heater.

Comments?
 
View attachment 14665
Now that the coach is home, I finally got the composting toilet out of its sealed cardboard box. It is sitting about 6" too high because I have not yet removed the two threaded studs that fastened down the old toilet.
There are no electrical or plumbing connections.
The removable container with the black lifting strap collects urine only.
It is hard to see but there are a bunch of small dark brown bricks siting on the lower shelf. They are copra, pressed coconut shell fiber. The bricks have to be broken apart and put in the number 2 container where the composting occurs. The copra and feces are stirred after every #2 use. Each fill of copra is in a bag, so when it is time to be emptied, pull the filled bag, tie up no dispose.
Ho more looking for a dump station.
This was designed for cruising boaters so that they could eliminate holding tanks and not be an enviromental outlaw.
The urine can be disposed of nearly anywhere. The composed feces/copra can be spread anywhere, including the garden as long as there are no edible plants. You can even put the bag in the garbage.
The 30 gal black tank is now a grey water tank but it is only getting water the drains at two sinks and you know how ofter you turn those faucets on. It will take forever, to fill those tanks and of course you can drain it anywhere.
It seems to extend less from the wall, providing more floor area in front of the sink and for showering. Unfortunately, I don't remember what it was like with the old toilet.

No more long coiled hoses, rubber gloves, macerators and tank blockages.
I have been advised by many satisfied owners that there is no bad smell issue.

I plan to fashion a floor grating from the 1" x 1" from the 1" x 1" Ipe wood that I have in the shop. Ipe wood is a strong as steel, waterproof, fire proof and beautiful dark brown when varnished.

There will be no standing in water and the grating will reduce the tripping danger when leaving to bathroom.

After taking a shower, the next person usng the toilet will not be standing in water either.

I have been advised that the new Whale 3 gal., 12vdc hot water heater will be delivered from Wallmart at a price well below Amazon. This unit has a heat exchanger that allows to siphon heat off of the 455's steaming hot water cooling system. The 3 gals will be very hot in the hw heater when the engine is turned off.
This is a marine device and is all stainless steel.
This is for non potable, recirculating, filtered, closed shower water system. I hope to locate the the filtration system here but if not, in the lpg tank compartment behind the bulkhead. The water pump is there already and the lpg tank is not there. It is in a third compartment behind the front wheel on the driver's side.
This system will provide hot water for both the inside and outside shower. I plan to collect water from the outside shower in a small inflatable toddler's pool with a loose wood grating.
Since water will be lost in the showering process, I plan to install a small expansion tank like the one for the 455's radiator. I plan to refill the expansion tank from the sink's hot water faucet. That replacement hot water is heated by the tankless hot water heater.

Comments?
I use a Natures Head composting toilet in both my GMC motorhome and my travel van. Much better than contending with all the hassle of the original system!
 
View attachment 14574
Well it has been a very difficult 10 months medically, but I am back. I have started to post for the last few weeks, but not on this thread. Please check out the other posts I have been sending.
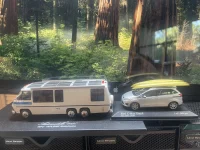
This is the new Automodello GMC Motorhome model that I have altered to look more like what my coach will finally look like.
It is good to be back.
IMG_2579.webp
I think that is is very cool to RV this way.
I think that there will be very little air resistance, but I am thinking about a rear spoiler on the coach. I have seen a few applications.
I have 2 red 16ft Hobie kayaks using Thule Hullavator mounts that support and drop the kayaks on the side of the vehicle.
 

Attachments

  • IMG_2545.webp
    IMG_2545.webp
    1.5 MB · Views: 440
Last edited:
The good news is that the dashboard ac is blowing hard and cold without the engine running. It is being fully controlled by the original controls in the dashboard, so no one will ever know that the system is very different than what it was when it was new.
Also, it is much quieter with no vibration like what we are accustomed to from the roof top. There is a small hum from the 12v compressor and the vacuum pump, which was not noticeable when masked by the 455's considerable rumble.
However, when pushing the envelop, there is always unanticipated consequences that have to be addressed.
First of all, the new 12v dc vacuum pump is running constantly to power the air dampers in the duct system. We are installing an switching system to limit the time that the vacuum pump runs because it uses energy unnecessarily and gets hot.
Secondly, to run the ac now the air conditioner only runs if the ignition key is turned on, so we must wire it directly through the house battery bank so it now is part of the 12v system like the rest of the coach without the key turned on.
With this now proven to work successfully and the 19.918 btu being greater that the 12,000 btu capacity surpassing that of the standard salon roof top unit, I think that it is an improvement over common method method all other GMC motorhomes air condition the front end.
Naturally, before everyone jumps in, I would like to recommend that we wait a while, unless you are very adventurous, to get the results of my long term experience with this new approach.
If there is no functional furnace, this system will not provide heat to the front end of the coach unless the engine is running.
Some of the forward roof tops were either reversible heat pumps or had electrical resistance heating coils in them.
It is posible to install an electrically functioning refrigerant valve in the system to make the ac unit function as a reversible heat pump, but this is not what I am doing because the YMGI for this area will address the heating issue.
Another consideration is that the dash board system does not have to compete with the 455's radiator heat disposal so it will probalby function much better than when it runs in competition with the far larger engine heat.
I have just found out that the blower will not operate at the highest speed and power unless the engine is running. That makes sense if the dashboard ac has an engine driven compressor. Since I have replaced that compressor with the 12vdc air conditioning compressor, I will have to rewire to get the fastest air flow without the engine running.

Any thoughts?
 
I have just found out that the blower will not operate at the highest speed and power unless the engine is running. That makes sense if the dashboard ac has an engine driven compressor. Since I have replaced that compressor with the 12vdc air conditioning compressor, I will have to rewire to get the fastest air flow without the engine running.

Any thoughts?

I believe that is correct. Blower Hi speed is directly fed from the alternator. If it's not making power then you lose the high speed for the dash air blower.
 
I think that that I found out why we couldn't get the 51.2vdc alternator working. Lithionics' and their distributer did not provide a wiring diagram for the CanBus communication system that is required for the Battery Management System to work.
View attachment 14616
I finally found this diagram after a very long search. However, the cables that we bought from Lithionics and WakeSpeed did not provide the appropriate cables shown here.
I am purchasing the missing items on Amazon and they should all be here by Thursday.
View attachment 14617
This is the WakeSpeed Ws500 installation in the engine compartment. The 12vdc unit on the right is functioning. The 48vdv one on the left awaits the Lithionics BMS to start working.

BattleBorn BBGC2 Engine Compartment 071522.webp


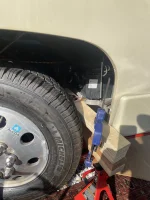
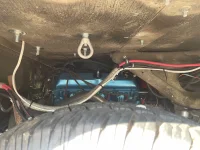
This was the original design for the 3 batteries in the engine compartment on the aluminum Ragusa battery tray. Since then, the rear BattleBorn BBGC2 has been eliminated and a DieHard Gold LF-2 100AH 800CCA battery has been substituted.
However, with the very significant and complicated wiring in front of the three batteries, it was too daunting to replace batteries from the front of the coach.
The alternative was to remove the wheel well on the passenger's side to gain access to the rear of the battery tray.
It was also too daunting to jack up the entire coach to remove the front tire.
That done, there were more challenges.
The pan is 22" above the ground and the tire is very difficult to get around. In this location, my weaker left arm would have to do most of the work.
First the old battery had to be removed, so the front wheels had to be turned all the way to the right. Mine wasn't all the way.
IMG_2591.webp
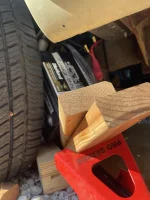
This rig was how I got the old DieHard out. I had to provide a surface to slide the battery out of its position on the tray. It ultimately fell to the ground as I was breaking down the support but not a problem since it was going to be recycled.
IMG_2601.webp
This attempt tried to pry the battery up enough to slip wood blocks under it. I on;y got the battery up about 6" before this approach was abandoned.
IMG_2597.webp
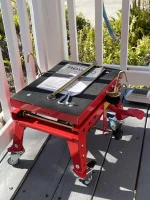
My first attempt to lift the new battery into place was using this motorcycle lift for the 38 lb. battery. I got it up 12" before it jammed with the coach's frame. Still about 11" more to go.
IMG_2602.webp
I then sought that I could rig a small block and tackle for the battery to be lifted. There are (9) 3/8" bolts and (4) 1/2" bolts to fasten the driver's and passenger seats. Adding lift nuts like these provide the fastening points. Luckily I did not need them but I have left them in place because they may be handy sometime in the future.
IMG_2606.webp
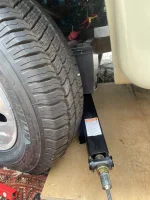
Ultimately, I was able to use this sizzors jack that could lift the battery all the way up but I had to rotate it about 90° (front to back) to clear all of the obstructions. I had to adjust the arrangement about every 1/2" lift to avoid a collapse. When the bottom of the battery was finally above the lip on the tray, I was able to slide it over.
It was a very tight fit and a small pry bar was needed to wiggle to battery into its final position on the tray.
This unit is not expensive and (4) of them are often bolted to the bottom of a trailer to level out and support the trailer when camping.
image.webp
As I got the battery close to the height, the treaded rod started to jam on the bottom of the bumper.
image.webp
I also tried (4) of these but they proved to be too unstable.

The new DieHard battery with it's 3 year warranty is now in place'
IMG_2586.webp
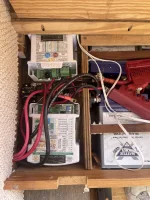
The lower Sterling 12vdc battery to 12vdc battery charger is now activate. The (10) BattleBorn 12vdc, 100AH batteries are supplying all of the charging battery for the DieHard 800 CCA starting power.
The BattleBorn 1,000 AH battery bank is charged by solar, shore and 160 amp alternator.
Phew, finally operational!
 
I have been looking for a solution to get rid of the engine driven radiator fan for a long time. It is the one remaining parasitic load on the 455 that I wanted to eliminate.
This is Florida and the thought of being stuck on Interstate 75 mid June parked in traffic and the water temperature rising, just terrifies me. I have not been able to put together an electric fan/radiator upgrade until now. As a Ranch Head, I have been following Jim and Jason. There is Jason showing a new dual electric fan shroud to be combined with a new aluminum Yokon radiator. Eureka!
The new radiator has sections for oil, transmission and engine cooling. There is also a dual fan controller with many options. The fan controller is electrIcally connected to the FiTech fuel injection system.
I can’t wait to move ahead with this project.
View attachment 7716
View attachment 7717
IMG_2626.webp
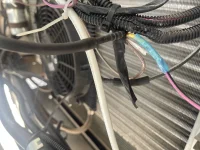
A new aluminum HVAC radiator with a 12vdc fan was already installed when I bought the coach. I have been testing the 12vdc dash vac system for the last few days and I am pleased. The system works well without the engine running and the key is turned on.
The air is blowing but we have set the compressor at its lowest level. Might want to increase the cooling capacity to the middle setting but I will hold off unit the 51.2vdc heat pumps are working.
I am now satisfied that the new dc compressor, expansion and condensing coils are working together pretty well even when using the original dashboard controls.