MattSailor,
That is an interesting device. I don't know if you ever programed the Balmar regulators. They were fun.....
I am a little concerned about the power capability of the poly-V belt. I got to a place that even double Vs could stay with the horsepower the big alternator wanted. Fortunately, I could turn down the max current. The owner did accept this as opposed to adding yet another belt to the main engine.
Matt
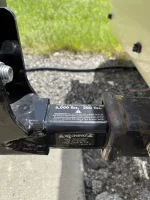
Victron BMV-712
I spoke with the owner and engineer for the WaveSpeed regulator for over 30 minutes. He told me that he worked for Balmar for about 20 years, so he probably designed their regulators. I am guessing that he started WakeSpeed because they did not want to go forward for a more advanced product.
However, that means that the WakeSpeed regulator and the Balmar alternators are very closely bonded together and I expect that this arrangement will provide much better performance.
In order to monitor the performance of the battery system, I am installing (2) Victron BMV-712 Battery Monitors (one for the 12v and one for the 48v). Probably could has used just one and switched back and forth between them, but zI wanted to see the information sids by side. The BMV-712 has built in bluetooth
With the Bluetooth capability, the BMV-712 will be able to talk to the iPhone, iPad, MacBook Pro and all Victron products.
The other Victron products to be installed are
(2) Victron MPPT 150/100 Smart Solar Charge Controlle
(1) Victron MPPT 75/15 Smart Solar Charge Controller
(2) Victron Temperature Sensor for BMV-712
(1) Victron MultiPlus II 2x 120 Inverter/Charger
(1) Victron MultiPlus II 48/3000/35-50 120v Inverter Charger
There are other products for different manufacturers that are part of the system:
(1) MasterVolt DC Master 48/12-20 - 48vdc to 12vdc Converter (could be another one)
(1) Sterling Ultra (12v/70A) Battery to (48v/15A) Battery Charger
(1) Sterling Ultra (12v/70A) Battery to (12v/70A) Battery Charger (for lead/acid DieHard starting battery)
(2) Sterling Remote for Battery to Battery Charger
(2) Battery Guardian AutoSelect (BGA)
(1) Firman 3042 Generator DF - 2700 watt on LPG or 5400 watt if paralleled to a second one I have
Attachments
Last edited: