1978 Royale Update and Restoration

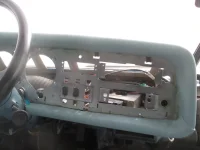
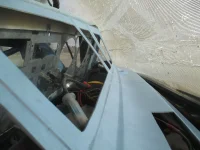
Got the rest of the dash remove last night.

IMG_3572.jpeg


IMG_3571.jpeg


In the process of opening this whole thing up, I’ve found a couple more items that need to be addressed. My fuse panel is getting replaced. The mounting tabs are broken, and someone previously had tried to glue it back together. It is in bad shape.

IMG_3568.jpeg

IMG_3570.jpeg


I really only need the holder, but I just couldn’t find one. Things like this make me wish I had a parts coach laying around. I probably could have gotten one from somebody…but I want this part this weekend to keep momentum.

I’ve already been considering replacement, since the fuses are the glass tube type (ACG) and the state of the electrical on my coach is/was scary. I decided to order a 22 circuit kit from Speedway motors. It comes pre-wired and has a bunch of the old GM style connector bits and bobs that are just plain useful to keep around. The wires are labeled, it uses the same fuses as my DC house system (ATO), and it will bolt in to the existing mount bracket. There are a couple unique things with the motorhome, like the air ride, but for the most part, the chassis system is just like any other 1978 car or truck.

Along with my circuit kit, I ordered some more insulation. The under dash stuff is nasty. It’s falling apart and wasn’t good to start. It’s reminds me of fiberglass batting with a black plastic trash bag facing.

IMG_3573.jpeg


IMG_3574.jpeg

IMG_3575.jpeg


The new stuff is aluminum faced on both sides and jute insulation. It is a bit thinner, but I’ll add a layer of the Mylar bubble wrap to it. Should help quiet the cabin down considerably.

In the meantime, I have to source some ultra dense foam rubber for the dash padding and work on my sewing skills. Since it’s this far apart, I’m replacing it all…so that means new upholstery too!
 
  • Like
Reactions: Kendra
Crossed a HUGE milestone today. With the dash and interior wire harness pulled out, I can no longer take anything else apart inside! Now any work I do is considered finishing the project! :ROFLMAO::ROFLMAO: I have to laugh…because if I didn’t, I’ll cry.

IMG_3590.jpeg

IMG_3591.jpeg


I have to clean up the old adhesive, then I’ll start applying the butyl rubber sound deadened. Lots of flat, thin sheet metal there to rattle and oil can. After that I have some really nice stuff from DEI for thermal insulation. It’s a half inch thick and reminds me of a wool blanket.

IMG_3598.jpeg


Then it’s on to integrating the new fuse box into the old harness, which means some of the work I previously completed (mirrors, radio, usb power source) will need to be redone. It’s ok, I’d rather pull those circuits back to the source than splice them in like I’ve done. I’ll also examine the harness carefully to ensure I replace anything suspect.

This is the main feed into the cabin from the engine compartment. This will remain as OEM (although without the dried up bugs 🤮)
IMG_3596.jpeg


The new fuse panel from speedway will bolt right into the spot vacated by the old panel. It also includes a space for the signal relays and a few auxiliary circuits. Glad I decided to do this. It’s going to help clean up the stuff I’ve added, eliminate the extra slices and such from previous owners, and make the flasher relays much more accessible (they were tucked up behind the IP from the factory)
IMG_3597.jpeg


And this little update was just to help with my AD/HD. Got a couple of those 10 dollar organizers from hazard fraught to sort my wiring supplies into. I was tired of digging through the debris on my floor for connectors, heat shrink, etc. for 10 bucks, this container is pretty nice. I can see a few more of them in my future.

IMG_3595.jpeg
 
  • Like
Reactions: ScottC and Kendra
Spent all weekend working on my dash plastic parts. The new one I was going to get fell through…guy went MIA. Said he had some family emergency and then ghost. I hope he’s ok. was careful removing the dash, since I had a feeling in the pit of my stomach that it may come to this. Anyway, with that option now if the table, I had to figure out how to repair the stuff I have.

It was only two pieces were really bad. They are the two that get all the UV from the sun. Thankfully, my coach has always been stored indoors, so my plastic isn’t completely trashed. Some of them I’ve seen crumble when you touch them.

Bought a couple new tools to help out. Got a plastic stapler
1737951506656.jpeg


And upgraded my plastic iron to a 100w model vs the 35 or so that my HF one is. The stapler is for the initial “tacking” of the cracks together. Works really fast and really well. Once all the pieces were kinda arranged where they were suppose to be and stapled in place. I used the iron to melt in some aluminum window screen to stabilize and reinforce the repair. Finally, I used some 3d printer filament to fill the areas where I needed to replace the plastic. Since the dash is ABS, it was a pretty easy process to do all this. Not a short process, I probably have 20 hours into the repairs so far, but ABS is an easy material to work with.

Some pics. These were fairly representative of most of the cracks I needed to fix.
IMG_0021.jpeg

IMG_0025.jpeg

IMG_0026.jpeg

IMG_0038.jpeg


The other big issue I had with the piece that goes on the drivers side is an area that has sagged over the years. That was pretty challenging to bring back, and the stress of doing so caused other cracks to form. My heat gun just didn’t have enough BTUs to warm a large enough area, but I did get it a lot better than it was.

Here you can kinda see the larger crack and the material diving south in the back ground (behind the heater control)
IMG_3210.jpeg


Step one was clamping slowly and applying heat. Once it came back to flat, I let it set for about an hour to cool and learn its new position

IMG_0033.jpeg


Once I had that mostly right, I put the cover on to check my alignment. Still sagging, but WAY better. The gap here is due to the deformation of the whole unit (which let the vent area deform in the first place).
IMG_0035.jpeg


More heat and more clamps, and I got that gap quite a bit better
IMG_0037.jpeg


The stress of moving that old stuff so far opened up another couple big cracks, so I decided it was good enough there. I really needed a large oven to get the whole piece warm enough to reshape it as far as it needed to go, but I did what I could. It’s a million times better than it was, and probably just as good as it came from the factory.

Now that I have things mostly where they belong, I’ll be laying up a layer or two of fiberglass on the back of the panels, just to help them resist movement in the future. Then it’s on the “body work”. Sanding, filling, texture application, prime and paint.
 
  • Like
Reactions: Kendra
till working along on repairing the dash...The Drivers side "birdcage" as its called was in really rough shape. I have it almost ready to add Fiberglass. The whole design is a bit wonky, in that they hung all the instrumentation on this plastic...Kinda like we complain about companies taking steel designs and making them out of aluminum without considering the particular nuances of working with aluminum, It looks like someone familiar with stamped steel design just decided to make a plastic dash...and its not great. All the weight is cantilevered up and away from anything that gives support. There is one leg (plastic) that comes down to a lower support, but that is pretty much it.

Couple nights ago, I bolted the IP back up. The IP is a piece of 16 ga steel, with a big foam and vinyl surround. most, but not all, of the screwholes lined up. Vertically, it seems pretty good, but horizontally, the thing had shrunk. I really was not surprised by this, since I've put a TON of heat into the part and plastic changes a bit when you heat and cool it (just like welding steel). We account for this in injection molding by designing the mold to be bigger than the part its producing (ABS for instance is about 0.008"/" of shrink, so you would design your mold for a 1" x 1" x 1" cube to be 1.008" on a side), but the way I' repairing this, there is no way to account for shrink. My temp is not controlled, there is no pressure, etc.

Anyway, with the IP bolted up where I could, I got the heat gun out again, and started working the material to "stretch" it. Of course, that caused cracks in other places :rolleyes: . Here is a good example...

1738237020884.png


Once I had all the screw holes lined up and had screws in them, I filled the new cracks to make my part a touch larger. Overall, when the assembly is together, its fitting pretty well.

1738237130086.png

1738237146900.png


Once its in the coach and things are solidly mounted, the final adjustments can be made...namely the cover gets a couple of screws into it which will pull the corners in that appear big right now. Its getting closer to paint. Once I get to the paint stage, I'll hand this part over to my wife, and I'll transition into getting the coach ready to receive the plastic pieces.


Oh, and I did some shopping last night. The steering wheel on this thing is a problem. For one, its GIANT...Like a steering wheel used on a non-power steering car, but the coach has a ton of power assist, so its way bigger than necessary. Second, it blocks the gages, which is terrible. Finally, I had the style of it. I guess its from a Cadillac? I dunno, but it was on the list to be addressed.
1738237798369.png


After looking at TONS of different GM wheels through the years, I stumbled across the two spoke Oldsmobile "sport" wheel from the late 70's, early 80's Cutlass. I've seen it referred to as a "Batarang" wheel too. Not super easy to find, especially with an horn button, but it was exactly the style I was looking for. Finally found a decent one on Ebay and pulled the trigger. Bit of a splurge, but I just didn't want to do the typical GMC S-15 wheel. This will get a new wrap and maybe I'll whip up a new center cap. I don't hate the Old's logo tho, since it has an Old's powertrain in it.

1738237630248.png
 
ometimes, an idea just comes together so perfectly, it’s a real joy to see it complete. That is the case with this lil mini project.

I mentioned that I picked up a new steering wheel. The original blocked my view of the gages terribly. So I searched factory steering wheels and stumbled upon an Oldsmobile wheel that they put in the cutlass, notably the 442, but you could get it in others. It’s the “sport” wheel option. Anyway, as soon as I saw it, I knew it was the wheel I wanted, especially with the trans am styled dash.

A comparison between the old and new wheel
image.jpg


You can see the difference in the projection of the arms…the new wheel will open the view to the dash much more. And thanks to GM using standard parts, this wheel slides right in to the splines in my factory column.

However, the issue of marque is there. This is an Olds wheel and has an Olds logo in it. Not the end of the world, since the drivetrain from the motorhome is from an Olds Toronado. But it was cracked, and I really wanted it to be in GMC livery.

I popped the olds center button out of the steering wheel trim.

IMG_0075.jpeg


And reverse engineering it. Then I found a nice image of the GMC logo and did some CAD wizardry to make a sketch of it. Sent it to my new printer and printed it in 3 colors. This is the result.

IMG_0076.jpeg


IMG_0077.jpeg


Installed back into the trim piece and installed on the wheel.
IMG_0079.jpeg

The final step is pouring some tabletop epoxy over top. Crystal clear and UV protected.
IMG_0082.jpeg


I’m super happy with how this turned out.
 
  • Like
Reactions: ScottC and Kendra
Spent all weekend doing "body work" to the two dash pieces I repaired. Took a few layers of body filler and a LOT of sanding, but I'm pretty happy with the final result. Some process pictures...

Here is kinda in between. Some filler and some filler primer

1739767615103.png


1739767639077.png


and after a few coats of high build filler primer.
1739767680517.png


1739767702487.png


Its looking really good. Tomorrow, I'll knock down the primer with some 320 and then use the SEM texture paint I bought to "retexture" the parts. Then, its time for white paint and upholstery. I'll have to spend some time re-wiring the dash and re-installing the HVAC. I've not mentioned it, but as a surprise to no one, that was messed up too. One of the vacuum actuators in NLA too, so I tried to rebuild that. I don't know that it is going to work though, so I might need to figure something out there. Its the one for the main deflector too...so its kind of necessary. There isn't a part number for it anywhere in my books...and no one has really come up with a solution there. I may be engineering an actuator here shortly. I can print TPU (which is pretty flexible) so I could make a couple bellows, then use some ABS for the housing...it might work.

This is the actuator in question...any ideas? The long tube facing the top of the photo is what is unique about this actuator. There is an O-ring that seats into the inside of that tube...Maybe so it doesn't require as much vacuum? I'm not sure...It does explain why my heater and A/C never really worked right.

1739768032943.png


EDIT: If anyone else is looking, the following is an identical replacement
https://www.oldairproducts.com/product/23-5905-actuator
 
  • Like
Reactions: Kendra
Back to reality, been working on finishing the Dash overhaul. All my pieces are now painted. I think they turned out great. They are not 100% perfect, but WAY better than they were, and I'm probably the only one who will notice the issues. I also tried a new product on these pieces. I did so much sanding to make my repairs disappear, I sanded through the texture in most of the repair areas. Tried SEM texture repair paint. It worked incredibly well. Better than the way I've done it in the past with Bedliner.


Here is the passenger side
1741087226776.png


Driver's Side
1741087924622.png


And a texture close up. This area was completely smooth

1741087949447.png


That about finishes all the dash parts needed for this project. My next step is finishing insulation in the coach, then the wire harness. To that end, I'm installing Dynamat (actually, some left over Noico from another project) over the huge flat sheets of aluminum. Got the dash done over the last couple days.
1741087974394.png


Still need to piece together the footwell area. Over this, I'll install some traditional thermal and soundproofing insulation (thick wool blanket looking stuff). My wife wants to install the sound damper stuff over the plywood flooring too after hearing how well the Noico reduced the vibration in the sheet metal Dash. I think we will, just to help with resonance. I'm a bit concerned about weight, but the cabin of this thing is LOUD, and anything we can do to stem that noise reduces fatigue while driving.

I also brought the wire harness home with me so I can meld the new with the old. Things that don't get pictured, but take a huge amount of time is those little detail things. The dash had 5 (!) 1" holes in it, for wire pass throughs. No grommets, cord grips, bushings, or anything. Just a big hole for air leakage. I spent about 2 hours working on plugging those up with some grommets. For every "big" project I do, there are three of four of those mini-projects that suck up a few hours here and there. Things like stripping old adhesive and cleaning the aluminum before the Noico can be installed. Chasing down circuits and rebuilding the harness, etc. I know I have a TON of work left, but I feel like I'm picking up steam here. I have good momentum, and it feels nice to make real progress.
 
  • Like
Reactions: Kendra
Holy smoke Mike that is amazing - your ambition and persistence. I'm watching closely as I'm faced with a similar dashboard re-do. Half century of brittle plastic degrading and a previous owner's "Big Mac" dash upgrade I thought was desirable but I've learned to hate - the Big Mac wipes out too much legroom. I'm not very tall and my knees bang into the aftermarket dash.

I was going to aim for a 100% stock retrofit and will probably have to bite the bullet and buy the fairly expensive but necessary Sirium fiberglass repro. Mine's a mess. After seeing this I am tempted by your Trans Am dash insert. Looks correct for 1970s and includes more than stock GMC gauges.
 
  • Like
Reactions: Mike_H
IMG_0017.webp
My birdcage was in pieces also, but I am missing several sections.
I ordered the birdcage through Serum, since I had the back cover, it was only $450.
Shipping was a little bit expensive though. Very glad that the front dash was actually
one piece instead of one like my Palmbeach. The fiber glass is much more ridged than the plastic.IMG_0018.webp
IMG_0021.webp
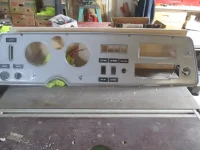
I didn't care for the fake wood grain for the instrument panel. I removed the vinyl and used a hammered grey color.
IMG_0020.webp
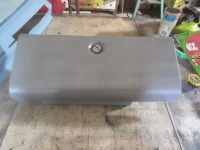
So I matched the glove box with the hammered color
IMG_0019.webp
Removed the fake wood trm from above glove box and added a little color
 
  • Like
Reactions: Mike_H
Drivers side dash is out for either repair or replacement. I’m heading down the path of repair and reinforce the one I have.
IMG_3555.jpeg


Another update is the my electric-luminescent wire update works very nicely.

Lights off. These are my 3d printed tags that snap in.
IMG_3537.jpeg


And with the EL wire on, behind the tag.
IMG_3536.jpeg


I’m super happy with how they’ve turned out.

More to come as I pick up steam.
My understanding is that EL wire longevity isn't very good. Any concerns there? Is there a viable LED substitute (COB strip or faux neon)?
 
My understanding is that EL wire longevity isn't very good. Any concerns there? Is there a viable LED substitute (COB strip or faux neon)?
Don’t know on that. Going to try it though. If it doesn’t work, I’ll figure something else out. I thought through building a harness to install LEDs behind my printed tags. It wouldn’t be the hardest thing to do, but that kind of design work takes away from making progress on the main project.
 
Holy smoke Mike that is amazing - your ambition and persistence. I'm watching closely as I'm faced with a similar dashboard re-do. Half century of brittle plastic degrading and a previous owner's "Big Mac" dash upgrade I thought was desirable but I've learned to hate - the Big Mac wipes out too much legroom. I'm not very tall and my knees bang into the aftermarket dash.

I was going to aim for a 100% stock retrofit and will probably have to bite the bullet and buy the fairly expensive but necessary Sirium fiberglass repro. Mine's a mess. After seeing this I am tempted by your Trans Am dash insert. Looks correct for 1970s and includes more than stock GMC gauges.
I was going to buy a fiberglass dash too. Would have been time way ahead. It didn’t end up happening for reasons I don’t really want to get into here. In the interests of moving my project forward, I decided to just repair what I had. It was mostly solid and it should be good for another 40 years
 
Last edited:
  • Like
Reactions: ScottC and Kendra
I can only stand here and shake my head in amazement, Mike. Your build walks a fine line between inspiring me and depressing me. I haven't the money, expertise or time-left-on-this-earth to attempt what you are doing, but your build reflects a ton of careful research, good decisions, and thoughtful craftsmanship. If you continue to finish your build at this level of care your coach will be beyond extraordinary. I can only offer my encouragement for your efforts and gratitude that you are taking so much time to document it. "Nicely Done!" doesn't begin to cover it.
 
I can only stand here and shake my head in amazement, Mike. Your build walks a fine line between inspiring me and depressing me. I haven't the money, expertise or time-left-on-this-earth to attempt what you are doing, but your build reflects a ton of careful research, good decisions, and thoughtful craftsmanship. If you continue to finish your build at this level of care your coach will be beyond extraordinary. I can only offer my encouragement for your efforts and gratitude that you are taking so much time to document it. "Nicely Done!" doesn't begin to cover it.
It walks a fine line, alright...Sometimes I'm not sure which side of the crazy line I'm on! The vision in my head keeps driving me, and if it turns out half as nice, I'll be a happy guy.
 
Got the last of the mass damped surface treatment done yesterday. I highly recommend you do this, if you have the opportunity to strip a dash down. The aluminum structure is all flat sheet and will have a tendency to resonate. I think the most impactful area is probably the footwell where the Accel and Brake pedals are. That area is VERY resonate and you can really hear the difference before and after the application of the insulation. Note, I elected to NOT do the sides, since they are already spray foamed. That in and of itself will quell the vibrations in those panels, plus they have some rigidity due to the structure formed into them. I may stick a some material on the plastic covers though.

1742222625408.webp


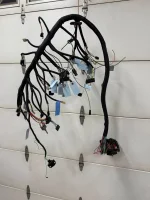
Next project...wire harness. Got it unwrapped last night and used zip ties to control all the break-outs from the main trunk. Now I need to label circuits in the factory harness. Then, I'll start comparing and blending my new harness with the Old. Eventually, I'll lay this out on a sheet of plywood or cardboard.

1742222828542.webp
 
  • Love
  • Like
Reactions: tmsnyder and Kendra
First "live" update in a while. I'm still working on wiring...

First things first, I spent a few hours labeling connectors and individual circuits, as well as their direction to something or from the fuse block. This will help me when I integrate the new harness. The plan is to remove the individual wires and replace them, terminals and all, where I can. I have about 90% of al the wires labeled. Some of them are not going through the fuse panel, so they will just stay put.

1742735792361.png


Next was to lay out the harness on a board with nails to take the place of my zip ties which are marking the different breakout locations. With the clarity of a full nite's sleep, I may need to redo this...I was thinking I needed to lay out both harnesses next to each other, but instead, they need to be on top of one another, so I don't need to be biased so far left. That would give me the opportunity to clean up all the connectors and grouping s on the left side too. Still not too late, since I haven't clipped my zip ties.

1742735905429.png


And, with ALL this work happening...I made another decision. I do NOT want to tear into this again, so I did some shopping last night. These two things are on their way next week

1742736154635.png


1742736178140.png


My dash will be getting the "Trans-Am" treatment.

1742736627980.png


I really want the tach. Having the water, volts, and oil will be nice (since I don't really have those either). The only thing I'll be missing at that point is a transmission temp gage. I have one to install, but I may look for something more factory that can also be integrated in the dash. This is going to require a bit of design work to make it all fit though...I know my Tell-Tale lights will need to change out. Probably point lights with simple labels, but I'm not sure yet. The real estate the factory set-up takes is valuable. Since I have Li-Ion house batteries, I can eliminate the batt boost switch (Li-Ion cannot be used for starting). Another alternative is to move those switches to the side panel with the electro-level controls. I also believe I will use my factory Speedo. Mainly because it includes the transmission range indicator, but it also has the accurate milage and I don't have to get on any lists anywhere, looking up how to monkey with the milage in the T/A speedo. All decisions will be finalized when I actually get the stuff though. Got the gauges for less than 150 bucks off Ebay, so I'm pretty happy with that. Epecially considering how expensive aftermarket gauges are. The ones I bought are "untested" but they are mechanical, so I should be able to make them work.

Today's plan is get the harness integrated. Its ambitious, so we'll see how far I actually get.
 
  • Love
  • Like
Reactions: tmsnyder and Kendra
First "live" update in a while. I'm still working on wiring...

First things first, I spent a few hours labeling connectors and individual circuits, as well as their direction to something or from the fuse block. This will help me when I integrate the new harness. The plan is to remove the individual wires and replace them, terminals and all, where I can. I have about 90% of al the wires labeled. Some of them are not going through the fuse panel, so they will just stay put.

1742735792361.png


Next was to lay out the harness on a board with nails to take the place of my zip ties which are marking the different breakout locations. With the clarity of a full nite's sleep, I may need to redo this...I was thinking I needed to lay out both harnesses next to each other, but instead, they need to be on top of one another, so I don't need to be biased so far left. That would give me the opportunity to clean up all the connectors and grouping s on the left side too. Still not too late, since I haven't clipped my zip ties.

1742735905429.png


And, with ALL this work happening...I made another decision. I do NOT want to tear into this again, so I did some shopping last night. These two things are on their way next week

1742736154635.png


1742736178140.png


My dash will be getting the "Trans-Am" treatment.

1742736627980.png


I really want the tach. Having the water, volts, and oil will be nice (since I don't really have those either). The only thing I'll be missing at that point is a transmission temp gage. I have one to install, but I may look for something more factory that can also be integrated in the dash. This is going to require a bit of design work to make it all fit though...I know my Tell-Tale lights will need to change out. Probably point lights with simple labels, but I'm not sure yet. The real estate the factory set-up takes is valuable. Since I have Li-Ion house batteries, I can eliminate the batt boost switch (Li-Ion cannot be used for starting). Another alternative is to move those switches to the side panel with the electro-level controls. I also believe I will use my factory Speedo. Mainly because it includes the transmission range indicator, but it also has the accurate milage and I don't have to get on any lists anywhere, looking up how to monkey with the milage in the T/A speedo. All decisions will be finalized when I actually get the stuff though. Got the gauges for less than 150 bucks off Ebay, so I'm pretty happy with that. Epecially considering how expensive aftermarket gauges are. The ones I bought are "untested" but they are mechanical, so I should be able to make them work.

Today's plan is get the harness integrated. Its ambitious, so we'll see how far I actually get.
You'll have to modify the 'redline' for the 455 :) More towards diesel tach range :)
 
  • Haha
Reactions: Mike_H
I have my harness project complete. Started with a Speedway Motors 22 Circuit kit.


I decided to go this route because it fits the original pass thru already installed in the firewall. Bonus is that my signal flashers are now relocated to the fuse box, instead of hiding up under the dash. With the extra space, I also added a couple extra circuits. One for my power mirrors (Ramco's), I added extra wiring for a modern radio (they all take a 12V batt feed and a 12V Ign or Acc feed), pulled in a tach signal wire and a Trans Temp Signal wire.

I was intending on replacing the entire harness, however it was not quite long enough to get what I needed. So, the bulk of the work was in splicing new wires in where I needed to. I basically replaced anything that looked questionable or that had previously been cut and spliced. So, this is now a mix of old and new. The speedway kit was nice, because the provided a LOT of the special connectors terminals and connector housings that GM was using at the time our coaches were built. Pack-Con and Packard Series 56 if you're looking for terminals and what not. A lot of that stuff is still available, if you know what to look for. One other step I took was to eliminate the soldered splices that GM used. They were probably fine (most everything worked when this coach came apart) but for "peace of mind" I used butt splices and heat shrink vs the soldered crimp rings and nasty, sticky, black tape GM used. I'm not a fan of soldered connections in a vehicle. They can cause stress risers in the wire. The solder causes a stiff, unmovable section where the solder flows, to a flexible area where there is no solder. With vibration, that stressed wire can break and since its buried DEEP in the harness, they are very tough to find.

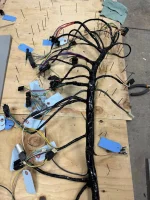
Once the wires were all spliced in, I wrapped the harness in non-adhesive vinyl tape (which is what GM originally used). First time I've worked with this stuff and its pretty nice. Its easy to stretch and wrap around the breakouts, its clingy enough to not unravel (think saran wrap), and you can bundle the wires up tightly with it.

1743427570911.webp

This is where GM left it. I took it another step, and added a braided split loom over the vinyl wrap. Just a little extra protection, plus it looks nice (not that anyone will see it). Tesa Cloth tape at the joints to help hold them together, and its ready to go back in. I will need to daisy chain a couple extra gage lights and a voltage feed once my dash is complete, but that is really easy to do and won't violate the rest of the harness.


1743427682097.webp
 
Last edited: