The first thing I tackled was the rear cap. Its in the worst shape, being that its in two pieces vs what it should only be one!
I got my plastic welder and some stainless steel mesh out and got to work. The mesh holds the two pieces of plastic together and reinforces the repair. This the front cap (I don't have pics of the rear), but the process is the same.
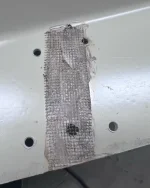
This is the front of the repair. With this big of a repair area, I needed to sand the crack back flat due to sagging. I used some polyester body filler (Bondo) to smooth things out.
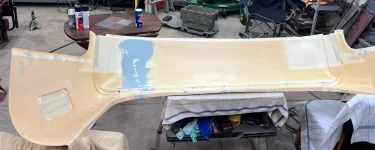
Since I had to sand on the class A surface, I had two choices...Sand the WHOLE THING smooth, which didn't sound like any fun at all, or figure out a way to duplicate the molded texture. I experimented with some Rustoleum bed liner. I've used it on the fender flares and other plastic pieces of my jeep and I had a pretty good suspicion it would work.
Before painting, I scrubbed it with a burgundy scotch brite pad and some Ajax with bleach. This was to remove any trace of mold release, oil, grease, etc that might be on the surface. After, I wiped it with a microfiber and some rubbing alcohol. Finally, I used some adhesion promoter to prepare the surface for paint. Here is the whole Cap, painted with bedliner.
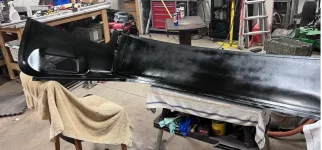
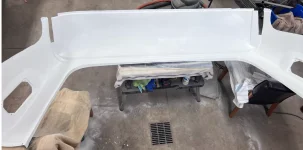
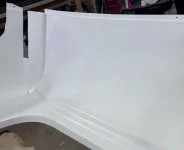
After the bedliner had time to dry, I used some plain, satin white Rustoleum 2x White spray paint. Covered pretty well, and the repaired area is nearly invisible.
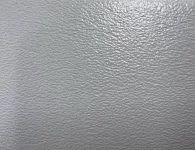
Here is a close up of the textures. This is the original.
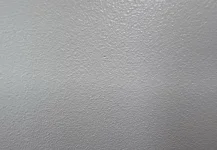
And my repair
Overall, I'm VERY happy with how this turned out. The rest of my plastic is in better shape (well, its in one piece at least). I have the front cap nearly ready for paint. All my cracks are repaired aside from two areas that are recessed where the curtain slider extrusion fits. The plastic was stretched a bit too thin in that area when molded. I have some polystyrene sheet on the way to build the area up. I also decided to buy new cockpit trim pieces from Alex Sirum. One of mine is missing and the other is not great.
I got my plastic welder and some stainless steel mesh out and got to work. The mesh holds the two pieces of plastic together and reinforces the repair. This the front cap (I don't have pics of the rear), but the process is the same.
This is the front of the repair. With this big of a repair area, I needed to sand the crack back flat due to sagging. I used some polyester body filler (Bondo) to smooth things out.
Since I had to sand on the class A surface, I had two choices...Sand the WHOLE THING smooth, which didn't sound like any fun at all, or figure out a way to duplicate the molded texture. I experimented with some Rustoleum bed liner. I've used it on the fender flares and other plastic pieces of my jeep and I had a pretty good suspicion it would work.
Before painting, I scrubbed it with a burgundy scotch brite pad and some Ajax with bleach. This was to remove any trace of mold release, oil, grease, etc that might be on the surface. After, I wiped it with a microfiber and some rubbing alcohol. Finally, I used some adhesion promoter to prepare the surface for paint. Here is the whole Cap, painted with bedliner.
After the bedliner had time to dry, I used some plain, satin white Rustoleum 2x White spray paint. Covered pretty well, and the repaired area is nearly invisible.
Here is a close up of the textures. This is the original.
And my repair
Overall, I'm VERY happy with how this turned out. The rest of my plastic is in better shape (well, its in one piece at least). I have the front cap nearly ready for paint. All my cracks are repaired aside from two areas that are recessed where the curtain slider extrusion fits. The plastic was stretched a bit too thin in that area when molded. I have some polystyrene sheet on the way to build the area up. I also decided to buy new cockpit trim pieces from Alex Sirum. One of mine is missing and the other is not great.