1978 Eleganza build

pjpalm1964

Member
Nov 3, 2021
34
11
8
Round Rock Texas
Bought this beast November of 2021 for $14,000
https://www.gmcrvforsale.com/1978-eleganza-georgetown-tx-2/

Here is what I have done so far 2021-2025

Running Tally of Total Spend $6,769.81

Applied GMC purchases September 2022 Total $2,337.16
  • Brake parts and tune up items. $1,794.80
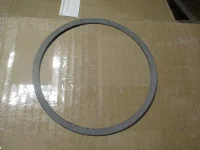
  • Air bag parts, carb parts, trans gasket, air filter $340.34
  • Window Felt, Side Vent, Exhaust parts $202.02

Amazon Purchases for GMC Fall 2022 Total $731.54
  • Wire covers: $28.09
  • GM power brake booster vacuum check valve $15.98
  • GM coolant sensor $19.04
  • DOT air line male connector 10.55
  • Power steering hose return line $16.50
  • Fresh air hose to carb parts, running lights $49.59
  • Misc Parts for GMC $48.56
  • Switch for engine light $11.90
  • Speed nuts for grill $8.06
  • Air tubing for air bags $16.24
  • Air line sealant: $29.97
  • Air tubing for compressor: $40.58
  • 50A power cord $256.44
  • House/Engine battery charge isolator: $116.23
  • Sound deadening mat for Generator compartment $63.81

Amazon Purchases for GMC Spring 2023 Total $806.11
  • ViAir Compressor, Tank, Fittings, and mounting bracket
Work done by owner 2022-2023 (just my labor, parts $350.00
  • Remove exhaust pipe placed on rear ladder
  • Refill and recharge both 6v house batteries
  • Remove old diode battery isolator and install new house/engine battery isolator
  • Clean up wiring in engine compartment, verify charging system works properly
  • Install ViAir compressor and 1.5gal air tank by engine battery
  • Install air line with regulator to allow airing up of tires/bikes etc under hood
  • Remove Electro-Level sensors that no longer operate (keeping old sensors)
  • Remove Electro-Level compressor system (keeping old compressors)
  • Relocate Electro-Level switches behind driver armrest (keeping old switches)
  • Install new airbag switches with gauge in the driver area
  • Run new airlines to from driver switches to compressor and left/right airbags
  • Install marine water heater, connect to engine coolant lines and 110V in bathroom
  • Repair plumbing in bathroom and test/repair any leaks
  • Repair water holding tank, add new line to fill spout, verify pump works properly
  • Repair water drain to holding tank and add drain to kitchen water lines behind closet
  • Paint window trim black
  • Replace microwave oven $350
  • Remove settee/bed assembly in rear and all overhead cabinets for repair
  • (to do) Get settee reupholstered and rebuild settee area and related woodwork/cabinets
  • (to do) Replace 120V inverter to refrigerator and verify proper refrigerator operation on 12V and 120V power

Work done by Fred Generator Repair (pre-paid for by previous owner) $0. (Valued at $3,000)
  • Take coach to Fred in Leander Texas to have him rebuild generator
  • Remove and rebuild generator, install new starter, filters, fuel pump and muffler
  • Insulate compartment with sound deadening material provided
  • Reinstall generator
Work done by Don Verta (GMC expert in Leander) $2,100
Venmo Payments
  • Cash to Don, down payment $500
  • Battery 9/1/2023 $200
  • Gauges 8/8/2023 $300
  • Steering 6/9/2023 $300
  • Tune/brakes 2/14/2023 $800
Brakes and General Maintenance
  • Replace front rotors with rotors provided
  • Repack front wheel bearings and CV boots
  • Replace front brake calipers, hoses and pads provided
  • Replace brake booster and master cylinder provided
  • Install brake vacuum pump provided
  • Adjust parking brake system
  • Replace brake PVMH proportioning valve provided
  • Remove/replace all rubber brake lines
  • Replace rear brake cylinders (4) provided
  • Turn brake drums as needed (4)
  • Replace rear brake hoses provided
  • Replace brake shoes and hardware provided
  • Repack rear wheel bearings
  • Repair air bag leaks
  • Change transmission filter and oil with new fluid
  • Change engine oil and filter with new fluid
  • Repair power steering squeaking and replace belt
  • Install, new belts routed properly as needed
  • Inspect engine coolant and replace if needed
  • Install OEM water temperature sensor
  • Fix Digipanel temp sensors for transmission oil temp
    • Don replaced gauges with mounted gauge pack on dash
  • Fix exhaust leak at engine manifold
Adjust steering systems
  • Rebuild steering assembly column and remove play in tilt steering system
  • Replace power steering gearbox
  • Repair steering coupler and install new gasket/cv joint
  • Inspect and repair any worn steering components
  • Lubricate front suspension
  • Adjust steering geometry to factory specifications
  • Replace engine battery
Work done February 2025 $445.00
  • Adjust and Bled brakes, purchased bleed kit for $125.00
  • Brake fluid $20.00
  • Wash undercarriage
  • Fix Oil Dipstick tube ($100)
  • Fix cracked exhaust manifold ($200)
 
Last edited:
  • Like
Reactions: Kendra and pvfjr
Well today I added oil since no oil on dipstick. After some investigating, it looks like the oil dipstick is not going into the pan, it is flopping around under the left exhaust manifold. So, got a new oil dipstick tube from Applied and soaking bolts in PB blaster.

Looks like this has been covered before, and others have had the same troubles. I wish there was a video showing how it is done.

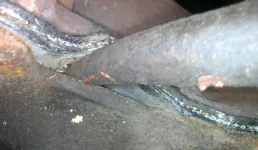
Here are some pictures. Is it normal to have the tube crushed between the exhaust manifold and block?

Oil tube between block and manifold.webp

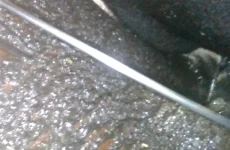
Picture of oil diptube below the manifold, not in oil pan.
Dip Tube not in engine pan.webp

Another shot of dip tube pinched between manifold and block
Oil Dip Tube.webp
 
Working on oil dipstick tube. Rather than pull the old tube out of the block, I decided to splice it. There was plenty of tube left at engine block, so I just cut off the rusty bits and had a good 3 inches left of tube. I then cut about 3 inches off the tube supplied by Applied GMC, and added a second union. Tested dipstick and it was smooth.

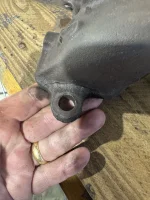
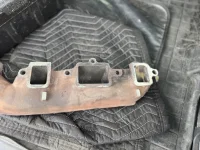
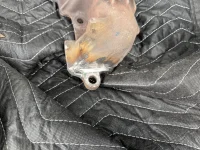
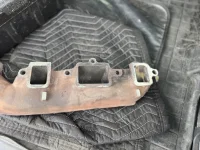
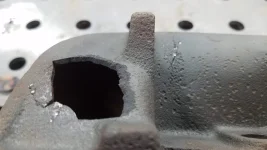
The previous owner repair records indicated a new left exhaust manifold. The manifold crushed the old dipstick tube. Somewhere along the line the tube was crushed, and rusted out where it goes between the manifold and the block. The rear most tab was also busted/cracked. Now I need to get a new exhaust manifold or weld the tab back on. Any suggestions?

Thanks
Paul
 
Left side exhaust manifolds are like hens' teeth. Check with the GMC vendors or have the tab brazed back on. By any chance do you have the formed sheet metal that covers the left side manifold?
 
Working on oil dipstick tube. Rather than pull the old tube out of the block, I decided to splice it. There was plenty of tube left at engine block, so I just cut off the rusty bits and had a good 3 inches left of tube. I then cut about 3 inches off the tube supplied by Applied GMC, and added a second union. Tested dipstick and it was smooth.

The previous owner repair records indicated a new left exhaust manifold. The manifold crushed the old dipstick tube. Somewhere along the line the tube was crushed, and rusted out where it goes between the manifold and the block. The rear most tab was also busted/cracked. Now I need to get a new exhaust manifold or weld the tab back on. Any suggestions?

Thanks
Paul
Maybe Cinnabar has some reproduction exhaust manifolds?

My dipstick tube was rotted off. I made a new section from 3/8" brake line and brazed a washer on it to hold it at the right height in the engine. Where it went between the manifold and the head, I squeezed the tube a bit so it would fit, then I ground the edges of the dipstick at the bottom to skinny it down so it would fit through.
 
Maybe Cinnabar has some reproduction exhaust manifolds?

My dipstick tube was rotted off. I made a new section from 3/8" brake line and brazed a washer on it to hold it at the right height in the engine. Where it went between the manifold and the head, I squeezed the tube a bit so it would fit, then I ground the edges of the dipstick at the bottom to skinny it down so it would fit through.
Thanks, I did call Cinnabar and left a message. I sent the manifold off to a local machine shop/welder who said he thinks it will be weldable, but no guarantee.
 
Maybe Cinnabar has some reproduction exhaust manifolds?

My dipstick tube was rotted off. I made a new section from 3/8" brake line and brazed a washer on it to hold it at the right height in the engine. Where it went between the manifold and the head, I squeezed the tube a bit so it would fit, then I ground the edges of the dipstick at the bottom to skinny it down so it would fit through.
Cinnabar did get back to me and said they have Left Exhaust Manifolds for a 403 in stock.
 
Screenshot 2025-02-25 at 3.57.16 PM.webp
I would like to verify something. My battery boost system does not work.

I have the

Samlex ACR-160 Automatic Charge Isolator

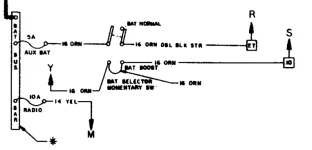
installed. The Status connector on the ACR-160 is connected to Y in the GMC diagram (the orange wire from the Front AUX BAT SW) and the Minus connector is connected to ground through a 5A fuse per ACR-160 wiring diagram.
I am not getting 12V power to Status connector when switch is pressed. House Battery and Engine Battery is at 12.6V, and the 5A fuse is good, and house battery is charged at 12.1V. I assume both battery systems are providing 12V to the boost switch.

I assume the diagram from GMC above shows the momentary switch when it is NOT pushed.

Can an expert please verify that when it is pushed, the two paddles connect to the two terminals below in the diagram? The left paddle provides power from 5A fuse from Engine Battery to the terminal below it (Y and S are connected to it) , and BAT NORMAL goes to BAT BOOST (S and Y are connected to it) providing power from House Battery. The jumper between the two lower terminals make sure power gets to S and Y from 5A fuse and/or House Battery.

R takes "fuse link" power from the long house battery wire, with the connection under the hood after the diode. I assume this powers the switch if the engine battery is dead (labeled as AUX BAT above).

Y sends 12V+ to the coil of the "Front AUX BAT SW"

and

S sends 12V+ to the coil of the "Rear AUX BAT SW".

I have this wiring diagram https://www.gmcmi.com/wp-content/uploads/2020/03/78-chassis-electrolevel-II.pdf

This is making me nuts. I may have to take dash apart to pull boost switch to bench test it and related wires.

Thanks,
Paul
 
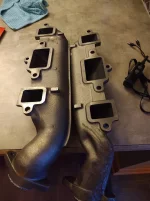
A little late to the party, but Cinnabar does supply brand New OEM exhaust manifolds. They are not cheap, but they are very nice pieces.

These are my old ones...Not too bad here
1741979355378.webp

but this side is cracked...
1741979380527.webp

and got really bad when I started to try to fix it!

1741979410375.webp

So, I just decided to replace them.

1741979437457.webp

1741979448682.webp
 
  • Like
Reactions: pvfjr and Christo