1973 GMC 26' Glacier Build

  • Please note, the forum recently had a problem with outbound emails for notifications, registrations, etc. A new email provider has been set up which should resolve all email issues. If you have any further trouble, please DM Christo or reach out via the Contact Us link in the website footer.
Scott,
Yes, in the early 73 coaches that were all built with electric refrigeration only, there were no exterior vents. All the vents for the reefer were to inside around the reefer cabinet.
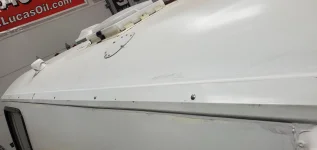
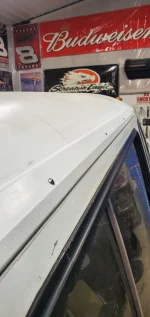
Problem 1: i When there were complaints in hot climates, the dealers cut in both roof and side vents.
Problem 2: Roof and side vents were added. Remember the existing vents to the interior? Those still existed and allowed the outside air (now ~20°F) to flow into the interior.
I closed off the vents to the exterior. I added so computer fans to move the hot air out the reefer box, and they are on a theral switch and they never run. Be aware that residential reefers use the case side as condenser so there has to be room to move cooling air through there.
To my knowledge, none of the coaches were made with more than the single hole in the black tank.
Chaumière is a 23 and so a smaller reefer. I found that a dorm reefer was a great fit. I power it with a cheap Chinese modified square wave inverted and the compressor case runs about 5°F higher than it is on shore power or the generator. Check the price of a 750/1500 inverter from Hazard Fright and make up your own mind.
If you have questions I did not address, come back and I will try again. '73's do have some special cases.
Matt
 
Matt, thanks for the info. I am going to remove the vents and cover holes with aluminum, also I am going with a Victron Energy set up with solar and Lipo4.

Next question, remove and relocate the propane line from wheel well? I plan on running 20lb tanks in place of the dated fixed tank. Has anybody else done this? I searched all over but did not find anything on the subject.
 

Attachments

  • 20230203_084052.webp
    20230203_084052.webp
    1.2 MB · Views: 15
Scott,
I can't help you with the propane lines at all, but while the fixed tank is "dated" (and it is old), be aware that it is an ASTM code tank and as long as it is not mistreated or damaged, it does not require recertification. There may be an owner out there that is looking for one because the replacements are all built to be mounted under the frame and so have large guard structures that make putting them in a GMC impossible.
Matt
Sounds like I might want re-think it
 
Just joined the site, and reading some threads here on the forum.. You've really put some work into your motorhome! I saw a picture with your plate code of 71 so you must be near the South Bend region. I'm pretty local to you.
 
Just joined the site, and reading some threads here on the forum.. You've really put some work into your motorhome! I saw a picture with your plate code of 71 so you must be near the South Bend region. I'm pretty local to you.
Pete, yes I am actually in Osceola so no not far at all, congratulations on your coach! Yes a lot of work in ours and at times I think it will never end, they say take what you think (cost & time) then double it and that probably will be true, lol. We will have to get together sometime this year.
 
  • Like
Reactions: PeteCarney
Scott,
Good work with everything. One thing to check on the old propane tanks is leaks at the valve. The stem can leak, either with the valve all the way open, all the way closed, or somewhere in between. Check all three modes for leakage. I made a post in my build thread about revamping the valve with new o-rings, rubbing compound, and cotton string. Good as new.
https://www.gmcmotorhome.org/threads/the-ferrigno-familys-1975-gmc-glenbrook.342/post-13744
 
Paul, thanks for the advise and link, it's funny how a few of us are working on propane and Jim Bounds post a video about the subject and he did today. I am thinking of just redoing my tank instead of going with 20lb tanks, mine is not to rusty so I might just repaint, repair or change value and put a 2 stage on it with a quick disconnect for grill or fire pit. I asked before about the LP line in the wheel well, I am just going to remove the line and run new line across to the driver side. Here are some pictures of redoing the propane area for the new style enclosure.
 

Attachments

  • 20230207_204106.webp
    20230207_204106.webp
    702.2 KB · Views: 18
  • 20230211_113901.webp
    20230211_113901.webp
    559.2 KB · Views: 18
  • 20230211_115137.webp
    20230211_115137.webp
    768.3 KB · Views: 18
  • 20230211_131823.webp
    20230211_131823.webp
    707.3 KB · Views: 18
  • 20230213_195828.webp
    20230213_195828.webp
    504.4 KB · Views: 18
  • Like
Reactions: pvfjr
Well I have some fitment issues I need to figure out, has any early owners swapped newer propane enclosure?
 

Attachments

  • 20230214_204148.webp
    20230214_204148.webp
    1 MB · Views: 14
  • 20230214_204157.webp
    20230214_204157.webp
    575 KB · Views: 13
  • 20230214_204219.webp
    20230214_204219.webp
    653.7 KB · Views: 15
  • 20230214_204338.webp
    20230214_204338.webp
    1.3 MB · Views: 14
  • 20230214_204344.webp
    20230214_204344.webp
    977 KB · Views: 13
The only thing I can figure out is to use some 1/2" treated lumber under the securing edge of the box, put some sealant between floor and treated then butyl between treated and fiberglass box, screw it all down together. The wheel wells do not have this issue, there must have been some changes in the aluminum structure at the rear. The generator box fits flat but the back side has some differences in the angled area but not as much of a problem as the propane box.
 
  • Like
Reactions: tmsnyder
Well hoping around, I figured before I get the propane box in I need to get the awning mounted so I could reinforce the bottom mount inside the propane box which has led me to the top seam. PO had removed screws at one point and left 2 broken ones, they then replaced with stainless sheet metal screws. As you can see they never cleaned the rail and just added some silicone in spots, took me days to get the original putty out, removed the 2 broken screws and cleaned the rail, I was able to tap the screw holes with 10-24 threads.
 

Attachments

  • 20230226_115903.webp
    20230226_115903.webp
    941.1 KB · Views: 6
  • 20230224_173138.webp
    20230224_173138.webp
    511 KB · Views: 6
  • 20230224_173131.webp
    20230224_173131.webp
    666.5 KB · Views: 6
  • 20230223_202841.webp
    20230223_202841.webp
    469.9 KB · Views: 7
  • Like
Reactions: pvfjr
Finished the passenger side and now working on install of older Zip Dee awning. Used Dicor 551LSW1 White Non-Sag for caps, 3/16" x 1/2" Closed End Aluminum Blind Rivets with Steel Mandrel and Dicor for awning attachment.
 

Attachments

  • 20230314_085222.webp
    20230314_085222.webp
    222.3 KB · Views: 8
  • 20230314_085228.webp
    20230314_085228.webp
    507.2 KB · Views: 8
  • 20230318_145911.webp
    20230318_145911.webp
    431.4 KB · Views: 8
  • Like
Reactions: pvfjr
Got the awning on over the weekend, as I stated before I picked up a used Zip Dee that was missing some parts, picked up the missing parts at Zip Dee on my way back from GMCMI Convention in Chippewa Falls, cleaned up aluminum the best I could, powder coated end mounts and had a black Sunbrella awning made by my local Amish Canvas Shop. I do have the brown & tan awning material available for sale if anybody needs it. I also have a New 18' Carefree tube, black material and LED strip light available.
 

Attachments

  • 20230308_171711.webp
    20230308_171711.webp
    473.3 KB · Views: 8
  • 20230328_185927.webp
    20230328_185927.webp
    272 KB · Views: 9
  • 20230408_135650.webp
    20230408_135650.webp
    2.6 MB · Views: 9
  • 20230415_182218.webp
    20230415_182218.webp
    502.3 KB · Views: 9
  • 20230416_175331.webp
    20230416_175331.webp
    596 KB · Views: 8
  • 20230416_181943.webp
    20230416_181943.webp
    499.7 KB · Views: 8
  • 20230416_182000.webp
    20230416_182000.webp
    565.1 KB · Views: 8
Wow 6 months since last post :( 
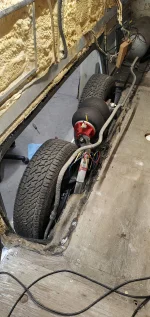
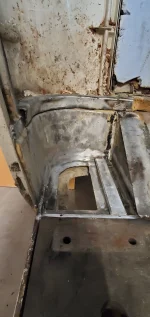
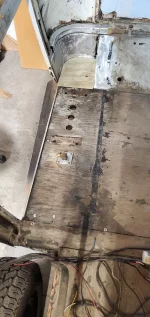
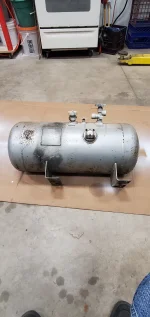
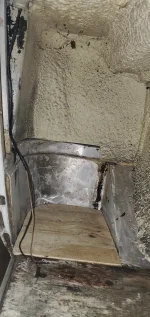
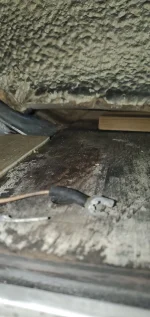
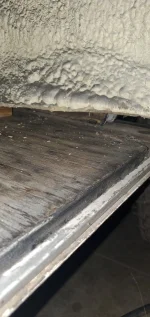
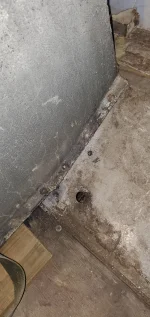
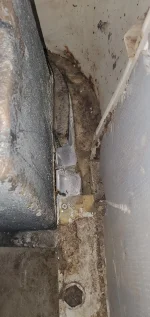
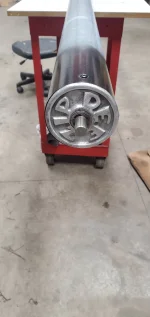
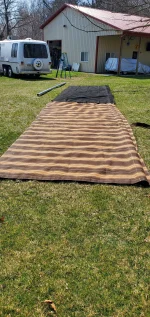
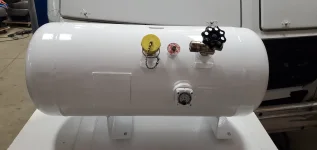
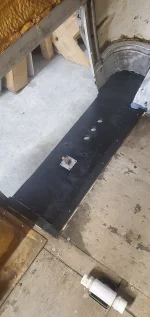
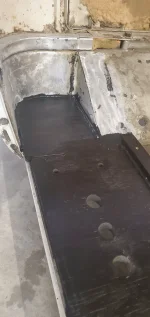
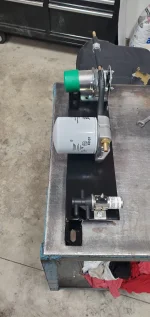
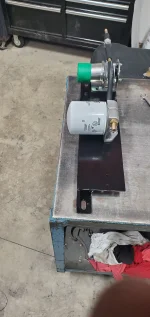
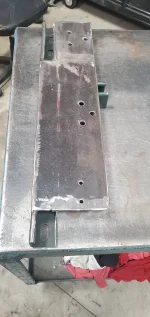
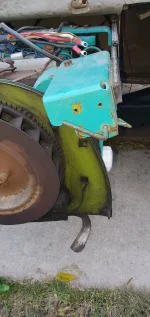
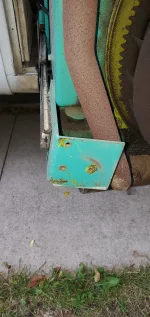
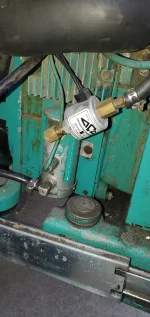
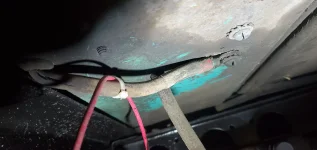
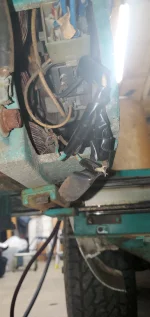
none of this stuff is in order. Finished up the propane tank, cleaned everything up and painted with Appliance Epoxy, had to make a new piece of floor out of 3/4" treated plywood that I routed and painted before install, the only thing we are keeping propane for is stove/oven, grill and firepit maybe.
 

Attachments

  • 20230305_144819.webp
    20230305_144819.webp
    319.2 KB · Views: 9
  • 20230814_192030.webp
    20230814_192030.webp
    808.5 KB · Views: 10
  • 20230814_192226.webp
    20230814_192226.webp
    633.9 KB · Views: 11
  • 20231009_193223.webp
    20231009_193223.webp
    249.5 KB · Views: 10
  • Like
Reactions: Mike_H and Kendra
Sealed up door and windows using Jim Bounds suggestions, 1st gen windows and they still leak at seam where the water channel meets the bottom of frame, finally found pictures of frame assembly and wow no wonder they leak, going to try and stop leaks with some crack seal, if I have to pull the windows I will probably look for newer replacements instead of trying to seal the old style frame.
 

Attachments

  • 20221108_203217.webp
    20221108_203217.webp
    454.1 KB · Views: 11
  • 20221108_203225.webp
    20221108_203225.webp
    576.8 KB · Views: 11
  • 20221108_212522.webp
    20221108_212522.webp
    566.5 KB · Views: 12
  • 20221108_214749.webp
    20221108_214749.webp
    561.9 KB · Views: 11
  • 20221108_214756.webp
    20221108_214756.webp
    558.8 KB · Views: 11
  • 20221108_214805.webp
    20221108_214805.webp
    430.8 KB · Views: 10
  • 20230911_212232.webp
    20230911_212232.webp
    611.1 KB · Views: 10
  • 20230911_215558.webp
    20230911_215558.webp
    679.8 KB · Views: 11
  • Like
Reactions: pvfjr
Added Carter electric fuel pump, Wix filter and moved all including selector switch out side frame rail before our trip to Fall Convention. Used some uni-strut for use of existing bolts in frame and allow parking brake cable to run behind plate. Fuel pump is ran off of Aux tank switch only if needed, usually run it for cold starts, was not needed for trip to convention, also have mechanical 3 port with return line to fill tube.
 

Attachments

  • 20230702_161517.webp
    20230702_161517.webp
    423.9 KB · Views: 8
  • 20230702_161509.webp
    20230702_161509.webp
    304.7 KB · Views: 8
  • 20230701_120914.webp
    20230701_120914.webp
    636.6 KB · Views: 8
  • 20230701_120903.webp
    20230701_120903.webp
    591.1 KB · Views: 9
  • 20230701_120019.webp
    20230701_120019.webp
    651.5 KB · Views: 9
  • 20230629_203917.webp
    20230629_203917.webp
    795.9 KB · Views: 9
Getting started on my Onan 6K generator, looks like I have got a lot of work ahead of me. Going to start tonight with basics, compression, spark and fuel. She turns over my hand so not frozen, feels like it has decent compression but will hook up battery tonight and get some compression numbers. Looks like the mounts are so bad that the sliders are twisting, definitely needs a re-wire, battery cable is split were it comes through base plate, board appears fried, needs a muffler and front seal.
 

Attachments

  • 20231024_181325.webp
    20231024_181325.webp
    346 KB · Views: 12
  • 20231024_181333.webp
    20231024_181333.webp
    350.2 KB · Views: 13
  • 20231024_181351.webp
    20231024_181351.webp
    964.8 KB · Views: 13
  • 20231024_181441.webp
    20231024_181441.webp
    620.4 KB · Views: 12
  • 20231024_181448.webp
    20231024_181448.webp
    822.2 KB · Views: 10
  • 20231024_181502.webp
    20231024_181502.webp
    806.3 KB · Views: 9
  • 20231026_181607.webp
    20231026_181607.webp
    709.4 KB · Views: 10
  • 20231026_181623.webp
    20231026_181623.webp
    398.2 KB · Views: 11
Looks like a bit of a project, but I think they're generators worth saving. Man has that board seen better days! Might be salvageable still, but there's no shortage of bad components on there. What do the traces look like? Plenty of corrosion in other places.

It seems someone has monkeyed with some of the wiring already too. Seems to have a custom rectifier job as well. Fortunately you don't really need the board to test the generator. You can just bypass it and ensure the gen is worth saving first. Have fun!
 
  • Like
Reactions: ScottC