I dug out my patch panel and started sketching out the outline. I'll be cutting the original panel back a ways to get rid of all the fine cracks.
Paul,
When you finally work out the Heater core thing, post final pics part #'s and core application to this and the other GMC forum. Also maybe to the GMCMI parts exchange. Thats a GREAT find!! A number of years ago I replaced my radiator with an aluminum, and also replaced the 7lb cap with the 16lb recommended for the aluminum. That turned out to be a mistake as it was shortly after that the heater core sprung a leak an had to be replaced. IMO, it might be a good idea to run with a lower pressure cap or cap recommended for the Econoline core that you are using. Just what I think. Looks like you are doing good work. Nice to watch the progress.
Thanks, Larry. The Spectra part number I'm using is 94584, and was available from Oreilly's as a Murray #94584 as well. Pulled it out of the box, and it had the Spectra sticker on it anyway (should be shown in the pics in previous post).Paul,
When you finally work out the Heater core thing, post final pics part #'s and core application to this and the other GMC forum. Also maybe to the GMCMI parts exchange. Thats a GREAT find!! A number of years ago I replaced my radiator with an aluminum, and also replaced the 7lb cap with the 16lb recommended for the aluminum. That turned out to be a mistake as it was shortly after that the heater core sprung a leak an had to be replaced. IMO, it might be a good idea to run with a lower pressure cap or cap recommended for the Econoline core that you are using. Just what I think. Looks like you are doing good work. Nice to watch the progress.


The front has had quite a bit of weight already removed for other reasons, and I'm pretty set on utilizing the triple tray for its intended purpose. The space in the back hatch will house a similar weight in tools, something I'll need more regular access to. I don't intend on swapping the batteries very often, so I'll use the less convenient storage area in the front for those.Paul,
If you put the big battery tray there, use it for other storage. Keep the house bank in the rear and get the full pull tray for the batteries back there. You can save the weight on the front.
Matt
 Time to order a whole roll of tubing I suppose.

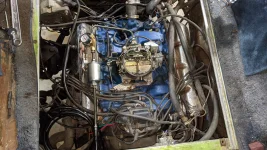
Unfortunately that fan shroud not covering entire radiator is a factory gm oem thing.Question:
Can you still call them "tranny cooler lines" if they're touching the headers?
View attachment 4414
I also noticed the fan shroud doesn't cover the whole radiator. Great, another hack job I get to redo.
View attachment 4415
Wait, what? This is a factory hack job? Oh boy, I didn't see that one coming.Unfortunately that fan shroud not covering entire radiator is a factory gm oem thing.


I really put the 496 and Allison to work coming up the hills! Combined weight was around 20k, and it did pretty good. I couldn't help but think the 496 would make a great transplant into the GMC.
It's a 2004, factory engine with 306k on it. It is effectively a stroked out 454 block, but with more LS type tech grafted onto it. Cathedral style heads, coil packs, etc. Average mileage with the crew cab long bed with mud terrains is 8.5 though. That's a lot of barrels if you add it up over the course of 306k miles.Is that a 454 you stroked? What year truck?


Once I find my coach in a painted and buffed state, I'll think about it...Paul,
I don't think you have enough to do. Could you come over and buff out my GMC?