1975 GMC Palm Beach Restomod
- Thread starter Mike Perez
- Start date
You are using an out of date browser. It may not display this or other websites correctly.
You should upgrade or use an alternative browser.
You should upgrade or use an alternative browser.
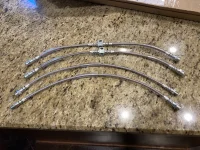
Another project I'm going to work on when I get some free time is the tail lights. I'm sure everyone has seen the updated tail light kit, but I don't want to change out the lenses and then just put small bulbs back in. Since I have the furniture and panels out of the rear, I have access to remove the tail light housings completely.
On the tail light retrofit kit that is available from the Peek family, the holes in the new lenses don't exactly line up with the old housing. It requires a big of messaging. I'm going cut a new housing out of aluminum that bolts back into the body in the original holes and then tap holes that are placed in the correct location for the new lenses.
The big update is going to be bright LED lighting. The upper stop/tail/turn section is approximately 7"x3". The bottom around the reverse is around 5"x1.5" if I recall correctly. The new housing will have a divider built in to separate the clear from the red sections.
I've found some light that I think will work, but they are a bit spendy and I need to make sure they are not too thick. Stay tuned.....
Sounds like a cool way to go.....
I opted to just update the bulbs but i wish someone would install something out of the new Vets or Camaro (just the bulb section that has that sort of slant or slash to it)
I opted to just update the bulbs but i wish someone would install something out of the new Vets or Camaro (just the bulb section that has that sort of slant or slash to it)
Here is what I’m doing with the left side of the firewall. My original plan was to take the heater duct out, but I’m going to utilize it to hide the hose that goes to the heater floor vent.
I removed the oversized light on the firewall which frees up some room to the left of the heater duct. There I’m mounting the fuse box, and the ECM for the engine. The cut out is for the Vin plate. To the right is the battery disconnect for the chassis battery and a Blue Sea Systems automatic charging relay.
This pretty much takes up all the room to the left of the HVAC box.
I had an idea for the light under the hood. I’m going to try to utilize the existing hood hinge mounting points and just cut a little aluminum strip that mounts the hood hinge holes from the inside, Then I’ll use an LED strip light there. Hell, while I’m at it, I might as well put some lights in the engine compartment in case of nighttime repairs.

Got a vist from the "aluminum fairy" last night. This is 1/2" thick aluminum plate cut-to-size (hopefully correctly) that will fill the hole under the driver and passenger seat that was once plywood.
On the original floor, GM took 1" marine plywood and actually routed out the pattern so the wood would sit down into the aluminum extrusions. If you look at it from underneath, the wood sits flush with the bottom. So although the wood is 1" thick, it does not sit above the body 1". It ends up being closer to 1/2". Dimensionally, it is important to keep this correct so there the floor does not interfere with the side panels when they go back on.
It will have 12 holes drilled around the perimeter through the original holes in the cockpit floor area. I have to order some countersink bolts that will allow the aluminum to sit flush with the bottom of the wood floor. There will be backing plates around the perimeter instead of washers. Now that it is aluminum instead of wood, the beefy main cockpit crossmember which is where the seatbelts attach will be connected to the floor structure directly.
That should stiffen that whole structure up as well which may have great benefits as well!


Very nice.
What's your plan for sound deadening and heat rejection there? That's going to want to get quite hot.
What's your plan for sound deadening and heat rejection there? That's going to want to get quite hot.
Very nice.
What's your plan for sound deadening and heat rejection there? That's going to want to get quite hot.
What, you think a 26 lb chunk of aluminum may be a heat sink or something? ?
For starters, I'm going to coat the entire underside of the floor and the hatch with Lizard Skin. That should help with sound, heat, and it will waterproof any exposed wood. The insulation above is to be determined. I haven't decided 100% on the flooring, carpet vs wood laminate. Either way I'll probably use Hush Mat, or something like the heat/sound insulation padding that is commonly used in Jeeps under the thin carpet. If you've ever driven a Jeep with the carpet out, you quickly realize how much insulating that stuff provides because the metal transmission tunnel will burn you after driving for 20 minutes.


I haven't decided 100% on the flooring, carpet vs wood laminate. Either way I'll probably use Hush Mat, or something like the heat/sound insulation padding that is commonly used in Jeeps under the thin carpet.
View attachment 1779
This is exactly what I want to do in the cockpit of my coach. Where did you get your HushMat and how much do you need to cover the whole cockpit floor? Thanks Mike.
This is exactly what I want to do in the cockpit of my coach. Where did you get your HushMat and how much do you need to cover the whole cockpit floor? Thanks Mike.
I haven't measured the square footage, but you can buy it here:
Online Retailers for Sound Dampening Material | HushMat
Find a HushMat online distributor. Pick a store to see their location, address, phone number, hours, directions and more.
 hushmat.com
They also have a search for local retailers on their website.
I'm also replacing the aluminum firewall insulation which has completely disintegrated.

Those look great! Are they cushy, or do they actually feel like they're from a Japanese vehicle? I look forward to seeing them installed and reclined.Seats are here. Very good shape for used
Those look great! Are they cushy, or do they actually feel like they're from a Japanese vehicle? I look forward to seeing them installed and reclined.
They are not super plush like a typical RV seat. They are very supportive and comfortable. Testing them out in the garage:

Got one of the plates permanently installed with the backing plates/washers before It started raining and before I lost one lock washer. Back to the hardware store for me.

I have a nice pair of front seats that were installed by PO. I believe they came from some newer Winnebago. They are power and have forward/backward slide, swivel and recline. Very comfortable for driving and its nice to have two extra seats way up in front when we are parked. I'll try to take a photo if you are interested to see them.Interesting. I've never seen seats that have all three things....swivel, recliner function, and slides. I've seen combinations of those three, but never all three in a single seat.
In the "stupid ways to mount a seat department.....check out the drivers seat from my coach when I bought it. That is a air ride trucker seat. It was seriously heavy. You can imagine my surprise when I found that it was attached to the floor with nothing but a few bolts through the plywood. ?
View attachment 1721

But do they have seatbelts?I have a nice pair of front seats that were installed by PO. I believe they came from some newer Winnebago. They are power and have forward/backward slide, swivel and recline. Very comfortable for driving and its nice to have two extra seats way up in front when we are parked. I'll try to take a photo if you are interested to see them.
Had to trim half a blade worth on each side, but now it they drop right in.
Did you use a table saw?
") Aluminum cuts like butter on a table saw with a carbide blade.
Aluminum cuts like butter on a table saw with a carbide blade.Circular saw with a guide clamped on to the piece. I've cut through aluminum sheet a bunch with that saw, but this 1/2" thick plate killed the blade.Did you use a table saw?

