The Ferrigno Family's 1976 Palm Beach

The old chain was a little looser than I expected for a double roller after turning the crank to get the slack all on one side. I decided to put in the standard timing set I had on hand. I'm still not sure what brand the old set was, but it doesn't look like the double roller Cloyes set sold these days.
View attachment PXL_20230625_195335978.mp4

This is with no cleanup. I'm pretty happy with how the engine looks inside. I'm surprised how clean the coolant passages are!
PXL_20230625_200234472.webp PXL_20230625_200240421.webp

New chain went in without a hitch.
PXL_20230625_201153673.webp

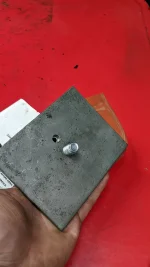
There isn't a lot of good info for front crank seal installation depth. The rubber was separated from the old metal shell, but you can see where it used to sit. I installed the new one in about the same spot since the balancer isn't grooved on the sealing surface.
PXL_20230626_023224518.webp

PXL_20230626_023214884.MP.webp

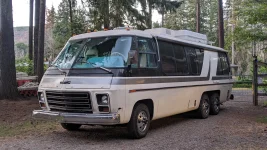
I took a sunset break with the old dog and the old Pathfinder to return a Redbox for the wife. A sight that never gets old.
PXL_20230626_033627685.MP.webp
 
  • Like
Reactions: Blur911
Things get a little silly after dark sometimes. I'm missing 3 Alcoa center caps, and am sick of looking at the unsightly holes, rusty wheel spacers and dust caps. I fashioned some improvised center caps courtesy of the Walmart Deli! A little trimming on the band saw brought the diameter down as needed.
PXL_20230626_002305978.webp PXL_20230626_061806099.webp
PXL_20230625_024051713.webp
 
The passenger half is the original; the driver's half is from the parts coach. Definitely better chrome on the original, but the original driver's side bumper wasn't salvageable. It took some bracket pounding on the anvil just to get this far. Once I roll it out of the shop, I'll see if the forklift can pull out some of the twist. I may be in the market for new front bumpers though.
PXL_20230627_033844218.webp

I reinstalled the timing cover as well. That wasn't fun by myself. Getting that rubber oil pan seal into place was a challenge. It almost seemed too thick, and really fought against lining up the dowel pins. It got messy with the gasket sealer and rtv... And frustrating, and exhausting. Then I realized I left out the oil slinger! Had to start over. Sheesh, was I ever mad; good thing my wife was in bed--she wouldn't have appreciated my vocabulary. 😂 But it's done. I got the water pump bolted on too. No pics, there was too much gasket sealer everywhere to break out the phone.
 
Well tonight wasn't as productive as I'd hoped. I was supposed to only have one kid, one that's pretty self-sufficient at that, and a buddy was going to come over and help all night. Instead I ended up with two kids, one of them puking, while the wife was out doing other stuff. Then I had a neighbor kid that needed to come over and press out a wheel bearing so he could get his only car up and running again, so that took a little time. Got started about 10:00 tonight, thought I'd do something simple like exhaust. Managed to get the pipes but welded, but it seems like it'll be a two-person job to get it slid back into place. Crossmember holes don't seem to have quite enough clearance with the c channel where it rises up by the back bumper. It took a lot of yanking to get the old straight pipe out, but now putting it back in it's going to take a lot of shoving and prying to get the leading end to go through the holes. I guess that'll wait for tomorrow.
PXL_20230628_044241587.MP.webp
PXL_20230628_045121113.webp
 
  • Like
Reactions: tmsnyder
What did you use for a cap to pressurize the MC to pressure bleed it?
I finally snapped a couple pics. Never mind the 1/2" bolt, the only thick piece of plate I had that was wide enough just happened to have a 1/2" hole in it already so I grabbed an o-ring and a bolt and plugged it.
 

Attachments

  • PXL_20230628_061443795.webp
    PXL_20230628_061443795.webp
    410.9 KB · Views: 10
  • PXL_20230628_061448761.MP.webp
    PXL_20230628_061448761.MP.webp
    442.5 KB · Views: 9
I finally snapped a couple pics. Never mind the 1/2" bolt, the only thick piece of plate I had that was wide enough just happened to have a 1/2" hole in it already so I grabbed an o-ring and a bolt and plugged it.
You inspired me to make my own, I only had 1/8" plate, but it worked. I had some sound deadening rubberized padding I put on the sealing side. Only used about 4psi so plenty good even if it leaked a little air.
 
  • Like
Reactions: pvfjr
It took a lot of work, but the exhaust has been shoved back in through the cross members. It was tough working through the interference with the rear frame rail. It's all clamped in now though.
PXL_20230629_054853405.webpPXL_20230629_054842414.webp

The local shop did a great job replicating the old tail pipe. It fit like a dream.
PXL_20230629_054119755.webp

A friend came and helped a lot this evening. We pulled the transmission pan, changed out the shift shaft o-ring (#012), and got the front motor mount bolted up.

I also have keys for the electric hatch, door, and glovebox! But, the water fill hatch didn't match... Ugh. I had to break into it. I pried it open 7mm to get my borescope in, and used a 90 degree radiator hose pick to dislodge the lock cylinder retainer clip. Thankfully, no deformation to the hatch door. I'm not really sure why the water fill needs locked anyway.

I also played around with parking brake cables quite a bit tonight. I've just about got that all figured out.
 
Well it took quite a while to find a steel pan under all the grime, but I finally got it cleaned up and got a fitting welded into the pan. I didn't have a bung, but I was able to recess a steel coupler into the pan which should work just fine.
PXL_20230630_024003729.jpg


I need a source one more of these '90s equalizer brackets to serve as a coupler on the other side, but I'm getting so close to having the parking brake done I can taste it. It tastes gritty, mostly.
PXL_20230629_194614823.jpg


Another casualty of the accident she was in; what I'm calling the crossmember strut brace. This one was pretty darn bent up, and one of the holes was ripped clean through on one end. Thankfully the mounting points were not affected, so I just pulled a new one from the parts coach and bolted it on.
PXL_20230630_023441545.jpg


I'm down to all the little tasks that start to add up. Thankfully all the major projects seem to be done, except for putting all the engine accessories back on. I'm on the home stretch though and I hope to have her sitting on the ground again tonight.
 
  • Like
Reactions: tmsnyder
Well I knew the upper and lower dipstick tubes had become separated at the compression fitting, so it's something I've had on my list as one of those small tasks to reconnect it. Well, I grossly underestimated what I was in for. The dipstick tubes did not merely become separated; the lower dipstick tube is completely destroyed. It looks like it was crushed quite some time ago, and has holes in it. I wondered why the dipstick was tricky to insert in to the tube, but now it all makes sense. Part that really stinks is trying to get the new one inserted. The guy has no chance of seeing or even touching the hole in the block and inserts into. I can't get my boroscope to hold still long enough to do anything, and then the battery died. Frustration levels were going to a thousand percent, so I didn't make it to my normal 2:00 a.m. cut off time. Hopefully I can figure out something smarter. On the plus side, I think I was able to manufacture a decent replacement for the lower dipstick tube. Hopefully I can find a way to get it in.

PXL_20230630_045320894.jpg
 
Last edited:
  • Like
Reactions: tmsnyder
I crossed a huge number of things off the list today. I got the cooling system all put back together, reassembled the front of the engine, got all the wheels torqued down, filled up the transmission, change the engine oil, and countless other little things. We got it back down on the ground, fired her up, and drove her out of the shop!
PXL_20230701_031253848.webp

This is her first time seeing daylight in a long time. The brakes feel good, the steering feels good ( at least in the driveway that is ) and the transmission is shifting in and out of gear much better. It actually has park, which is awesome. I've even got the parking brakes working, though they could use a little fine tuning once I get the shoes to self-adjust a little better.

But, and this is a big but, the noise that I had hoped was a loose timing chain all this time is still present. I can hear the engine better now that the exhaust isn't completely rotted away, and I'm hoping that I'm hearing some valve train noise. At this point I'm thinking it would be imprudent to take it camping tomorrow morning, so now I'm switching over to getting the blue Glenbrook ready to go instead. Very disappointing, but at least we know what to expect with the old blue one.

The undeniable truth of the matter is, this trip was not shaping up to be an appropriate shakedown run anyway. 250 mi towing a 4,000 lb boat is just a little absurd with so many unknowns. Not only that, it's supposed to be 100° on the last day of our trip coming home. I know that the Glenbrook won't overheat ( it might suffer from vapor lock, but we know how to deal with that ).
 
  • Like
Reactions: tmsnyder
I can hardly believe it, but it's been 6 weeks since I've touched this thing! Ugh. Battery was dead. I really need to install a combiner so the power converter can take care of the engine battery in addition to the house batteries.

Tomorrow our rural fire department is putting on their annual car show, and it's always a good one. It's only a couple miles away, and it's a great show, so I've decided to take the Palm Beach! I'll use this as an opportunity to work some MMO into the engine--maybe my tick will magically go away (I've had luck before).

So in preparation (in the 11th hour tonight), I started tidying up the interior. She cleans up pretty good. I also got a new phone that does wide-angle shots, so that's handy.

PXL_20230819_044044334.MP.webp

PXL_20230819_043944308.MP.webp

PXL_20230819_044113735.webp

PXL_20230819_044021796.webp

PXL_20230819_044100416.webp
 
Last edited:
It's beautiful! :)
Thanks! There's a lot of little things I would've done differently, but I think it's a great starting point. The PO was a little sloppy with paint, and unfortunately the wall panels are very buckled due to humidity. So wall panels need complete redoing. They also didn't come out curved at all, so its hard to fold the bunk down into couch mode, as the back rest sticks out a bit (the foam is extra thick too).

We did end up taking it to the car show and had a lot of fun yesterday. There were a lot of younger folks discovering GMCs for the first time, and some older ones recalling memories of them from years past. All were welcomed to venture inside, and most did.

No one even asked about the holes in the front end; I'm sure it bugs me more than anyone else. My wife I was looking for a little table to spread our binder on (and hotwheels GMCs, of course) and my wife reminded me of our vintage fold-up picnic table. I took it along and it came in handy while the kids hung out.

1692567247542.webp

1692567377376.webp

I was approached multiple times at church this morning with, "I heard that was your motorhome at the car show yesterday..."
Haha, you've just gotta love small towns.
 
  • Like
Reactions: Mike_H and bdub