Well, I’m lining up more projects and the next one is some-kind of paint job for her. As I’ve heard the cost of a paint job i’m trying to do the up front prep to get it ready for the overall paint job. My thought would be to do the sealing and fiberglass work before the roof gets painted. I have been considering the micro fiber roller and backbrush method or would a sprayer be better?
Also, my leaks in the past seem to be coming from front windshields and side windows as well as the back windows from somewhere. I know the awning side gutters are a issue but mine look like they are in decent shape but I could provide pictures to allow more experience eyes than mine to determine that. My other water sealing question is for the front and back fiberglass to aluminum seam. They again look pretty decent but I can take pictures. My question is, if I were to redo the seal do i dig it all out or simply lay another sealing bead over whats already there after cleaning them?
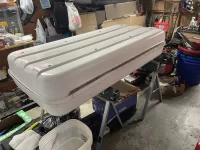
Oh PS: I forgot to ask if there is anything special on these rubber grommets on the luggage carrier, thought I’d clean it up and put new ones in.
Thanks,
Tom
Also, my leaks in the past seem to be coming from front windshields and side windows as well as the back windows from somewhere. I know the awning side gutters are a issue but mine look like they are in decent shape but I could provide pictures to allow more experience eyes than mine to determine that. My other water sealing question is for the front and back fiberglass to aluminum seam. They again look pretty decent but I can take pictures. My question is, if I were to redo the seal do i dig it all out or simply lay another sealing bead over whats already there after cleaning them?
Oh PS: I forgot to ask if there is anything special on these rubber grommets on the luggage carrier, thought I’d clean it up and put new ones in.
Thanks,
Tom
Attachments

Last edited: