I just spent the last two full days changing out all the control arm bushings, uppers and lowers. What a job, I'm whooped.
The uppers, I could see the rubber was crumbing off the exposed parts. They weren't too bad but I pressed them out using my hydraulic press. Digging around the garage there was a perfect diameter sleeve to use as a spacer. It just needed a little removed with my lathe to make the length right, cut it in half to make two shells to wrap around the old bushing for pushing out. Further digging, a socket made a perfect tool to push the little end out, and a piece of exhaust tubing (trued up in the lathe) on the bottom and they came right out with no damage to the control arm.

One offset bushing was installed with the arrow pointing away from the ball joint on the rearward leg of each control arm. Regular bushings were installed in the front one.

On both the upper and lowers, you can't press directly on the bushing b/c the arm itself is in the way, I had to push on a bar supported on blocks on one end, and reaching into the spot I wanted to push on the other end.

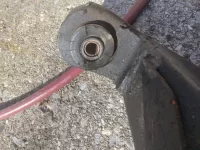
The lowers, they looked like the pins were no longer in the center before disassembly.... Boy was I right, once the control arms were out in the light of day, the lowers were obviously shot, the centers were almost touching the outside!


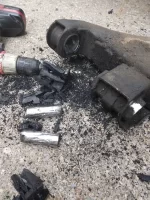
To get those out, I had to attack the rubber with a 3/8 drill bit and once most was gone the rubber and center fell out. Notice the white paint on the torsion spring socket, before disassembly I cleaned up spots on the spring and the arm and put white paint on them to aid in getting them assembled correctly.

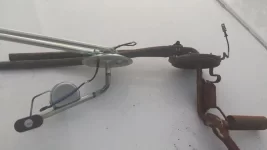
Crude but effective.
Then I sliced the old bushing shell with an angle grinder a few times at the tip of the arm, not touching the control arm, then bent the shells inward with a chisel to collapse it, making it smaller so it would slip out.

To press in the new ones, I found that exhaust tubing scraps fit perfect around the rubber to push on the tiny lip they give you for pressing. Using the lathe, I turned one slice about 1/2" tall for the top, and another slice about 3/4" tall for the bottom. The bottom support needed a little bit ground off to bridge the area between the hole and the stiffening bend in the control arm. I made a spacer from the tubing as well to prevent the control arm from crushing.
Day 1 I got one side apart, made the tools needed for pressing, pressed the 4 bushings in and reassembled the driver's side.
Day 2, I pulled the passenger side apart, rebuilt the control arms, got it back together, reinstalled the torsion springs (what a PITA) and did an alignment. Set the toe using strings on 5 gallon buckets at each corner, 101 inches apart, ~5 inches off the rear most tires, 8" off the center hub of the front wheels so it gave me 2 parallel lines to measure off. (This is just for me to reference later if I ever want to check the toe.) Got the toe set right at 0" Then used a caster/camber gauge to set the caster at -0.25* and caster at 3.75*. To make it easy on my tires and steering, I set the front tires on some scrap pieces of sheet metal. Two on each side with a glob of grease between the two. Made turning the wheel really easy.
Hopefully the handling will be a bit better, it wasn't bad before but it did have a 'tail wagging the dog' feeling with lane changes / winding roads. Seemed like if you made a turn, the front would dig in and the rear would rotate around and it would end up turning more than intended. And it didn't have the caster it needed, wouldn't track / return to center on its own if you took hands off the wheel. Hopefully this will help fix those driving problems.


