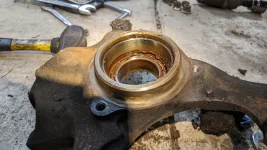
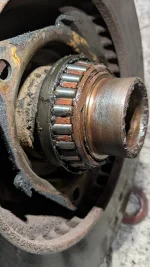
I started working on the front wheel bearings. I removed the CV axle nut and the caliper. I then gripped the disc/hub assembly and wiggled it off by hand! Uh oh. The manual shows usage of a large slide hammer to accomplish this task, so something was amiss. I got things apart and could see the inner bearing had a lot of clearance on the wheel hub's shank, rather than being a nice press-fit anymore. So, this hub will need spray welded and machined. Great.
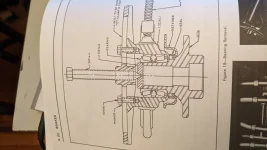
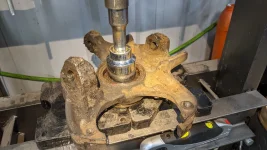
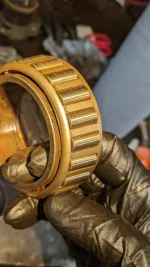
The good news is, I actually had to press the races out of the knuckle. It didn't take a lot of work, so they weren't super tight, but it was a 20 ton press after all. I'm going to say the knuckles are OK. We'll see how the new races fit going in.
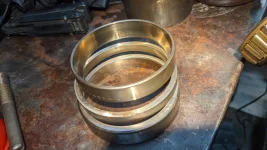
This RV had bad bearing noise going down the road. The rearmost drivers bearing sounds pretty bad spun by hand, but hard to say how much of the racket was rusty brakes dragging. Judging by the looseness of the front wheels, I expected to see metal shavings and pitting, but I didn't. There's a light rust contamination color to the grease, I think, but I see no pitting on the races or rollers. There's a hint of scoring, but nothing I can feel with a fingernail. Odd.
Even weirder, is when I initially removed the cotter pin, the nut didn't feel very tight. So I tightened it, and all the slop in the wheel bearing basically vanished! So, did someone fail to see how these bearings work? Did they tighten the nut "finger tight" as if they were run-of-the-mill adjustable tapered roller bearings on a spindle? Yeesh, I shudder at the thought. A gambler might tighten them up proper and roll the dice, but the fact is, they've been driven on in an improper arrangement, and the innermost bearing race isn't holding tight to the wheel hub's snout/shank/whatever. So I'm going to do these up right. But, I don't wish to spend a couple grand shipping things to Dave Lenzi, so I've got some feelers out for an ag repair place that works on shafts.
Not sure if it works, but this attachment is a video:
View attachment PXL_20230316_045051078.mp4