1975 GMC Glenbrook

  • Please note, the forum recently had a problem with outbound emails for notifications, registrations, etc. A new email provider has been set up which should resolve all email issues. If you have any further trouble, please DM Christo or reach out via the Contact Us link in the website footer.
Last night I took the distributor apart and swapped the pickup coil. At first, I couldn't get the distributor to turn. The calipers revealed that the old pole piece had 1.456" between the peaks on the pole piece, which left .005" or so of clearance against the tips of the opposing teeth. The new pole piece had only 1.420" between its peaks, which caused interference. Ugh. More ill-fitting parts. This is becoming an annoying trend. Luckily my old pole piece showed no cracks (which is one of the failure modes that can cause hard starting and erratic timing over RPM ranges), so I swapped it over with no issue. So I've got the new pickup coil with the reversed polarity, and the old pole piece.

I got the distributor swapped back in. Previously, it was hard cranking--as if it had WAY too much advance. If I retarded it, it would crank easier, but ran terribly. It was difficult to find a setting that allowed the starter to turn the motor over fast enough for a start (or at all), and still have a decent idle. After swapping the pickup coil, it cranked right over with much more enthusiasm AND idled smoother. Amazing.

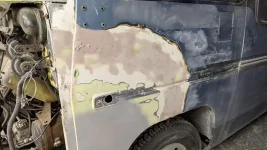
What a stupid problem. I kind of feel bad for the PO. 3 carburetors, phenolic spacers, electric pumps, piles of new ignition parts--he threw the works at this thing, and it never ran great. That must've been frustrating. Perhaps there was an element of relief when someone collided into the side of it! :LOL:

Now all I need to do is bore a hole in my bell housing and make some new timing marks. I just found my new-in-the-package piston stop; I wasn't sure I'd see it again after the move. I can't wait to get it back on the highway and see how it climbs. I was constantly adjusting the timing for different conditions earlier. A setting that allowed easy starts wouldn't allow for slow cruising and idling around town, so I'd adjust it after starting. A setting that allowed slow cruising and idling wouldn't allow for high speed hill climbs, so I'd adjust it. That sure did get old.
 
I've put off the fiberglass long enough, telling myself I ought to do this or that first while I still have good access. I was also unsure how I wanted to handle shoring up the backside. I needed something to bring the faces flush and keep everything in alignment, so I could remove my clamps, grind, feather, and do the layup. I tossed around some different ideas of how to do it without access to the backside, but they all seemed like half measures. So today, I finally pulled out the seat and the side panel so I could do a mini layup on the backside. This will hold it all together, give me a layer to grind down to, then I can build it back up.


PXL_20210613_003314754.webp
Prepping a clear strip on either side of the seam, getting rid of foam, sanding, and cleaning.

PXL_20210612_233820301.webp
Shimmed a couple clamp surfaces to make up for unequal panel thicknesses. Gave the alignment a final tweaking.

PXL_20210612_232551076.webp
Got my cart all cleaned up and prepped. I'm trying to perform a task in an organized and well-prepared fashion for once. Once that cup is mixed and the timer starts, there's no room for foolishness!

PXL_20210613_010643138.webp
I made a guesstimate about how much resin I'd need. Here's the leftovers from the first layup on the back side. That was very satisfying. It's tricky, since you don't want to run out in the middle of the job. You don't want to make too much though, at $125 per gallon!

I didn't take pictures of the layup itself. It's a waiting game now. Hopefully the morning will reveal a nicely hardened layup. Fingers crossed that I haven't cemented my clamps in place. As always, the glassing got a little messy.
 
Last edited:
The wife and daughter are away for the weekend, so I had a four-year-old "assistant" whose sole focus was on whatever I'm doing. It sure is easier getting something done with his sister around to distract him. Poor little guy seems to always be in my path as I move around, just wanting to stay close and having a keen interest in whatever I'm working on. We're working on developing an intuition about giving a guy "room to move" as he works. We're also learning what it means to "box somebody in", and how to avoid that. :LOL:

He did enjoy troubleshooting some air leaks with me. Finding bubbles is within his realm of expertise, and he lit up whenever he could help find a leak. I've noticed my compressor runs anytime the coach is started. It'll bleed down overnight. The coach doesn't lose any height on "hold", so I figured I ought to check all the lines and fittings connected to the tank pressure.

Thankfully, none of the work I've already done is leaking. It's all old stuff that I haven't messed with yet. Hopefully I can just clean up a few connections and redo them with good sealant. There will be a couple parts to replace...

PXL_20210612_212156258.MP.webp
The first discovery was the pop-off valve. That's a bummer.

PXL_20210612_212631914.webp
Next up was the connection just upstream from the check valve. I might let this one ride. It's basically an automatic unloader, right? It's pretty slow too.

PXL_20210612_213018547.webp
Then there's one of the two pressure switches. I've never had an electrical connection leak air before, but there you go.

PXL_20210612_212604692.MP.webp
And finally, we have the starboard ride-height valve at it's tank pressure connection. It looks like it's just the threads for the adapter, so that should be a $0 fix.
 
Last edited:
I also robbed the engine hatch cover and stock air cleaner out of a parts coach. Then I discovered that my new fuel-line setup is in the way of the stock air cleaner. It's the first stock air cleaner I've had my hands on, and boy does it wrap down around that carb! Swell. Maybe I'll rework that, I guess. And just when I was so pleased with the fuel system. That just figures. Oh well, I kinda like using the bender and hydraulic flaring kit anyway.


PXL_20210612_213959270.webp
I'm really going to enjoy a flat floor, instead of that cockamamie concoction that weighed a ton and was falling apart, and had no means for securement.
 
Last edited:
I went out this morning to check out the backside layup. It turned out really well, and the two pieces were joined very securely.


PXL_20210613_191313960.webp
It was time to start grinding. It looks like this coach has been three different colors. It's no wonder the third coat had issues. I'll have to take it down to bare when I want it to start looking nicer.


PXL_20210613_195803567.webp
I ground the seam all the way down to the new substrate, then feathered the grind out a few inches on either side.


PXL_20210613_204327572.webp
I got the initial layup done on the front side. I started with narrow strips, and got progressively wider. This initial layup mostly fills the deep part the the valley. Tomorrow I'll cut some wider cloth to taper into the rest of the body panel. I probably had 8 or 9 layers on here before I started approaching the end of the resin's working time.
 
Where Chaumière's left cheek got punched by the bumper, I cut the crack open as best I could and then cleaned and laid 18-8 stitched bi-ax behind it. I'm going to finish fill with micro-lite and then just fair and paint.

I bet yours comes out better than mine will.

Matt
 
Where Chaumière's left cheek got punched by the bumper, I cut the crack open as best I could and then cleaned and laid 18-8 stitched bi-ax behind it. I'm going to finish fill with micro-lite and then just fair and paint.

I bet yours comes out better than mine will.

Matt
I'm sure your repair is up to snuff, but I appreciate the words of confidence.


1623993040108.webp
I did sand the first layup to smooth it out and scuff it up. I'm pretty happy with how it came out. As I had expected, there was a little room for some more layers. Perhaps a little more room in some areas than others, but that's OK. The goal is to get as much glass in there as I can, and maybe have to grind off some excess if necessary.

I went ahead with the 2nd, and much wider layup last night. I can't wait to sand it and block it, and see how much filler I'll need. It feels like things have a chance to start coming together soon!
 
Last edited:
Paul,
When I used to do a lot of boat work, I bought West Epoxy in the 5 gallon size for a season.....
Never had a mix failure. But I always used the pumps. Now I have to mix by weight because nothing I do can use as much as a single pump.
Looking at your working roller, I don't see some things.
Gloves are a big one or you will have skin issues before you are done.
No vinegar for clean up. Works great until the cure starts.
A soaker board. A board of any kind with an epoxy proof or disposable surface that you can use to wet out the glass fabric before you try to hang it on a vertical surface. It is much easier than trying to wet it out in place.
Two pair shears - one dry for cutting fabric to shape - one wet (maybe disposable or at least cheap) for trimming the wet fabric to eliminate threads and minimize post cure trimming. Wet shears may not last very long unless they can be cleaned (with vinegar) quickly enough.

West system does form an "amine blush" as it cures. This is a very effective release agent if it is not removed. Washing with soap and water will remove it. Of course, the sanding you did removed it.

I hope that the folded material below the finish cloth is not mat. Normal glass mat is bound with styrene that the solvent that is in any polyester resin would dissolve so it could be part of the laminate. West System has not such solvent. It will incorporate the glass mat, but it will not bond to all the fibers. The laminate will have less than the best possible strength.
Matt

I appreciate the tips, but I actually have most of those points covered. Gloves are on the cart (black 9-mil, only thing I've had left since COVID started). There's no way I'd want resin all mixed up in my hairy arms/hands.

This is the first time I've used the pumps. I was hesitant, but quickly got over it since they felt pretty quality. I also hadn't realized they were storage compatible, so that was the cherry on top. We weren't allowed to use them back when I was on-the-job, as the repairs we did were considered too critical. We always had to measure everything out on gram scales and write down exactly what the scales read in a log. It's nice to do fiberglass for myself instead! I can choose PPE that's appropriate and comfortable, and utilize convenient tools that would've been considered untrustworthy.

I don't really need to use a wet board or have any wet shears though, I cut my teeth doing large layups inside confined spaces where that would have been impractical. The layups were often upside down, so there's no way you're pasting a 1m x 2m piece of wetted cloth above your head without wearing it like a hat. I just got so used to wetting the substrate, sticking the cloth on dry, completing the saturation, then rolling the excess resin out from underneath. Having wet shears is nice if there's a second person, but I just couldn't see making that much mess. I've got plenty of acetone for cleanup as well (I'll have to give cleaning vinegar a try--that would be much less noxious and expensive!) I wouldn't mind pre-wetting if I had a second set of hands, but I just don't want to handle that stuff if I also have to handle tools and whatnot. I'm used to working with a partner, one with wet hands and one with dry hands (and a third monitoring resin temperature and oxygen levels). For the most part, I was able to keep my gloves fairly dry and clean, and avoid spreading too much mess around the workspace.

I didn't know about the amine blush from West Systems, but you're right, and I could feel that on the surface after curing. Each layup I've done here has had to be completely sanded and solvent wiped down to fresh material to get rid of that slick feeling. I also purchased glass mat spec'd for epoxy resin, so hopefully there will be no compatibility issues there. Actually, I never got around to using the mat, and just used the cloth the whole time (perhaps a decision based on laziness or convenience). Maybe I should count my blessings. A styrene binder would certainly throw a chink in the armor! My test scraps do seem to have the expected strength. My main unknown is the bond to the SMC, since that is new to me. Fingers crossed the epoxy will do its job.
 
Last edited:
Paul,

Your concern about bonding to the SMC is justified, but with your standard practice of solvent washing before applying epoxy, you will have no problem.

If you did not know, the SMC used in the GMC was a very early version and as they did not have a means to release coat the tooling in the cycle operation, they used an SMC with the release agent included in micro-encapsulation. While this worked well for them, it has raise hell with later people that were not aware. If the parts were not cleaned well enough, the finish coat would fall off. Some times years later.

Mat is really only good for adding thickness to the layup fast. I used the stitched biax to put my fender pieces back together because so much of the strength was gone and I wanted to have workable structure without adding features.

Speaking of features... If you ever have to deal with a broken door, just get something like balsa sheet that is used in boats and use it to make thicker structure where the SMC is broken. Again, you have to sand and wash, but the repairs I have done this way have been very successful.

Chaumière may be reliable and comfortable, but she was not beautiful to look at when we acquired her. I do not expend any great energy that way now. As long as I can count on her to stay with us, she will have a good home.

Matt
Thanks for the feedback, Matt. Another reason I never touched the mat, was the fact it was 1-oz mat. My cloth was 4-oz, which was already thin enough to be tedious. I'm not sure why I ordered any 1-oz stuff--it may have been an oopsie, but it's been too long to remember.

While we're on the topic of compatibilities, I'm not a huge paint expert. Can you recommend any non-aesthetic paint products I can pick up locally? I don't want to leave my body filler and fiberglass exposed--I'd prefer to seal them. I'm also not tackling the official coach repainting yet; that will take some time. I just want to get this better-than-a-tent box rolling down the road before summer escapes us.

I know you can't go wrong with epoxy primer, but I think that's always a two-part deal, and I don't really want to get into HVLP guns for sealing up this tiny patch job. Is there a rattle can option that would be OK? I assume enamels and lacquers are a no-no, perhaps a urethane primer?
 
Paul,
Cured epoxy is so chemically stable that I never worried about what I put over it. You can even get polyester gelcoat to stick if you wet the epoxy with acetone. You don't want to do that here.

Clean it the way you do and use what ever paint you want. I have never used any type of primer and never had a problem later as the epoxy is a very solid surface.

Matt
Thanks. I'm kinda looking to the future as well. I didn't want to put something on here that will cause issues with future urethane paints if I ever get that far. After some more reading, it sounds like Rustoleum's Primer/Sealer is a decent candidate that will offer good protection until I'm ready to paint. It should be a lot less porous than most of the high build sandable primers out there. There are some 2K aerosols that would be very robust, but of course they must be activated, have a short pot life, and are very expensive. That doesn't really fit my "seal and prime as I go" plan of attack.
 
Thanks. I'm kinda looking to the future as well. I didn't want to put something on here that will cause issues with future urethane paints if I ever get that far. After some more reading, it sounds like Rustoleum's Primer/Sealer is a decent candidate that will offer good protection until I'm ready to paint. It should be a lot less porous than most of the high build sandable primers out there. There are some 2K aerosols that would be very robust, but of course they must be activated, have a short pot life, and are very expensive. That doesn't really fit my "seal and prime as I go" plan of attack.
Paul, I've found that even in my little town of Lincoln, NE there is a very good paint supplier to all the local body shops. I would go find a body shop supplier and take their advice.
 
Paul, I've found that even in my little town of Lincoln, NE there is a very good paint supplier to all the local body shops. I would go find a body shop supplier and take their advice.
I'm 2 miles outside a town of 224 people, so Lincoln is about 1000 times the size. But, I consider myself very lucky, we have a Napa and an Ace. I was able to score some light grey primer/sealer, which was just what I needed. Any time I can save myself a lengthy trip to the city it's a big win.


1623993693125.webp
The last couple nights have consisted of applying some bondo, and sanding it off. Then, applying bondo, and sanding it off. Rinse and repeat. It's taking shape though. I've got more work to do on the wheel opening flange, and the step-flange where the nose mates.

1623993728578.webp


1623993815425.webp

I did some more checking with my stainless ruler. The slight crown is looking good by the wheel opening. I'd say that's a good transition from panel to panel. Of course, everything always looks worse once I put paint on it. Oh well, it'll be good enough for camping. It's not a show car, and I get to do some paint/body practice before I tear into our classics.

1623993914344.webp


1623994339766.webp
Holding the ruler vertical up under the mirror and pushing each end tight to the original panel surfaces revealed a divot below the mirror. Apparently my attempts to work around the mirror led to some poor sanding technique. So the mirror came off, and I piled some more bondo on. A little more on the flanges as well. I started playing around with the primer/sealer too. Tomorrow I'll get to see how well it fills/sands.

1623994246996.webp
David Orders' parts coach sure had a serious case of acne. My coach has this in a few other places as well. It's strange. The unsuspecting person would think there were rust bubbles forming under the paint. It's going to take an awful lot of sanding when I paint this for real someday.

1623994303319.webp
The many shades of the Ferrigno Glenbrook!
 

Attachments

  • 1623994097747.webp
    1623994097747.webp
    140 KB · Views: 1
Paul,
It is looking real good right now and will look even better when it gets to be just one color.
You could have saved the Bondo (if that is what you really used). I haven't bought any of that stuff since I went over to West. Just start a mix, coat the working area and then mix filler to the rest. Better than conventional polyester filler for three big reasons:
1 - It would trip on you without any warning. (Bang, the paddle is stuck!)
2 - You can mix in filler to get the working stiffness that you really want. (Somewhere between self leveling to hang on the overhead.)
3 - With the pre-wetted surface a bond to the prior fill is guaranteed. (A big chip won't fall out later.)
Matt
I'm used to using Cabosil to thicken the resin for those overhead layups, but haven't used it as a filler before. I thought about experimenting with that, but didn't want to really experiment too much on this project. Admittedly, I had Bondo laying around, so I took the lazy way out. Hopefully I won't have any chipping issues.

1624070999227.webp
I've lost count of the number of Bondo batches I've mixed up, and the number of times I've sanded it back off. So, even though it isn't perfect, I decided it was adequate.

1624071788137.webp
I'm fairly happy with the wheel opening, especially since so much of the flange had to be built up from scratch. It was time for paint!

1624071818840.webp
Now my daughter wants to know when the rest of the coach will be gray!
 
  • Love
Reactions: tmsnyder
I decided to use the front end off our Palm Beach parts coach. It's really starting to look like something!

PXL_20210621_005837972.webpPXL_20210621_005851046.webp
I need to make a repair to the front clip where the valance bolts on. That'll help draw the sides together so the grille fits properly. I ran a bit short on paint too. This'll all have to be sanded off again someday, but it'll keep it from looking any tackier than necessary in the meantime.
 
  • Like
  • Love
Reactions: Mike_H and tmsnyder
The dash currently has no screws, and is busted up in most places where screws would go. I was considering possibly popping some rivet nuts in there in fresh locations, and some socket cap screws that could be used with a ball-end allen bit, with some anti-sieze. I've gotta figure it out quick though, I want those windshields in pronto!