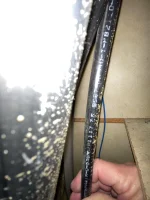
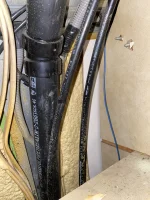
Plumbing done!

Yep Scotty, as you see in some of the pics I left some of the original black plastic piping in, specifically the cross over piping from bathroom to kitchen. I felt I could replace it when I see leaks occur with those lines. Last thing I gotta figure out is a RV antifreeze line from the propane tank area. Just have to think on how that connection works. May just stick with what I have and pour the antifreeze into the tank??

TG
Is this what you are thinking of doing?
 
Valuable Thread.
I’m going to attempt this week.
My “Goldie” got stored in Utah winter, without being winterized after her second meticulous owner passed away.

I’m inclined to replace everything with 1/2” pex, and shark bites.

I’m upgrading the sink faucet to a nice household unit.

I’m planning to upgrade the bathroom with something too.

Keeping the electric engine preheated water heater for now—would love a nice propane on demand, but don’t wanna drill holes or cut into the side of Goldie for that. So, imagine I’ll keep it the way it is—unless anyone has any input for me.

Any other pictures besides the excellent ones shared by Billygoat, above?
I’m in the process of replacing my water heater and decided against on-demand. We minimize water use, so on the rare occasion when we use the onboard shower (vs campground facility), we pause the water flow to soap up. With on-demand, that would mean there’d always be a slug of cold water when restarting the shower.

I also decided not to use the engine coolant loop. To me it’s too big of a risk to the engine for the small convenience of hot water on arrival at the campsite. That plus the non-zero risk of contaminating the potable water with antifreeze if an internal leak occurs.
 
Last edited:
  • Like
Reactions: tmsnyder
I’m in the process of replacing my water heater and decided against on demand. We minimize water use, so on the rare occasion when we use the onboard shower (vs campground facility), we pause the water flow to soap up. With on demand, that would mean there’d always be a slug of cold water when restarting the shower.

I also decided not to use the engine coolant loop. To me it’s too big of a risk to the engine for the small convenience of hot water on arrival. That plus the non-zero risk of contaminating the potable water with antifreeze if an internal leak occurs.
Yes, on the on demand cold pause if saving water. That's a real thing. If saving water--on demand is NOT the ticket.
I completely agree about the engine heating water.... What did you replace the OE one with? I didn't have it on my list to do the water heater, because it "Aint Broke" (hmmm maybe, how would I know, I haven't had water in it since I've owned it--thinking out loud).
Thanks.
https://defender.com/en_us/isotemp-spa-20-marine-water-heater. It has the engine coolant loop feature even though I'm not planning to use it.
 
https://defender.com/en_us/isotemp-spa-20-marine-water-heater. It has the engine coolant loop feature even though I'm not planning to use it.

That's funny to me Christo b/c a PO placed a tiny domestic hot water heater in mine, so it is electric only, same as isotemp.

And honestly, electric only heat has been working just fine for us. Even trips as a family of five, that hot water heater is plenty. It's probably only about 5 gallons and obviously doesn't have the higher temp / iso mixer valve on it which makes it effectively very small vs the isotemp tank.

You should see the way the guy installed it too, plenty of silicone and construction adhesive. It's a beaut!

Hot water on demand as we drive would be nice but if I want a hot shower after a day of driving, I just have to remember to start the generator and turn on the water heater about 15-20 minutes before our ETA.
 
Let us know how that unit fits. Does it have to go in from the bedroom side, or will it fit through the under sink hole?
It just fits through the under-sink hole. The drain trap has to be removed and it has to be slid in with the feet facing out, then rotated once in place. I also had to add a couple of 3/16" x 1-1/4" rails to the existing mounting frame, and I used pre-bulbed / multi-grip rivet nuts for the tank mounting to ease the process of securing the tank. I used 1/4" grade 5 bolts to mount the tank and the rails.

I'll post another photo once I get the plumbing finished -- I'm using PEX/SharkBite. The routing is tricky for the upper (hot) connection; I'll have to install an elbow to avoid the sink bowl and I need to make sure both lines will flow back into the tank when winterizing. I haven't decided yet whether I'll connect to the existing drain nipple or just make another hole in the wheel well. Note the recommended GFCI outlet -- the old (non-orig) heater was hardwired. I decided to use an outlet that has an audible alarm since it will be somewhat hidden. Hopefully the drain knob and the GFCI reset will be operable without removing the cabinet frame (I think so).

IMG_2201.webp
IMG_2190.webp
 
The Isotemp installation continues. Here's a BIZARRE hiccup: All of the connections are 1/2" MNPT except for the hot water outlet which is 1/2" BSPP (British Standard Pipe Parallel), also known as G-thread or G-1/2. It's a parallel thread that uses a washer to seal. These fittings are most commonly found in the US on shower heads/hoses.

Due to the proximity to the sink bowl, I am installing a BSPP elbow followed by a BSPP-to-MNPT adapter and finally a FNPT-to-PEX push-to-connect fitting. Yeesh.

https://www.amazon.com/dp/B0CT5Q28G1?ref=ppx_yo2ov_dt_b_fed_asin_title&th=1. The description for this part is inaccurate/misleading but it fits and I like that you can put a wrench on it. The threads are in fact BSPP, not IPS, and teflon sealing tape should NOT be used since the threads are straight not tapered.


More photos coming!
 
Last edited:
  • Like
Reactions: Richard RV
The Isotemp installation continues. Here's a BIZARRE hiccup: All of the connections are 1/2" MNPT except for the hot water outlet which is 1/2" BSPP (British Standard Pipe Parallel), also known as G-thread or G-1/2. It's a parallel thread that uses a washer to seal. These fittings are most commonly found in the US on shower heads/hoses.

Due to the proximity to the sink bowl, I am installing a BSPP elbow followed by a BSPP-to-MNPT adapter and finally a FNPT-to-PEX push-to-connect fitting. Yeesh.

https://www.amazon.com/dp/B0CT5Q28G1?ref=ppx_yo2ov_dt_b_fed_asin_title&th=1. The description for this part is inaccurate/misleading but it fits and I like that you can put a wrench on it. The threads are in fact BSPP, not IPS, and teflon sealing tape should NOT be used since the threads are straight not tapered.


More photos coming!
Welcome to the rabbit hole, Christo. I went down the IsoTemp BSPP hole with the Birchaven.

IMG_8128.webp
 
  • Like
Reactions: TwistyTony
Welcome to the rabbit hole, Christo. I went down the IsoTemp BSPP hole with the Birchaven.

View attachment 16877
I was cursing Italian engineering for a few minutes, I gotta tell ya!

- What’s the turnbuckle for?
- I get the idea of the clear tubing on the drain, but will that tubing hold up if hot water comes out due to an over pressure situation? I’m planning to use heater hose.
 
Here are a few photos of the completed install. Note the small clearance between the elbow and the sink bowl -- whew! Note also the drip loop on the power cord.

I love that this water heater has a mixing valve -- you can keep the water in the tank very hot and then adjust the output temp via the mixing valve. This approach really stretches how much hot water you can get from this small unit. Also, the insulation is excellent.

UPDATE: One final note, at the upper left of the first photo I had to join 1/2" PEX to the existing 3/8" Polybutylene pipe that goes to the kitchen sink. For that I used a Flair-It Reducing Coupler #16853 which is compatible with both types of pipe. The Flair-It product line is pretty extensive and could be handy for making repairs or modifications to existing Polybutylene piping.

IMG_2210_Original.webp
IMG_2214_Original.webp
IMG_2213_Original.webp
IMG_2216_Original.webp
 
Last edited:
  • Like
Reactions: pvfjr
I imagine there's a problem-solving story to go with that twisted wire and all-thread. ;)
The tourniquet is to keep the right side fitting from rotating due to the pressure from the (temporary) slightly too long braided stainless hose between the bypass valves. I'll replace it when Carl returns my tuit.
 
OK. Deep in now.
Here’s the questions:

1. City Water—appears to be behind the closet back. What’s the non destructive way to access the city water inlet from behind to run a new PEX connection from that point?

2. got a camera up in the channel where the black stuff (old pipe) goes up over the top. Seems foamed in… what’s the key to pulling new pex up over and down into the bathroom? ??? Pull harder? Some experience share there would be super welcome.

3. The water pump area has been patched and hacked way too many times…. I’ll clean it all up. But—what’s this little 1/8” pipe??? I see another end of that under the sink. ???

4. Any good pics of where the toilet hooks up? Someone just cut it—I can’t see where it attaches to the toilet???

5. There’s this harness for the water pump, with some unconnected connections…any insight into what it was or where it goes, how that harness might need to be cleaned up?

6. the plywood floor under my water tank is dry rot through…. Could replace the plywood, or make a metal pan for the system so leaks in future can drain??? Any experience shares there, rotten floor… SEEMS isolated to just under the tank.

7. Why does the floor between the seats rise up?

8. Got a mouse or squirrel in there. How’d it get in? Anyone? Bueler? ;-)

I wanna put it back together as pretty as possible, and proudly put finished pictures in like Christo and Billygoat.

I haven't done it, but am familiar with the plumbing you are contemplating. I believe you would have to remove all the cabinetry which is blocking your access to the tubing in order to replace it. The only reason I've read about which requires that type of access was if the one way check valve on the city water connection freezes or leaks. That's it. I don't think anyone is tearing apart the interior of their coach just to swap out that tubing. We all just live with it b/c theres really nothing wrong with it.

Even the check valve ( I think) can be accessed through the back of the cabinets, some of them are removable if you take out the screws showing at the back of cabinets.

If you feel you must replace all that tubing, start by taking out all the cabinet backs and see if you can do it that way. I'm doubtful it is possible, also doubtful that it's worth it honestly.

1/8" pipe?: that might be factory or PO added winterizing drains

Toilet connection: iirc that was just a standard style connection up under the rear of the toilet, just threads on. If needed you can remove the toilet, there's only ~2 bolts holding that down to the flange.

Wiring harness near water tank: Two wires would go to the level sensor so those would run to the meter panel next to the door. And two wires would go to the water pump; one ground and one 12V

hope this helps, good luck with your build!
 
  • Like
Reactions: TwistyTony
I highly recommend abandoning the city water connection for a few reasons:
  • The custom panel-mount molded plastic housing is old, brittle and prone to cracking. When they crack, they develop a pinhole leak that fills the walls, space behind the closet/cabinet, and seeps under the hallway flooring. I've had this happen on both of my coaches.
  • City water connections allow unmetered usage of water. It makes it pretty easy for unwitting coach users to overfill your black tank. If the fresh water tanks and black water tanks are about the same size, running out of fresh water is a much more desirable problem than having a sewage backup in the shower.
  • The city water connection requires a built-in check valve to hold back pump pressure when the city connection is not in use. These can leak/dribble and cause pump cycling and loss of water.
  • City water can have pretty crazy pressure spikes. Regulators can help, but it's more stuff to carry, and I've had those regulators fail too.
That's just my opinion/experience. If you really want to retrofit that to PEX, you'll have to find some adapter(s) of some sort.
 
I agree with Paul on abandoning the city water connection. You could have a small leak(s) anywhere in the plumbing system and not know it until its too late and damage has been done. When you use the freshwater tank, if you hear the pump cycling when no water is being used, then that's your clue you likely have a leak somewhere. Best find it and fix it.

Or you can have a large leak and come back to find water running out of your coach everywhere! With the freshwater tank, the most it can leak is 25 gallons if full.
 
Sounds logic on the city water “skip”.
I just feel so compelled to make everything new, known and reliable…it’s my OCD engineer brain just having it’s way with logic.

I checked and added a signature file, if it’s not showing up, this is a ‘76 Palm Beach 260-3. It was “restored” by Cinnibar circa 2010. While I find things that are new and updated, i also find things that maybe didn’t get touched that should have been, given the extensive restoration.

This black water line, is PB 2110 (Polybutylene). I can PEX both sides, but I’m not sure I can pull hard enough to pull the overhead loose and pull in 1/2 PEX in its place.

I CAN access both sides sufficient to replumb…. I might need to take the BACK of the closet out… to get to the city water connection…that wouldn’t be too bad…. That would let me replace the full kitchen side and the full bathroom side—

I’m trying to decide how to proceed.

1. I could go around the back, and abandon the factory over the top runs.

2. I could pull hard, and win or loose having to take down or repair the headliner, and maybe some cabinents to take the head linger down…

Wisdom of the Forum—wanted. I’m paused, gathering info and thinking.
 

Attachments

  • IMG_8489.webp
    IMG_8489.webp
    585 KB · Views: 3
  • IMG_8488.webp
    IMG_8488.webp
    1.2 MB · Views: 3
Last edited: