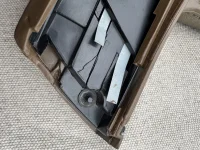
Today, I decided to replace the rear clearance lights with sealed LED lights. Since I will be re-painting this beast in a few years, i needed a way to unplug the clearance lights instead of painting around them or cutting the wires then using a butt connector later.
As you may already know, the OEM lights have the ground wire riveted to the base of the light assembly and the 12v hot wire connected to a socket for the bulb. Both wires must be cut in order to hook up to the sealed LED lights.
I have some old Ford bullet wires that seal nicely once connected so I purchased more bullet pigtails to use for both the front and rear clearance lights.

These still require butt connectors but everything is 16 gauge wire and these can be shoved inside the 1/2” clearance hole for each light. It drives me nuts that most automotive electrical uses red for + and black for - but then someone decided they would use black for + and white for - Consequently, I added red heat shrink on the + lead coming out of the LED lights to remind me which lead is 12 volt. I also used the protected rubber sleeve on the + lead and the unprotected bullet for the - lead coming from the GMC wiring.

As you may already know, the OEM lights have the ground wire riveted to the base of the light assembly and the 12v hot wire connected to a socket for the bulb. Both wires must be cut in order to hook up to the sealed LED lights.
I have some old Ford bullet wires that seal nicely once connected so I purchased more bullet pigtails to use for both the front and rear clearance lights.
These still require butt connectors but everything is 16 gauge wire and these can be shoved inside the 1/2” clearance hole for each light. It drives me nuts that most automotive electrical uses red for + and black for - but then someone decided they would use black for + and white for -
Consequently, I added red heat shrink on the + lead coming out of the LED lights to remind me which lead is 12 volt. I also used the protected rubber sleeve on the + lead and the unprotected bullet for the - lead coming from the GMC wiring.
Last edited: