My 1974 Money Pit: Mods & Updates

Today, I decided to replace the rear clearance lights with sealed LED lights. Since I will be re-painting this beast in a few years, i needed a way to unplug the clearance lights instead of painting around them or cutting the wires then using a butt connector later.

As you may already know, the OEM lights have the ground wire riveted to the base of the light assembly and the 12v hot wire connected to a socket for the bulb. Both wires must be cut in order to hook up to the sealed LED lights.

I have some old Ford bullet wires that seal nicely once connected so I purchased more bullet pigtails to use for both the front and rear clearance lights.
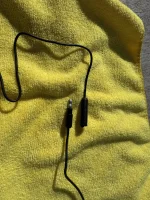
IMG_5416.webp
These still require butt connectors but everything is 16 gauge wire and these can be shoved inside the 1/2” clearance hole for each light. It drives me nuts that most automotive electrical uses red for + and black for - but then someone decided they would use black for + and white for - 🙄 Consequently, I added red heat shrink on the + lead coming out of the LED lights to remind me which lead is 12 volt. I also used the protected rubber sleeve on the + lead and the unprotected bullet for the - lead coming from the GMC wiring.
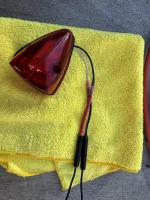
IMG_5415.webp
 
Last edited:
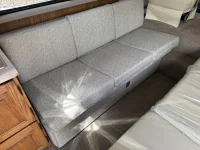
It’s been awhile since I installed the new dinette. The GMC was at the shop for over 1.5 years doing a minor overhaul: new timing chain/gears, remove oil pan and install a new rear main seal (460 ford seal), new oil pump, pull tranny and replace all seals and test it plus install Manny gear/chain, install new water pump, swap out 3.07 final drive with rebuilt 3.21 final drive.

Anyway, I was waiting to rebuild the jackknife sofa with new materials. I just got it back yesterday so here it is. No more pokey buttons.

IMG_5576.webp
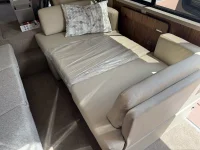
Next up was to reinstall the new dinette and figure out how much wood to cutoff on the bottom cushions that is forcing them to stick out in the isle and hanging up full retraction of the jackknife sofa. Once I trim the seat base wood, I will have my upholsterer trim the seat foam and re-sew the seat material.
IMG_5577.webp
 
Last edited:
  • Like
Reactions: tmsnyder and Kendra
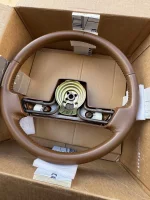
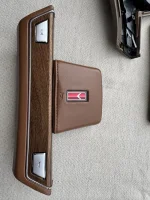
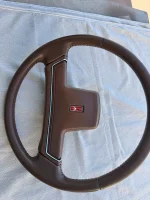
Today’s project involves prepping my replacement steering wheel which is an 1990 Oldsmobile 88 steering wheel, backing plastic and horn pad.

This particular wheel was leather wrapped from the factory but it didn’t include the horn pad. I did find a good horn pad on eBay (see below). However, it’s the wrong color but the seller of the steering wheel just happened to list the color as Oldsmobile Dark Sienna. As paint projects often go, it took 8 cans of expensive spray paint to finally get an exact color match. Paint My Ride out of North Carolina had exactly what I needed and I will be using a base coat urethane on top of SEM Adhesion Promoter (don’t leave home without it).
IMG_5712.webp
IMG_5714.webp

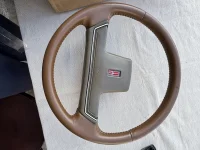
The biggest headache is disassembling the horn pad without snapping off the plastic nibs that holds the backing plate to the flexible plastic cover. I bought a second horn pad as a test so in case I break a nib no big deal. That test horn pad was originally burgundy and is now painted to match the wheel (see image below). Yes, the Oldsmobile insignia is upside down and I did break both nibs but now I have a process to avoid that issue entirely and I will post that process soon.
IMG_5716.webp
 
Last edited:
  • Love
Reactions: tmsnyder and pvfjr
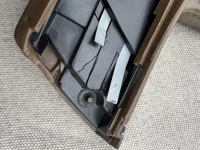
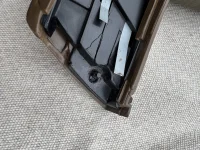
On this horn pad, there are 4 plastic nibs with speed nuts holding it against the plastic base.
IMG_5718.webp
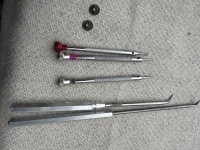
Here are a few of the tools I used to pry the speed nut off of the plastic nibs.
IMG_5717.webp
I purchased the longer tools off of Griots Garage and they have come in quite handy. The speed nuts need to be slowly pried upward to come off. I used the smaller jewelers screwdriver to start the process then slowly work around the nut to pop it off. When prying up on the speed nuts, push up from the backside on the horn pad to relieve the stress on the speed nut,

These horn pads are 40+ years old so you may end up breaking a nib.
IMG_5720.webp
 

Attachments

  • IMG_5718.webp
    IMG_5718.webp
    1.1 MB · Views: 1
Last edited:
  • Like
Reactions: Kendra
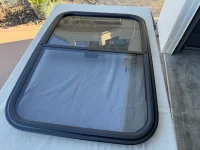
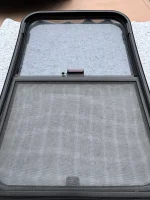
Since my motorhome is still in the shop for an oil leak, I decided to drive up to Applied GMC and pick up a 2nd design entry door sliding window. Of course, it needed complete restoration but the sliding window was complete, tight in the window slider guide and included a screen. The screen itself appears to be original (metal) and undamaged so I left it alone.

I disassembled the parts that could be removed (weatherstrip, screen, screen guides and window handle) then had a local body shop repaint the entire frame - semi gloss. The screen guides were cracked so I replaced those with new guides that I already have on hand. I ordered new weatherstrip then installed both weatherstrips. Boy were my thumbs sore working that larger gasket into the fixed window.
IMG_5924.webp
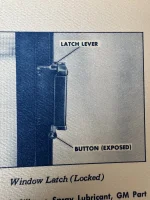
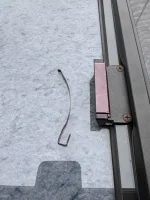
One of items on the slider that had me puzzled was a spring that was installed backwards and kept locking up the glass slider. I pulled my ‘78 GMC Operating Manual to see what was published on the sliding window. Sure enough, that spring steel is a latch lock mechanism for the slider but it was missing the small button on the end and it was bent wrong. Below is a snapshot of the ‘78 Operating Manual showing the correct orientation of the spring. So I reshaped the spring then installed it correctly knowing the small button was missing.
IMG_5921.webp
IMG_5919.webp
Now, I was tasked to find that button for the end of the spring. I owned several 1957 Fords in my early years and recall that the missing button looked nearly identical to the 1957-59 Ford heater temperature control knob so I ordered this part: https://www.dennis-carpenter.com/cars/interior/dash/b7a-18519-a-heater-temp--reg-control-knob

It has a spring clip buried inside the rectangular mount for it to bite into the mount arm. I pushed it on and *Whoop there it is* I duplicated the original button and it stays on. Just be sure to push it on tightly or it will pop off. You may want to use a little locktite on it.

Now I can install this new slider window onto my entry door. By the way, the original seals on that window edge were paper thin and no wonder it leaked water. I will be using 1/2” wide butyl tape for sealing it to the door frame.
IMG_5938.webp
 
Last edited: