Is this norm for an early 77? If so then i assume i grind down the large rivets without hitting the control arm then drill out? All the prior pics i have seen and discussions show and say bolts...have tempted to pic up a set from Applied gmc of rebuilt control arms..
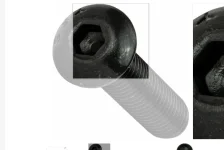
Lower ball joint, no side bolts all rivets
- Thread starter justpassinthru
- Start date
You are using an out of date browser. It may not display this or other websites correctly.
You should upgrade or use an alternative browser.
You should upgrade or use an alternative browser.
The original ball joints were riveted in. Replacements are bolted. Drill them out and use 3/8" button bolts with loctite on the nuts.

Yes. Those will not interfere with the knuckles on tight turns.Thanks! Like this?
Is this norm for an early 77? If so then i assume i grind down the large rivets without hitting the control arm then drill out? All the prior pics i have seen and discussions show and say bolts...have tempted to pic up a set from Applied gmc of rebuilt control arms..
The acceptable 'play' on the ball joints is 0.125" Make sure you really need to change ball joints b/c there are questions about the new joints that are available.
will do....just lifted the front end in the air, not feeling alot of play in the ball joints but will check that again when the hubs are off. control arm bushings definitely shot so the arms are coming for that regardless of the joints. The rig just has 52k on it so joints might be ok.
Read this post that I did back in 2017.
The Greater Midwest Classics had a "work" rally at Steve Rasmussen's place last weekend. As one the workers, I was charged with checking the lower A arm ball joints of every coach that was put on either of the two racks. Not necessarily checking for a bad joint, but rather checking for replacement ball joints that were improperly installed or loose. The original ball joints were riveted in place, and according to the manual, (GMC Motorhome Maintenance Manual X-7725) on page 3A-17 under "Ball Joint Checks", a pry bar is used to check for play. The "reading must not exceed .125". That is 1/8th inch. Unfortunately most alignment shops will check for play and to them any play at all is unacceptable, so they charge you for, and replace ball joints that don't need replacement. Consequently there are many coaches out there with new lower ball joints that have been replaced using the grade 8...5/16" bolts that come in the package. These new ball joints are held in place with three bolts. One larger bolt that goes down from the top through the A frame into the ball joint. In addition then, there are two 5/16", bolts on the "Ears" of the joint. Considering that these joints are really replacement for the Toronado or Eldorado, the 5/16" bolts are inadequate for this application. Over time these bolts come loose and can lead to lower arm failure in cracks that can appear around the larger bolt hole or can loosen to the point of falling out, which can eventually lead to a cocking of the joint which changes the camber and can wear out tires in a hurry. If you have replacement joints, the top larger bolt should be checked first for tightness. Then the 5/16" bolts should come out and be replaced with 3/8" X 1 1/4" grade 8 international fine button bolts and you should apply several drops of red Lock Tight to the threads. When drilling out the hole for the larger bolts, use progressively larger drills or reams, until the bolt has a lightly snug fit in the hole. Of the 15 coaches that I checked, EVERY ONE of the lower arm ball joints were loose, and in several cases, bolts on the ears were missing. Even two of the four ear bolts on mine were loose, and I had the 3/8" bolts in place, but without the Lock Tight.
With that kind of a record, everyone should be checking the the bolts on their lower ball joints NOW. JMHO and HTH someone.
So, what all of that means is that IF the joint are riveted in place, they are factory original. IF play does not exceed. .125" (1/8th in.) do not replace them. The factory joints, even with some wear are better than aftermarket replacements. JWIT
Last edited:
Ok so got it lifted up ,tire off , with a crowbar propped on wood to pivot its max movement...here is a video of the movement on the passenger side ball joint. Sounds like we want to retain our originals if still viable, i am setting this rig up for appox 10k to 15k miles over the next nine years (will reassess my ability to travel at the age of 80)...i want to trust the rig, but not do unneeded repairs. What do you think?
https://www.gmcmotorhome.org/media/ball-joint-reduced-file-size-mp4.1020/
Ok got it posted in a reduced size into the photo library...
Ok got it posted in a reduced size into the photo library...
I was able to download the linked file and watch the .mov, couldn't watch it by clicking on the picture in your post as is usual.Ok so got it lifted up ,tire off , with a crowbar propped on wood to pivot its max movement...here is a video of the movement on the passenger side ball joint. Sounds like we want to retain our originals if still viable, i am setting this rig up for appox 10k to 15k miles over the next nine years (will reassess my ability to travel at the age of 80)...i want to trust the rig, but not do unneeded repairs. What do you think?
It looks to me like you're near the 1/8" cutoff, but I'll leave it to more experienced eyes to make the call.
Have a dial indicator arriving this afternoon....will measure up and down play and go from there.
I understand that the areas where the ball joint contacts the LCA can deform and should be corrected before a new ball joints is installed so that it is a tight fit. On mine, the top surface of the control arm at the ball joint was no longer flat.
Ok so got it lifted up ,tire off , with a crowbar propped on wood to pivot its max movement...here is a video of the movement on the passenger side ball joint. Sounds like we want to retain our originals if still viable, i am setting this rig up for appox 10k to 15k miles over the next nine years (will reassess my ability to travel at the age of 80)...i want to trust the rig, but not do unneeded repairs. What do you think?
They are under constant load, so the play in the joint is never opened up.
You have to jack up the corner and rest that joint on a jack or jackstand to get all the force out of the joint, since the torsion spring is supporting the coach, twisting the lower A arm 'down' to the ground.
So i just cut right the chase....pulled the knuckles. The upper ball joint is tight, the lower is extremely loose. Pushing up and down over 1/4 inch easy , and loose in all directions circling around. Too bad cause i do see how nothing could match the stability of those original rivets. So ball joints and bushings.... Thanks for the help from all of you...I have been shade mechanic for over 50 years, just never tackled a full front end job.
So i just cut right the chase....pulled the knuckles. The upper ball joint is tight, the lower is extremely loose. Pushing up and down over 1/4 inch easy , and loose in all directions circling around. Too bad cause i do see how nothing could match the stability of those original rivets. So ball joints and bushings.... Thanks for the help from all of you...I have been shade mechanic for over 50 years, just never tackled a full front end job.
replacing with Cinnabar lower ball joints ?
I'll be doing my control arm bushings (and possibly ball joints) in the very near future too. Let us know how it goes!

