Prototyping some tail light upgrades

Mike Perez

Active member
Feb 17, 2019
499
142
43
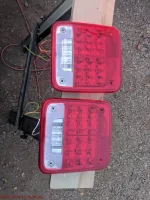
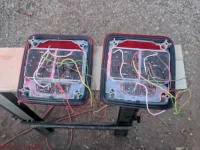
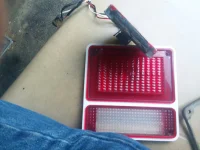
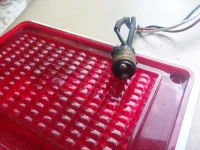
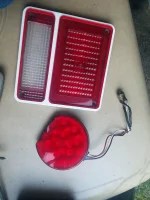
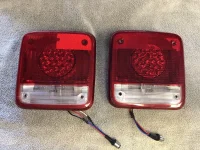
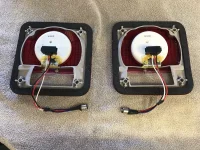
I’ve been working on a good LED bulb replacement for the rear lights. I’ve never been a fan of the replacement socket type LEDs because most of the light is thrown sideways instead of rearward. It's the same reason the factory bulbs aren't very bright. I've seen the Sirum GMC Tail light (pictured below) and I just don't like the "trailer" light being the wrong shape. It sticks up into the reflector area, and it just doesn't look nice. My idea is to take a rectangular shaped LED light for both the Stop/Turn/Tail, but also the reverse light and mount them to a new metal framework behind the lens.

Problems to address:

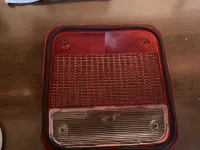
Ideally I'd like to set this up for either the old style lens or the new style. The complication with the original style lens is that the distance between the lens and the metal framework behind it is very limited. On the new style lens, the lens sits much further away from the metal, so I'll need to space the light further away to account for the lens sitting on the body instead of the aluminum trim ring.

The other problem that bothers me about the new lens is that the holes are not aligned with the original frame. Anyone who has done this upgrade know that the screws have to be driven in at an angle. It works, but not ideal. I'm going to try to address that.

I've got some lights to mock up that I think are going to work great. The Stop/Turn/Tail is easy, but the reverse light has been hard to find that not only fits the area, but is also bright enough to actually be useful.

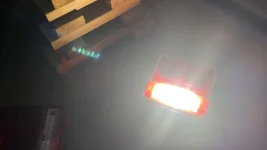
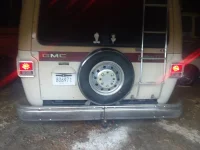
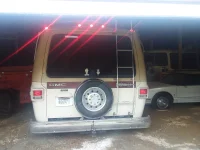
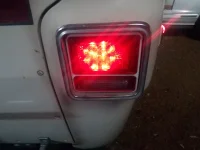
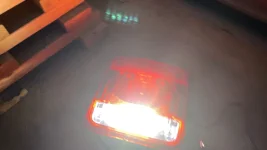
This morning I was testing a few things in the garage. Below are two screen grabs from a video I was trying to shoot in the darkness this morning. Night and day different from original bulb. More to come.
1587470515146.webp1587470531179.webpFrame-21-04-2020-08-21-18 copy.webpFrame-21-04-2020-08-21-07 copy.webp
 
  • Like
Reactions: JodyPackerfan
Looks good, probably a lot easier then what i did i took 2 sets (1 set for each lense) of anzo jeep tail lights and cut them apart and hot glued them into the lenses, even the backup is led and it is bright
 

Attachments

  • IMG_20180506_195554.webp
    IMG_20180506_195554.webp
    1.5 MB · Views: 30
  • IMG_20180506_195635.webp
    IMG_20180506_195635.webp
    1.4 MB · Views: 34
  • VID_20180506_195817.mp4
    VID_20180506_195817.mp4
    28 MB
Yes, my setup will be a bit more plug and play so they can be installed in less than an hour by anybody. When you were messing with yours, did you see an easy way to separate the red lens from the rest of the body? If have the Peek Family light kit where the lens is already separated from the body. I'm wondering if it is just glued on in production.
 
do you mean separating the grey part from the red lens ? i didn't try to separate that
something else i noticed yours have like a foam gasket ? mine is rubber
not sure what a peek family light is ?

Those pictures above aren't mine. Those are the Sirum GMC lights that are cut like yours to attach a trailer light to the lens. The Peek Family is a GMC vendor who has been offering a kit with new lenses for 25+ years. I think they separate the lens somehow and then give you a new metal divider and new gasket along with hardware. I bought it a few months ago.
IMG_0689.webp
 
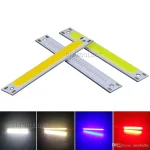
I've been dreaming about fitting COB LED arrays onto pieces of appropriately sized aluminum plate. I've thought about doing a three or four slanted stripe arrangement or something. You can get the COB arrays in many different shapes and sizes, but I thought the multiple stripes of 1/2"ish by 3-4"ish would look kinda neat. It would easily fit inside the housing, and would throw most of the light rearward. You can get a variety of qualities, colors and brightnesses this way too, and could source from Arrow, Digikey, Ali, etc.

1587752086649.webp

That's a ways down the road for me though. My coach has the "taillight upgrade", though I don't think it was performed well, and seems to have a lot of years on it. I'll be interested to see what you settle on.
 
Looks good, probably a lot easier then what i did i took 2 sets (1 set for each lense) of anzo jeep tail lights and cut them apart and hot glued them into the lenses, even the backup is led and it is bright
I agree, that doesn't look super easy, and seems to require quite a bit of glue. You can't argue with the end results though, that looks pretty effective in the video. Nice job! I wonder about temperature just a bit though, with the hot glue holding it together. It's probably a little more insulated currently than what the Jeep lights were designed for. Have you tried leaving them on for an extended period on a hot day and checking the temps?

Edit: on second thought, it doesn't seem those had much provisioning for heat sinking to begin with. Was the video taken at dusk then? Perhaps they're not as blindingly bright as I thought, and aren't dissipating enough watts to worry about.
 
I agree, that doesn't look super easy, and seems to require quite a bit of glue. You can't argue with the end results though, that looks pretty effective in the video. Nice job! I wonder about temperature just a bit though, with the hot glue holding it together. It's probably a little more insulated currently than what the Jeep lights were designed for. Have you tried leaving them on for an extended period on a hot day and checking the temps?

Edit: on second thought, it doesn't seem those had much provisioning for heat sinking to begin with. Was the video taken at dusk then? Perhaps they're not as blindingly bright as I thought, and aren't dissipating enough watts to worry about.

I haven't tried that yet, but i have a pair installed which hasn't seen any issues yet, but the back where the electronics are is still covered only as anzo made them.
 
My first experiment was a bust. I won't even bother posting pictures here. I did learn something interesting though. If you look at modern car LED tail lights, they all seem to have a non-diffused red lens. Depending on the spacing, the defuser in the newer style lens can actually make some of the LEDs completely disappear. I tried a 4x6 panel that is typically used on fire trucks and ambulances, and wired for stop/tail/turn. It looked awful. Still waiting for some parts to arrive next week, but I'm not super optimistic.
 
I tried an oval Stop/tail light LED assembly behind the newer style van lens. Yes, the resulting light coming through was all wonky. The LED assembly had a "lens" over each LED which didn't line up with the van style lens.

I haven't tried just replacing the bulb with a corn cob LED replacement to see what that looked like.
 
I tried an oval Stop/tail light LED assembly behind the newer style van lens. Yes, the resulting light coming through was all wonky. The LED assembly had a "lens" over each LED which didn't line up with the van style lens.

I haven't tried just replacing the bulb with a corn cob LED replacement to see what that looked like.
I think the distance is key. If the LED is right up against the lens, then it may look ok. Really far back, and it will look like a single light bulb. Right in the middle and you'll get what you described which is exactly what happened with the lights I tried.
 
Hmm, I've already got some COBs laying around. Maybe I should play with them and the lens on the bench and see what happens. Just don't tell the wife I'm not working from the top of the list!
 
Mine are good enough for who they are for.
 

Attachments

  • D3FEA9D4-0E58-4328-A8AA-5C567A763753.webp
    D3FEA9D4-0E58-4328-A8AA-5C567A763753.webp
    230.6 KB · Views: 13
  • 6323788C-B7DA-44E1-AD7E-95F767083411.webp
    6323788C-B7DA-44E1-AD7E-95F767083411.webp
    303.8 KB · Views: 14
  • ED0FF2DE-41B1-4ED9-951C-B7E639316B16.webp
    ED0FF2DE-41B1-4ED9-951C-B7E639316B16.webp
    370.1 KB · Views: 16
  • 153D3FFC-C9B2-4E8F-B18C-61619D08352C.webp
    153D3FFC-C9B2-4E8F-B18C-61619D08352C.webp
    216.3 KB · Views: 17
  • 6DA84BE8-4833-40B4-8086-9E444B89E444.webp
    6DA84BE8-4833-40B4-8086-9E444B89E444.webp
    253.5 KB · Views: 17
  • FE22BAFD-D510-44FB-8DF1-4288EF6AD1F7.webp
    FE22BAFD-D510-44FB-8DF1-4288EF6AD1F7.webp
    266.7 KB · Views: 17