The Battle of Serenity [Valley]

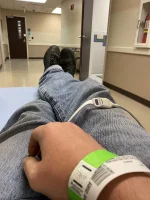
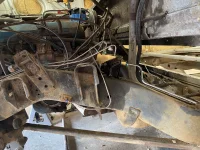
Well, I completed the very simple removal of the upper control arm shaft today but not before an arrant swing of a 32oz ball peen hammer sent me to the ER.
Thankfully nothing was broken but my thumb was well a truly walloped. Since my bandages won’t fit the media blaster’s gloves I suppose it’s back to removing the wheel wells and accessory housings.
 

Attachments

  • 609B6B17-E573-4C30-97DF-B5CA261E0604.jpeg
    609B6B17-E573-4C30-97DF-B5CA261E0604.jpeg
    5 MB · Views: 4
  • 5BC54B87-5176-4EEA-A85E-F0D2606BE2FC.jpeg
    5BC54B87-5176-4EEA-A85E-F0D2606BE2FC.jpeg
    4.2 MB · Views: 4
Another weekend is coming to a close. A decent amount of progress was made and the weekend’s goal achieved. The rear wheel wells were removed with little difficulty.

The LPG tank was removed giving me my first look at the status of corrosion in the back, it seems sound but I won’t know for sure until it’s vented and I can get the rust and paint off.

with the LPG tank removed I was able to access the last hold out on cover fasteners. I’ll tell you what, the engineer that put the four fasteners in the little cutout beside the tail light area...that person was a sadist.

Next we got the generator cover out, it was the weirdest thing. There were three fasteners who’s heads were half (and I mean that literally) rusted away. The strange part is they were in three separate locations, so it can’t be explained by standing water or rodent urine. I assume there was something inferior about the metal they were made of. At any rate, it made their removal interesting.

I also got my first look at the back of the Onan. It shouldn’t come as any surprise that there was more rat poop...yay.

With the final housing/cover removed, I could finally assess the full scope of deck rotting. It’s not like you’d fall through yet, but a little more on the passenger side and you could Fred Flintstone the right front tire!

So next up is cleaning up the housings and storing them away until the day comes that the new floor decking is in and I am ready to reinstall them. I bet they will look pretty nice all scraped off and pressure washed.

Hope you all had as much fun as I did this weekend!

-Kentuckian-Texan signing off
 

Attachments

  • 16B30683-21E5-4740-A844-75A53F8BA480.jpeg
    16B30683-21E5-4740-A844-75A53F8BA480.jpeg
    6 MB · Views: 25
  • 6C27A854-86C2-4BB4-9789-FADAA379C0FF.jpeg
    6C27A854-86C2-4BB4-9789-FADAA379C0FF.jpeg
    6.3 MB · Views: 27
  • 6A665A70-05D7-4C33-BFC8-CB41C0E8A518.jpeg
    6A665A70-05D7-4C33-BFC8-CB41C0E8A518.jpeg
    5.4 MB · Views: 24
  • 7B95CB6F-74DE-452D-9406-F1A09040B6E4.jpeg
    7B95CB6F-74DE-452D-9406-F1A09040B6E4.jpeg
    5.8 MB · Views: 23
  • 949D0B10-38D3-4650-AF98-9CB28AF91868.jpeg
    949D0B10-38D3-4650-AF98-9CB28AF91868.jpeg
    7.9 MB · Views: 21
  • D63EEB84-3497-4BFA-9981-533279B2D801.jpeg
    D63EEB84-3497-4BFA-9981-533279B2D801.jpeg
    6.1 MB · Views: 20
  • 07BCA846-62E4-410A-8F81-389D3E7475CE.jpeg
    07BCA846-62E4-410A-8F81-389D3E7475CE.jpeg
    7.3 MB · Views: 20
  • 72B104DD-4991-4C65-B8D0-F70EFD69DDBD.jpeg
    72B104DD-4991-4C65-B8D0-F70EFD69DDBD.jpeg
    6.2 MB · Views: 20
  • D800094F-941C-4104-8DCE-E40540420B28.jpeg
    D800094F-941C-4104-8DCE-E40540420B28.jpeg
    5.5 MB · Views: 20
  • C56B28AA-F6D7-49C5-893F-1C7419D2D78E.jpeg
    C56B28AA-F6D7-49C5-893F-1C7419D2D78E.jpeg
    7.3 MB · Views: 17
  • D9CAEF77-54A1-4E2A-A9D1-AF0B454DBD20.jpeg
    D9CAEF77-54A1-4E2A-A9D1-AF0B454DBD20.jpeg
    5.6 MB · Views: 16
  • 32CF284B-A3C2-4442-8935-75D387F49DDB.jpeg
    32CF284B-A3C2-4442-8935-75D387F49DDB.jpeg
    5.8 MB · Views: 17
  • A84E0953-67AC-4EFB-B87D-C50ED468EE45.jpeg
    A84E0953-67AC-4EFB-B87D-C50ED468EE45.jpeg
    5.4 MB · Views: 19
  • 9B629883-46B9-4270-A667-CBEC00A02DCC.jpeg
    9B629883-46B9-4270-A667-CBEC00A02DCC.jpeg
    8.3 MB · Views: 30
  • Love
Reactions: tmsnyder
These weeks just keep ticking by. I’m still in the “out with the old” looking forward to “in with the new. I did have to buy another shelving unit to accommodate parts (many of them being new shiny goodness).

this weekend certainly felt like I was making progress finally. I got the floorboards, insulation, and aluminum pans removed. Then removed and drained the forward fuel tank. Next I removed the black water tank, thank goodness it was empty! I removed and drained the aft fuel tank and the two fuel tanks combined held about 2.5 gallons (plus what I spilled on the floor).

The lower waste gate fasteners had rotted away from my blackwater tank, if anyone knows the “correct” repair please let me know...my current thought is to remove the material that remains and then fill up to where the bottom of the hex nut would be with JB Weld, drill and tap, then JB Weld new hex nuts in place.

I wrapped up the weekend scraping the gobs of dirt of the frame and rails. I think this coach may have partially buried itself before the PO moved it to the lot where I found it.

after getting the floor swept I decided to call it a weekend. My plan for the next step is to remove all the brackets and get them ready for paint, then pressure wash the residual dirt and dust off. Then prep for frame paint.

As always I hope you all had at least as much fun as I had!
 

Attachments

  • 75BCCF50-610C-4F3E-AE2A-1D93484057BB.jpeg
    75BCCF50-610C-4F3E-AE2A-1D93484057BB.jpeg
    6.3 MB · Views: 19
  • F6A9A693-1684-497B-8E84-67EB39B373AF.jpeg
    F6A9A693-1684-497B-8E84-67EB39B373AF.jpeg
    6.8 MB · Views: 19
  • 397F0099-8F97-446E-B75D-0F83B5198629.jpeg
    397F0099-8F97-446E-B75D-0F83B5198629.jpeg
    6.1 MB · Views: 18
  • 36DCB240-B998-406E-BAA5-81A869F0BEDE.jpeg
    36DCB240-B998-406E-BAA5-81A869F0BEDE.jpeg
    5.9 MB · Views: 18
  • C54BC50F-AD08-421D-BF6A-336BF518B345.jpeg
    C54BC50F-AD08-421D-BF6A-336BF518B345.jpeg
    6.3 MB · Views: 17
  • E4842236-AE14-416D-A2BE-87FC2644EECF.jpeg
    E4842236-AE14-416D-A2BE-87FC2644EECF.jpeg
    6.2 MB · Views: 17
  • 7B721072-5853-41B4-8300-2597E070230E.jpeg
    7B721072-5853-41B4-8300-2597E070230E.jpeg
    6 MB · Views: 16
  • 72DD1FD0-8708-4FBB-BB7A-AB12A5A9176F.jpeg
    72DD1FD0-8708-4FBB-BB7A-AB12A5A9176F.jpeg
    7.3 MB · Views: 17
  • 9515A0E6-76B0-4D19-8ECC-B09B9B97967D.jpeg
    9515A0E6-76B0-4D19-8ECC-B09B9B97967D.jpeg
    5.7 MB · Views: 17
  • 609A7173-63E9-4968-8B1C-DC29C7547DCA.jpeg
    609A7173-63E9-4968-8B1C-DC29C7547DCA.jpeg
    5.2 MB · Views: 17
  • B98CDFE2-9F6D-4BDB-86F3-501C768B37FD.jpeg
    B98CDFE2-9F6D-4BDB-86F3-501C768B37FD.jpeg
    5.4 MB · Views: 17
  • 1BDCE63B-651D-4A08-B712-1F517E46A296.jpeg
    1BDCE63B-651D-4A08-B712-1F517E46A296.jpeg
    5.3 MB · Views: 17
  • DACFBC75-319C-449D-B56E-73F37953016A.jpeg
    DACFBC75-319C-449D-B56E-73F37953016A.jpeg
    5.6 MB · Views: 18
  • FA1F26AB-6F2D-4D6E-983B-F3F57FFE2888.jpeg
    FA1F26AB-6F2D-4D6E-983B-F3F57FFE2888.jpeg
    5.4 MB · Views: 18
  • BAE5B83A-2D18-4FD3-B377-058133F0062D.jpeg
    BAE5B83A-2D18-4FD3-B377-058133F0062D.jpeg
    6.5 MB · Views: 17
  • 9DB935F6-25F7-4445-A8FE-4A065ED80011.jpeg
    9DB935F6-25F7-4445-A8FE-4A065ED80011.jpeg
    5.9 MB · Views: 18
  • F21A6927-B5B0-44E4-8589-5F644C522A02.jpeg
    F21A6927-B5B0-44E4-8589-5F644C522A02.jpeg
    5.3 MB · Views: 17
  • 86205C7F-FD5E-4D3F-B47F-A56265630608.jpeg
    86205C7F-FD5E-4D3F-B47F-A56265630608.jpeg
    6.3 MB · Views: 18
  • 67A01935-1490-44E7-817D-8D63D0D3804B.jpeg
    67A01935-1490-44E7-817D-8D63D0D3804B.jpeg
    6.1 MB · Views: 17
  • 113A1DDC-0A60-4A8E-9881-7E0CB84A7BE2.jpeg
    113A1DDC-0A60-4A8E-9881-7E0CB84A7BE2.jpeg
    5.3 MB · Views: 16
  • E5F8F357-D593-40FE-A99A-97F6991C3132.jpeg
    E5F8F357-D593-40FE-A99A-97F6991C3132.jpeg
    5.5 MB · Views: 16
  • 75D567E3-52CB-4235-A433-2DBAC7E1C4D6.jpeg
    75D567E3-52CB-4235-A433-2DBAC7E1C4D6.jpeg
    7.9 MB · Views: 16
  • 8C142BC2-96D4-4C00-8951-1F87173482AF.jpeg
    8C142BC2-96D4-4C00-8951-1F87173482AF.jpeg
    5.8 MB · Views: 21
Wow you are really doing it right. Keep up the great work!

The old valve that used to attach to the black water tank is no longer available.

I wonder how close the 4 bolt holes line up with the holes on these dump valve flanges?

1618932052787.png

If you clean up the tank really well and JBWeld that flange on there, that would get you converted to the modern dump pipe size and you could then glue in a short length of pipe and a dump valve.

I had a similar mess on mine, the bolt hole bosses were all busted. I ended up getting it really clean and scratching it up with sandpaper, then JBWelded a short piece of dump pipe directly into the tank with a big fillet all around the outside of the pipe. It's been a couple years and a few thousand miles and no leaks yet.
 
  • Like
Reactions: KenTexian
Wow you are really doing it right. Keep up the great work!

The old valve that used to attach to the black water tank is no longer available.

I wonder how close the 4 bolt holes line up with the holes on these dump valve flanges?

View attachment 4274

If you clean up the tank really well and JBWeld that flange on there, that would get you converted to the modern dump pipe size and you could then glue in a short length of pipe and a dump valve.

I had a similar mess on mine, the bolt hole bosses were all busted. I ended up getting it really clean and scratching it up with sandpaper, then JBWelded a short piece of dump pipe directly into the tank with a big fillet all around the outside of the pipe. It's been a couple years and a few thousand miles and no leaks yet.
Interesting! I’ll look into it. My original dump valve is functional, the fasteners just rotted away. I thought I saw the original valve available at applied for around $70. I am not at all married to the idea of keeping the old style waste gate. I also intend to install a macerator while it’s all opened up too. Though this is mostly just a convenience thing as I think I have put together a solution to marry a TOTO washlet (Japanese bidet super toilet seat) to a dometic 311 toilet...assuming that works the coach will not require toilet paper anymore.

On a side note, if you’ve never experienced a Japanese smart toilet seat you should...it is a game changer!

my next question is float level sending unit availability. Any advice there? I planned on calling Sirum and cinnabar today to inquire.
 
Last edited:
Ken,
Yes, an original valve is still available from Thetford, but they are very proud of the part. They can often be had for less money from one of the antique trailer parts people. All the new ones use a different bolt center and are a bitch to adapt. That flange also looks different than any I have seen from GMCs. If you want to use the lower holes, do what everybody else does... Drill on through and use 1/4 SS screws and elastic stop nuts with enough washers. Lock washers won't work.
Matt
 
  • Like
Reactions: KenTexian
Ken,
Yes, an original valve is still available from Thetford, but they are very proud of the part. They can often be had for less money from one of the antique trailer parts people. All the new ones use a different bolt center and are a bitch to adapt. That flange also looks different than any I have seen from GMCs. If you want to use the lower holes, do what everybody else does... Drill on through and use 1/4 SS screws and elastic stop nuts with enough washers. Lock washers won't work.
Matt
Good tips, thanks. As I see it there are two options, throw money at it and replace with a new thetford (who knows how long my original will continue to function properly) or adapt to a modern waste valve.

I bought a plastic welder a couple years back for repairing kayaks and I am leaning towards welding a modern adaptor to it. That would outlast the tank. The draw back here is figuring out exactly what type of plastic the original tanks were...this isn’t my specialty but with some time I think I could get it done.
 
  • Like
Reactions: tmsnyder
Just a quick tid-bit, I finally got around to removing the headliner. Good news is the entire interior is removed. The bad news is that head liner...just look at it! I cleaned the big bits and nest off then softened it up with a good soaking in simple green. Rinsed and sprayed chlorine bleach/water 1:2. Didn’t take a picture of the finished product before squirreling it away to my safest corner of the workshop.

it was cool to see the original installers signed the head liner, Vickie + Ida 3/22/1977.

also pictured are the PO’s air horn lines. I’m going to have to close those holes up when I remove them...
 

Attachments

  • C46848C6-0D78-4DAE-A65D-13AA26E23D9A.jpeg
    C46848C6-0D78-4DAE-A65D-13AA26E23D9A.jpeg
    6.4 MB · Views: 18
  • 7C72F5CC-98B2-40C6-BB0A-3FB413B1FFD7.jpeg
    7C72F5CC-98B2-40C6-BB0A-3FB413B1FFD7.jpeg
    6.2 MB · Views: 18
  • 22B24620-067D-4961-ACB8-847E0D4C3DDB.jpeg
    22B24620-067D-4961-ACB8-847E0D4C3DDB.jpeg
    4.8 MB · Views: 18
Oh man, that is a bit nasty. It's got to feel good to know you're removing that mess from there, even though ignorance was bliss before. You've got me wondering what kind of surprises await me in the future.
 
  • Haha
Reactions: KenTexian
Oh man, that is a bit nasty. It's got to feel good to know you're removing that mess from there, even though ignorance was bliss before. You've got me wondering what kind of surprises await me in the future.
This ain’t my first sh*tshow...it never feels good to have removed it until after the shower!
 
It isn't much in terms of the total scope of the project, but I managed to get the new sensitized brake booster, new brake master cylinder, stainless steel brake line kit (I was really impressed with the accuracy of the line bends, out of all the lines only one bend needed any significant tweaking), and new stainless steel braided rear brake hoses.

I have also made some progress in getting suspension parts sandblasted and painted but progess is slow, the texas heat and humidity limit me to the early morning and late evening hours of weekends to get anything done.
 

Attachments

  • SSBrakelines1.jpg
    SSBrakelines1.jpg
    5.9 MB · Views: 15
  • SSBrakelines2.jpg
    SSBrakelines2.jpg
    5.4 MB · Views: 15
Man... what a journey you've been on. I feel so fortunate about my PO every time I see threads like this (while the interior wasn't exactly *pretty* when I bought it, the mechanical side of things is fairly rock solid ...knock on wood. Most of what I'm doing is "lipstick." Serenity was definitely in the short list of names for our coach, so I certainly appreciate your moniker. At some point I will "get" to paint ours, but for now it has to remain beige, so we're calling it Shai-Hulud. I already have a Doberman named Muad'dib, so I thought I'd just continue the theme, even though nobody can pronounce the names.
 
  • Like
Reactions: KenTexian
Man... what a journey you've been on. I feel so fortunate about my PO every time I see threads like this (while the interior wasn't exactly *pretty* when I bought it, the mechanical side of things is fairly rock solid ...knock on wood. Most of what I'm doing is "lipstick." Serenity was definitely in the short list of names for our coach, so I certainly appreciate your moniker. At some point I will "get" to paint ours, but for now it has to remain beige, so we're calling it Shai-Hulud. I already have a Doberman named Muad'dib, so I thought I'd just continue the theme, even though nobody can pronounce the names.
The nice thing about the name is that if people need a pronunciation lesson they can watch a great flick! Dune is one of my favorites.

Thanks for commenting!

As for my GMC journey, I made a decision to get the least expensive coach I could find, I entered this ordeal fully aware that I would need to rebuild/renovate every part, system, appliance, and chair. My thinking at the time was how else could I trust it not to leave me stranded?

Everyday I question that decision because it’s not easy work when signs of progress are slow. I often long to just be finished and on the road, to have the fun of camping and adventures.

I plod on, trusting that the difficulty and waiting will make the adventures to come all the more special…
I hear you. This is my plan for my 23 (which is my ultimate goal), but I feel very "fortunate" to have a usable vehicle for adventures with my kiddo while I look and then while I restore. I put fortunate in quotations because my situation was provided by my last RV, a 1975 Argosy 24, catching fire in the engine compartment, so the current GMC is a result of an insurance payout --harrowing experience, but ultimately made the GMC possible at a completely different level than the previous vehicle.

I look forward to keeping an eye on your build, and hopefully I can contribute some useful information or even physical labor (who knows?!) as things progress! Best of luck!
 
Well, I am putting my coach up for sale. Another one bites the dust.

The military has given me orders and they are not the ones that I expected. The bottom line is that I no longer have the need to live in an RV to give my family stability for my last assignment. Good news for the family and good news for someone looking to pick up a deal on a coach.

My plan is to list it at the no haggle/priced to sell number and continue working on it. The further I get the more the price will go up.

I will do a more detailed listing in the for sale section of the forum. Suffice it to say I will be starting out at $5,000 the parts/kits alone cost $8,000 but some of them are no longer available (improved parking brake set up for example).

If anyone that has been following along is interested send me a message and I will give you the full run down.